The light
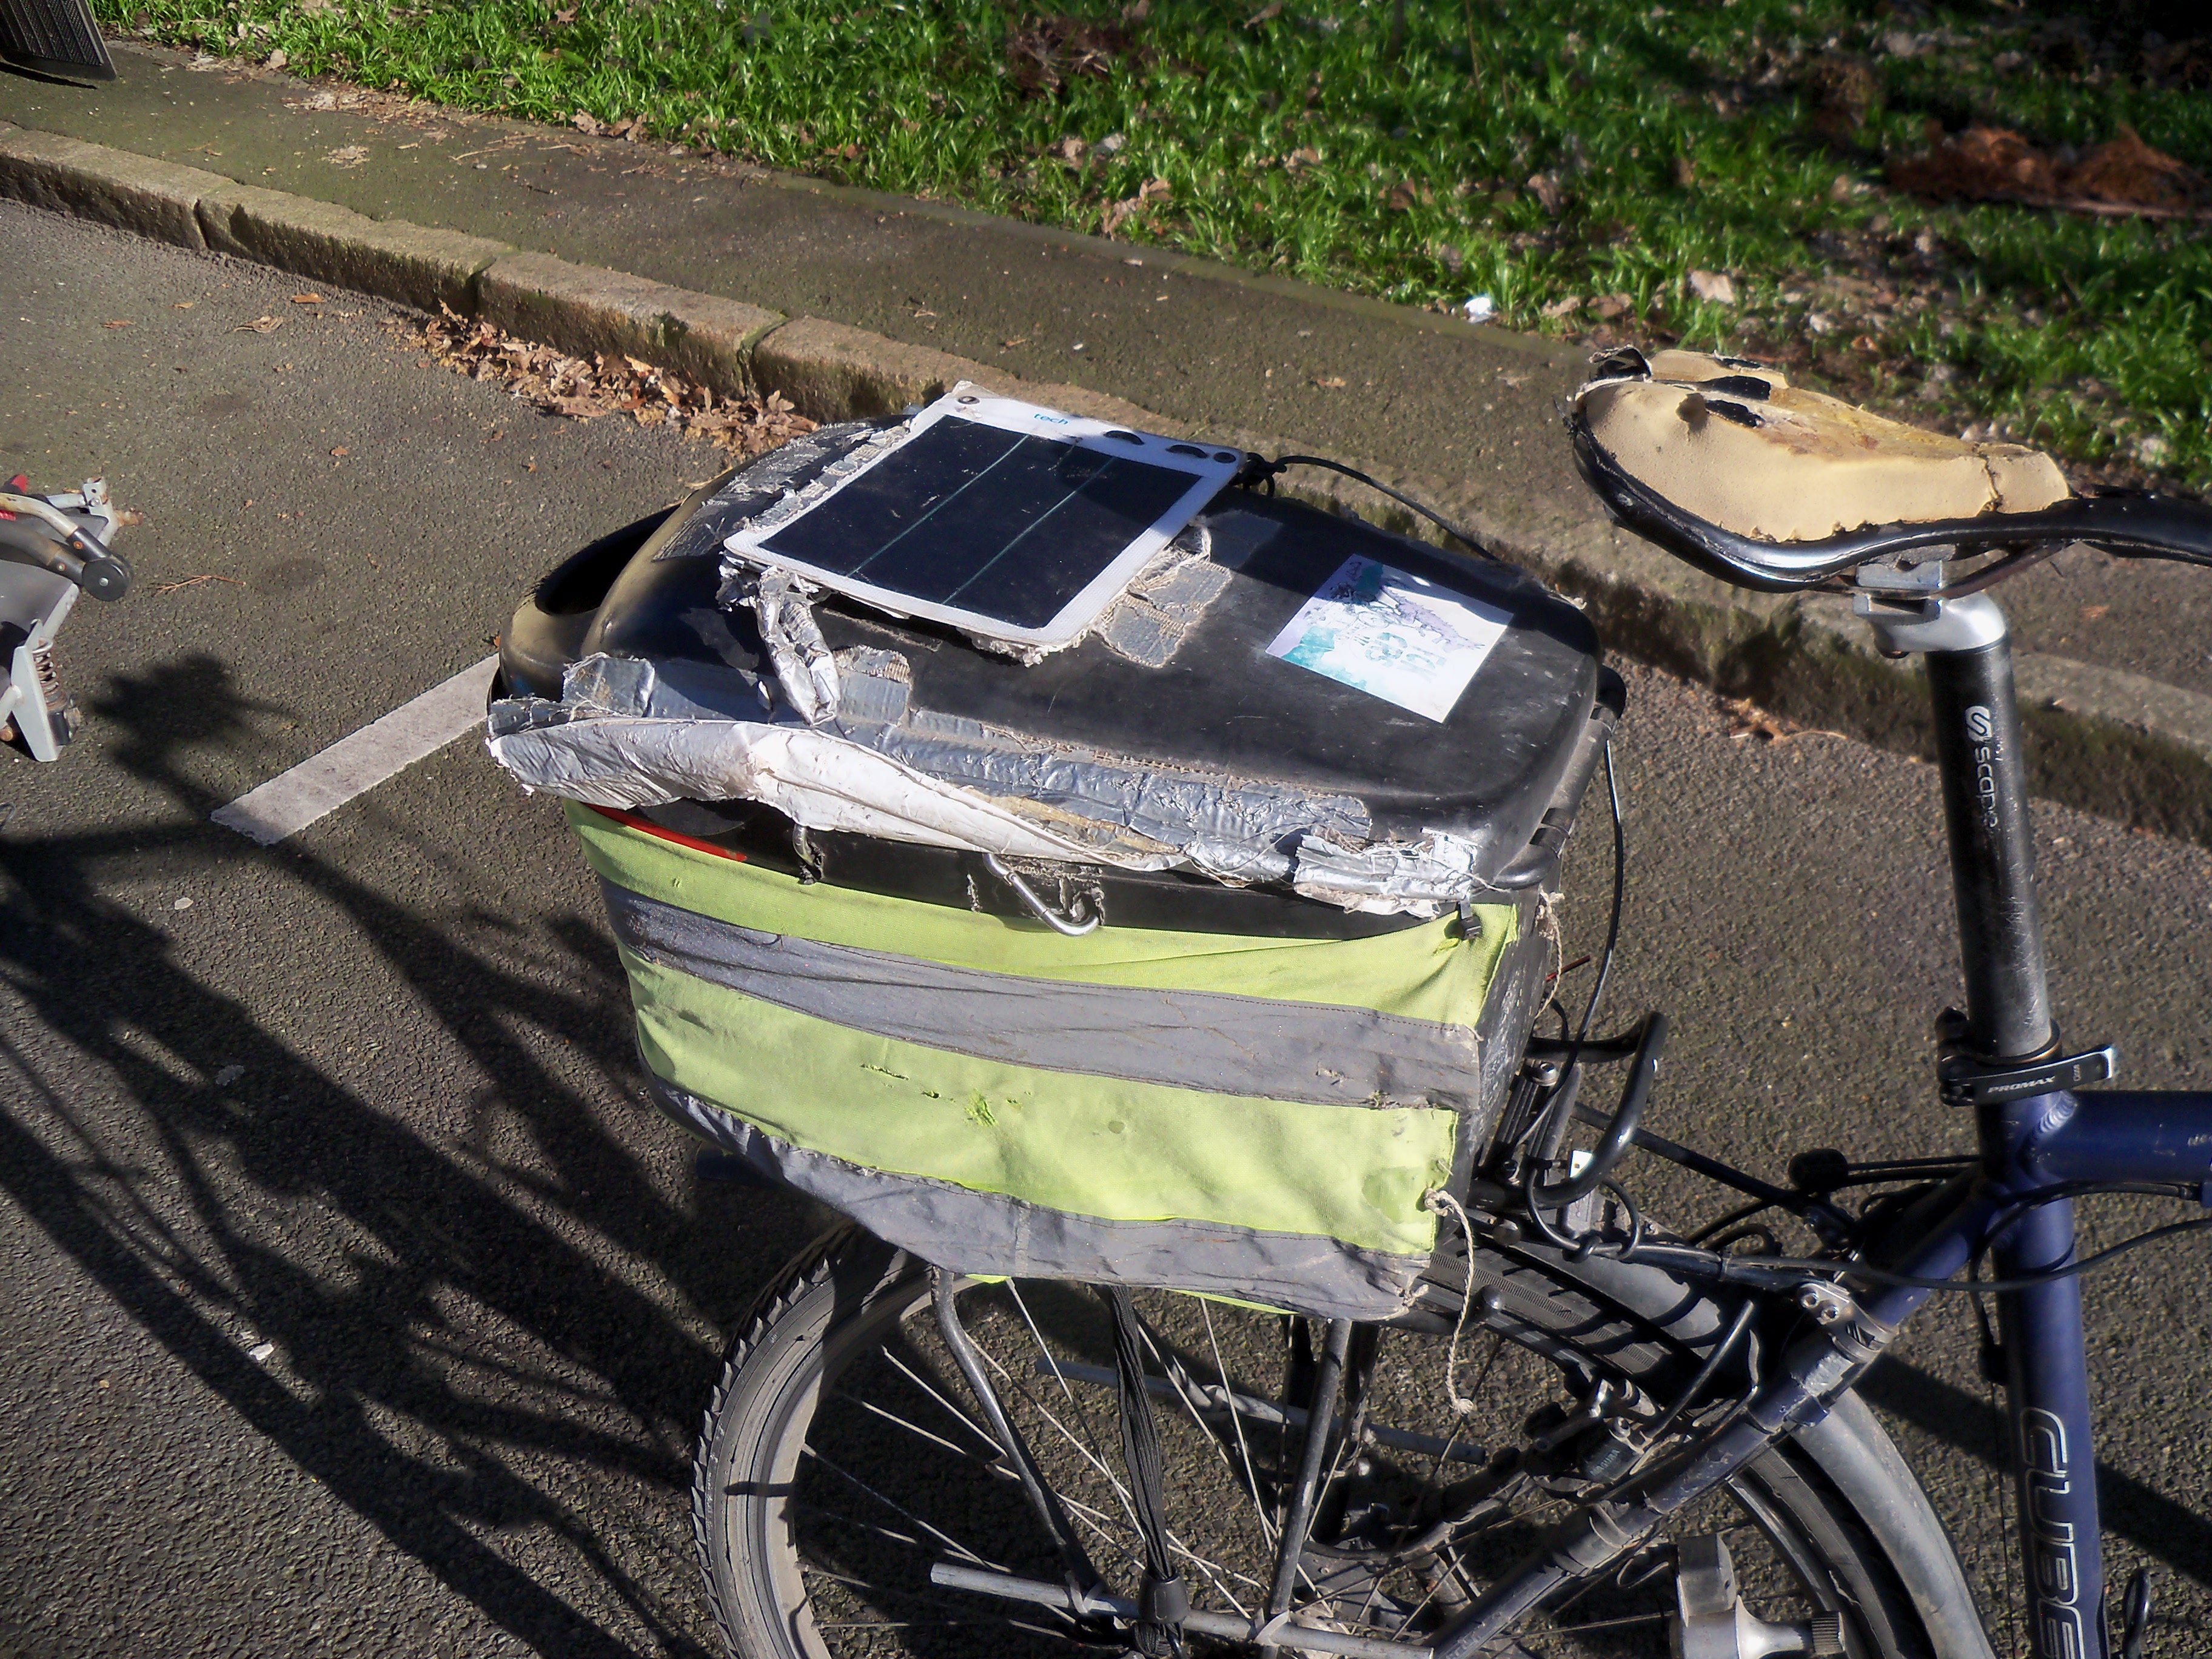
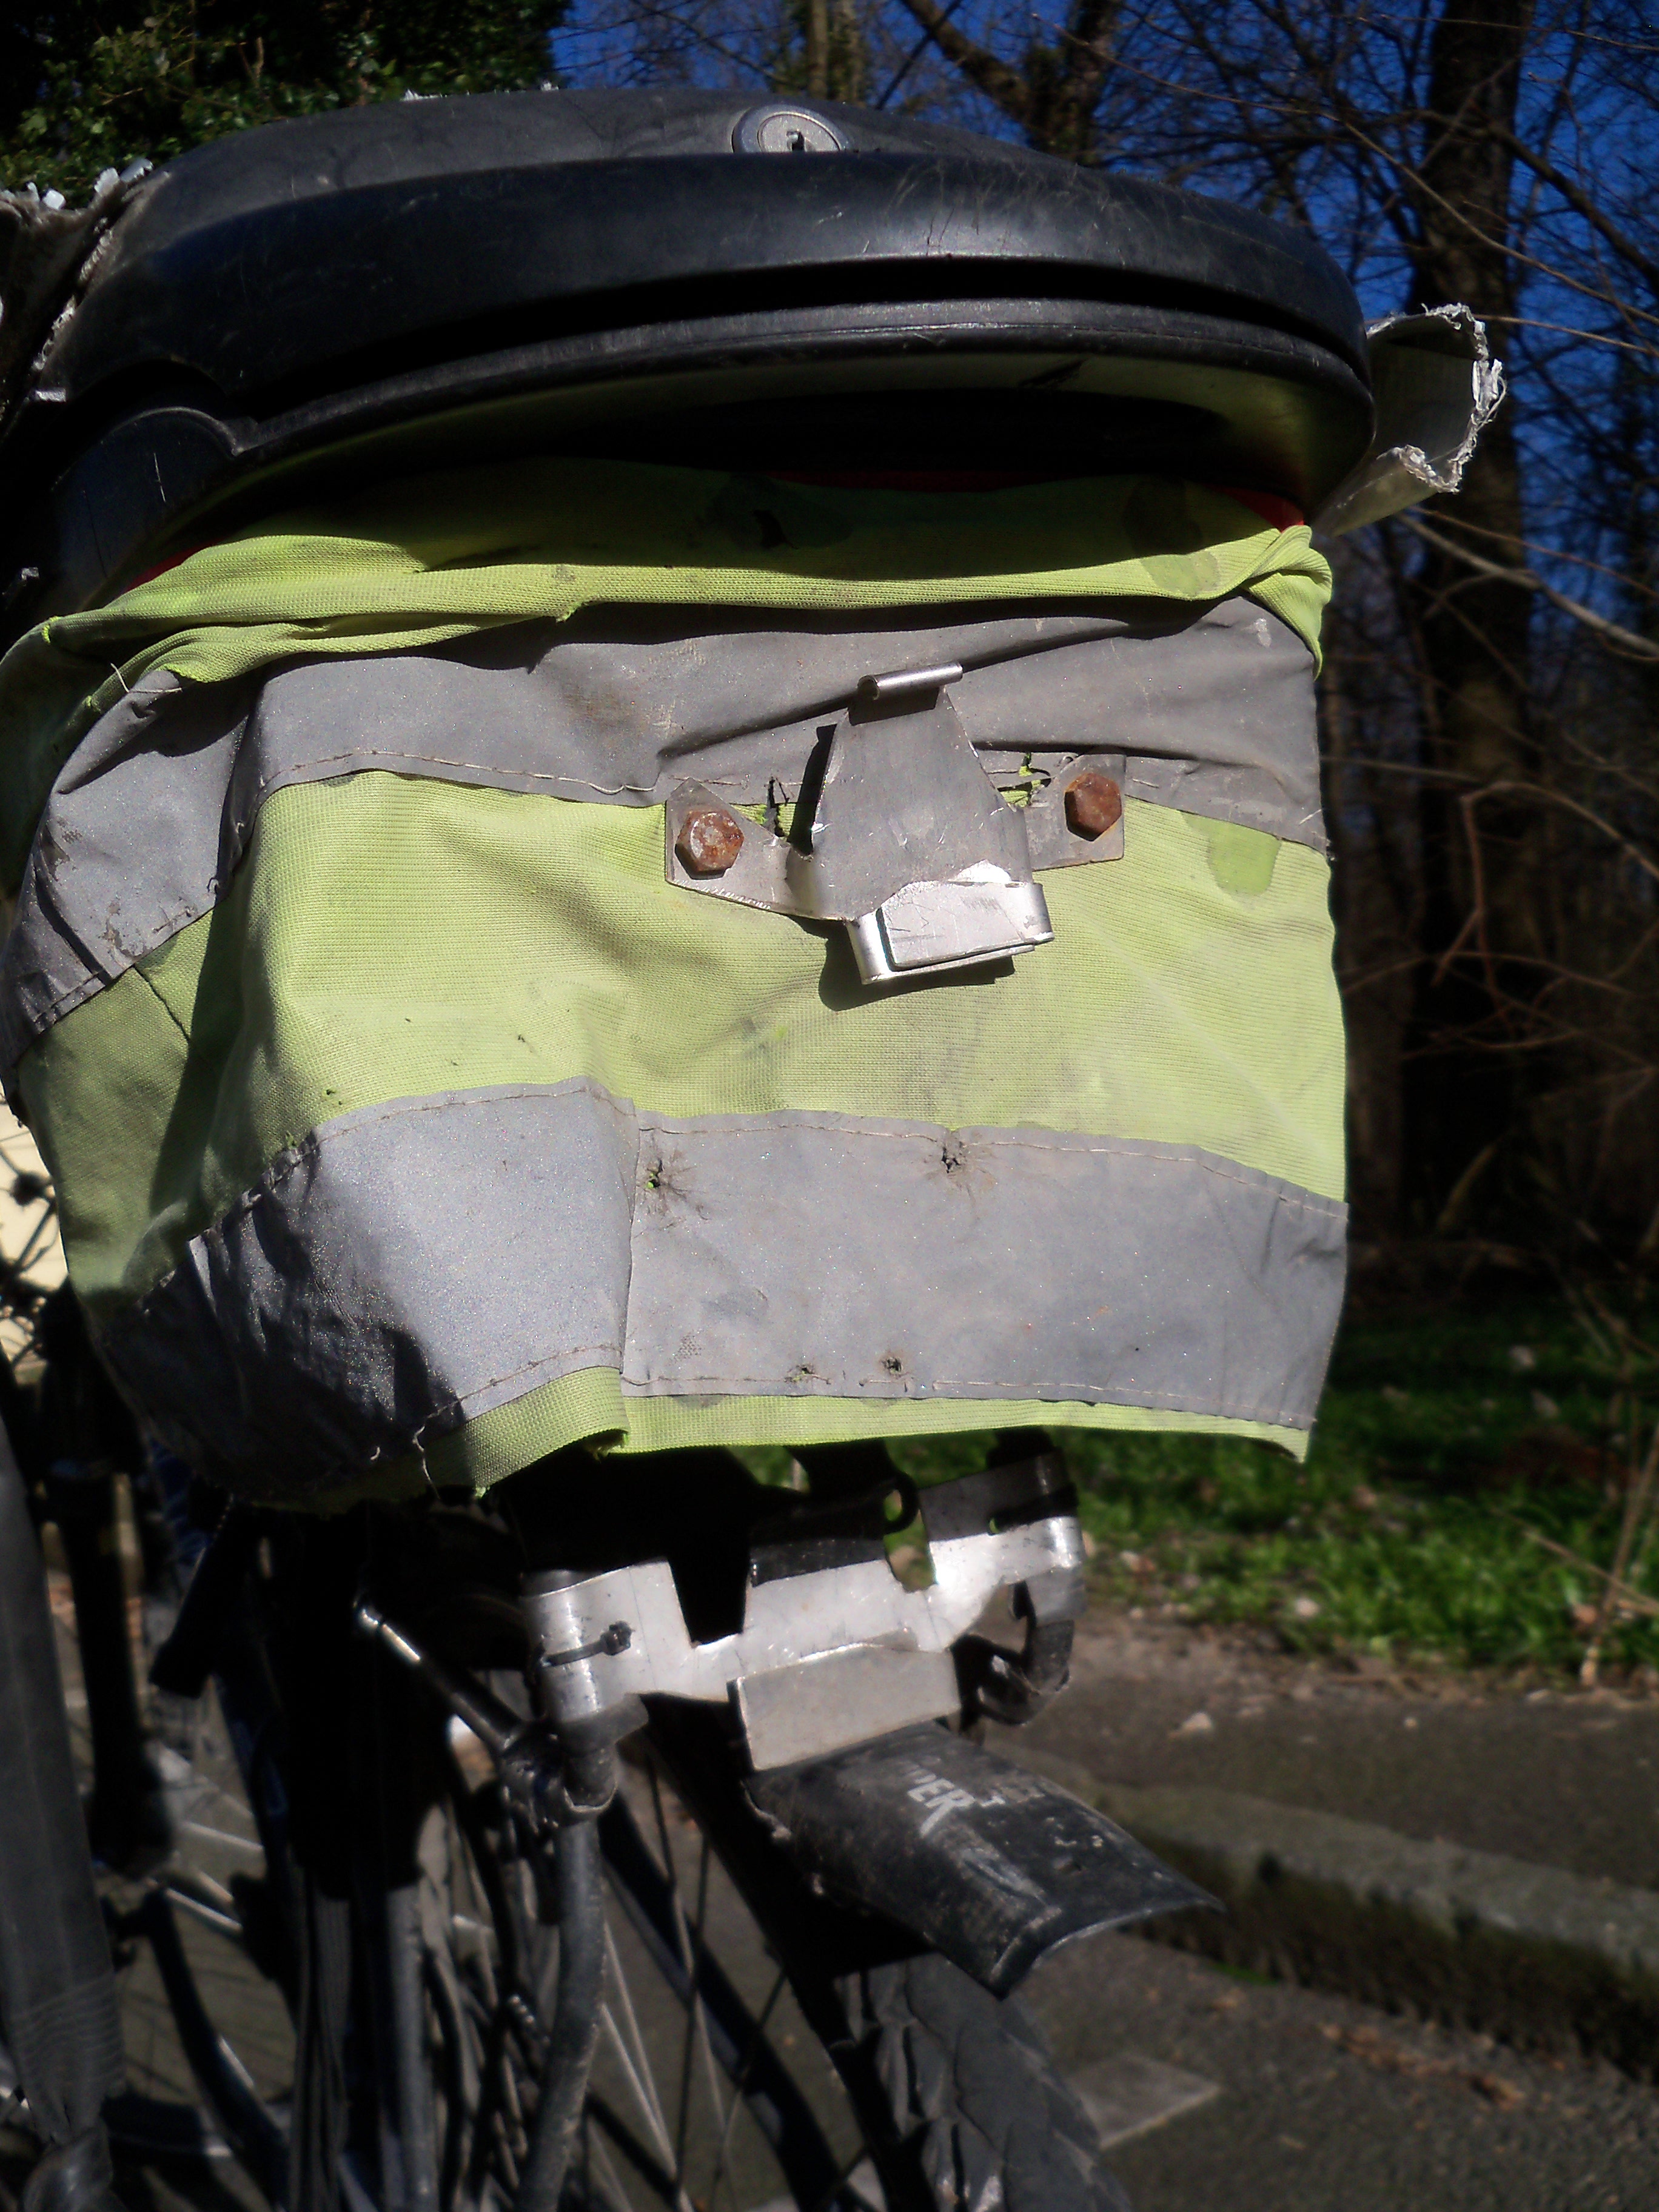
When I cycle with luggage, I usually have a box on my rack that I can use for stuff that needs to stay dry but easy to access. I particularly use it for electronic devices, there is a small solar panel on it and it is connected to the dynamo charger (more about that below). On the box, there is also an old high-vis that I cut up and wrapped around it for more visibility in the night or in tunnels.
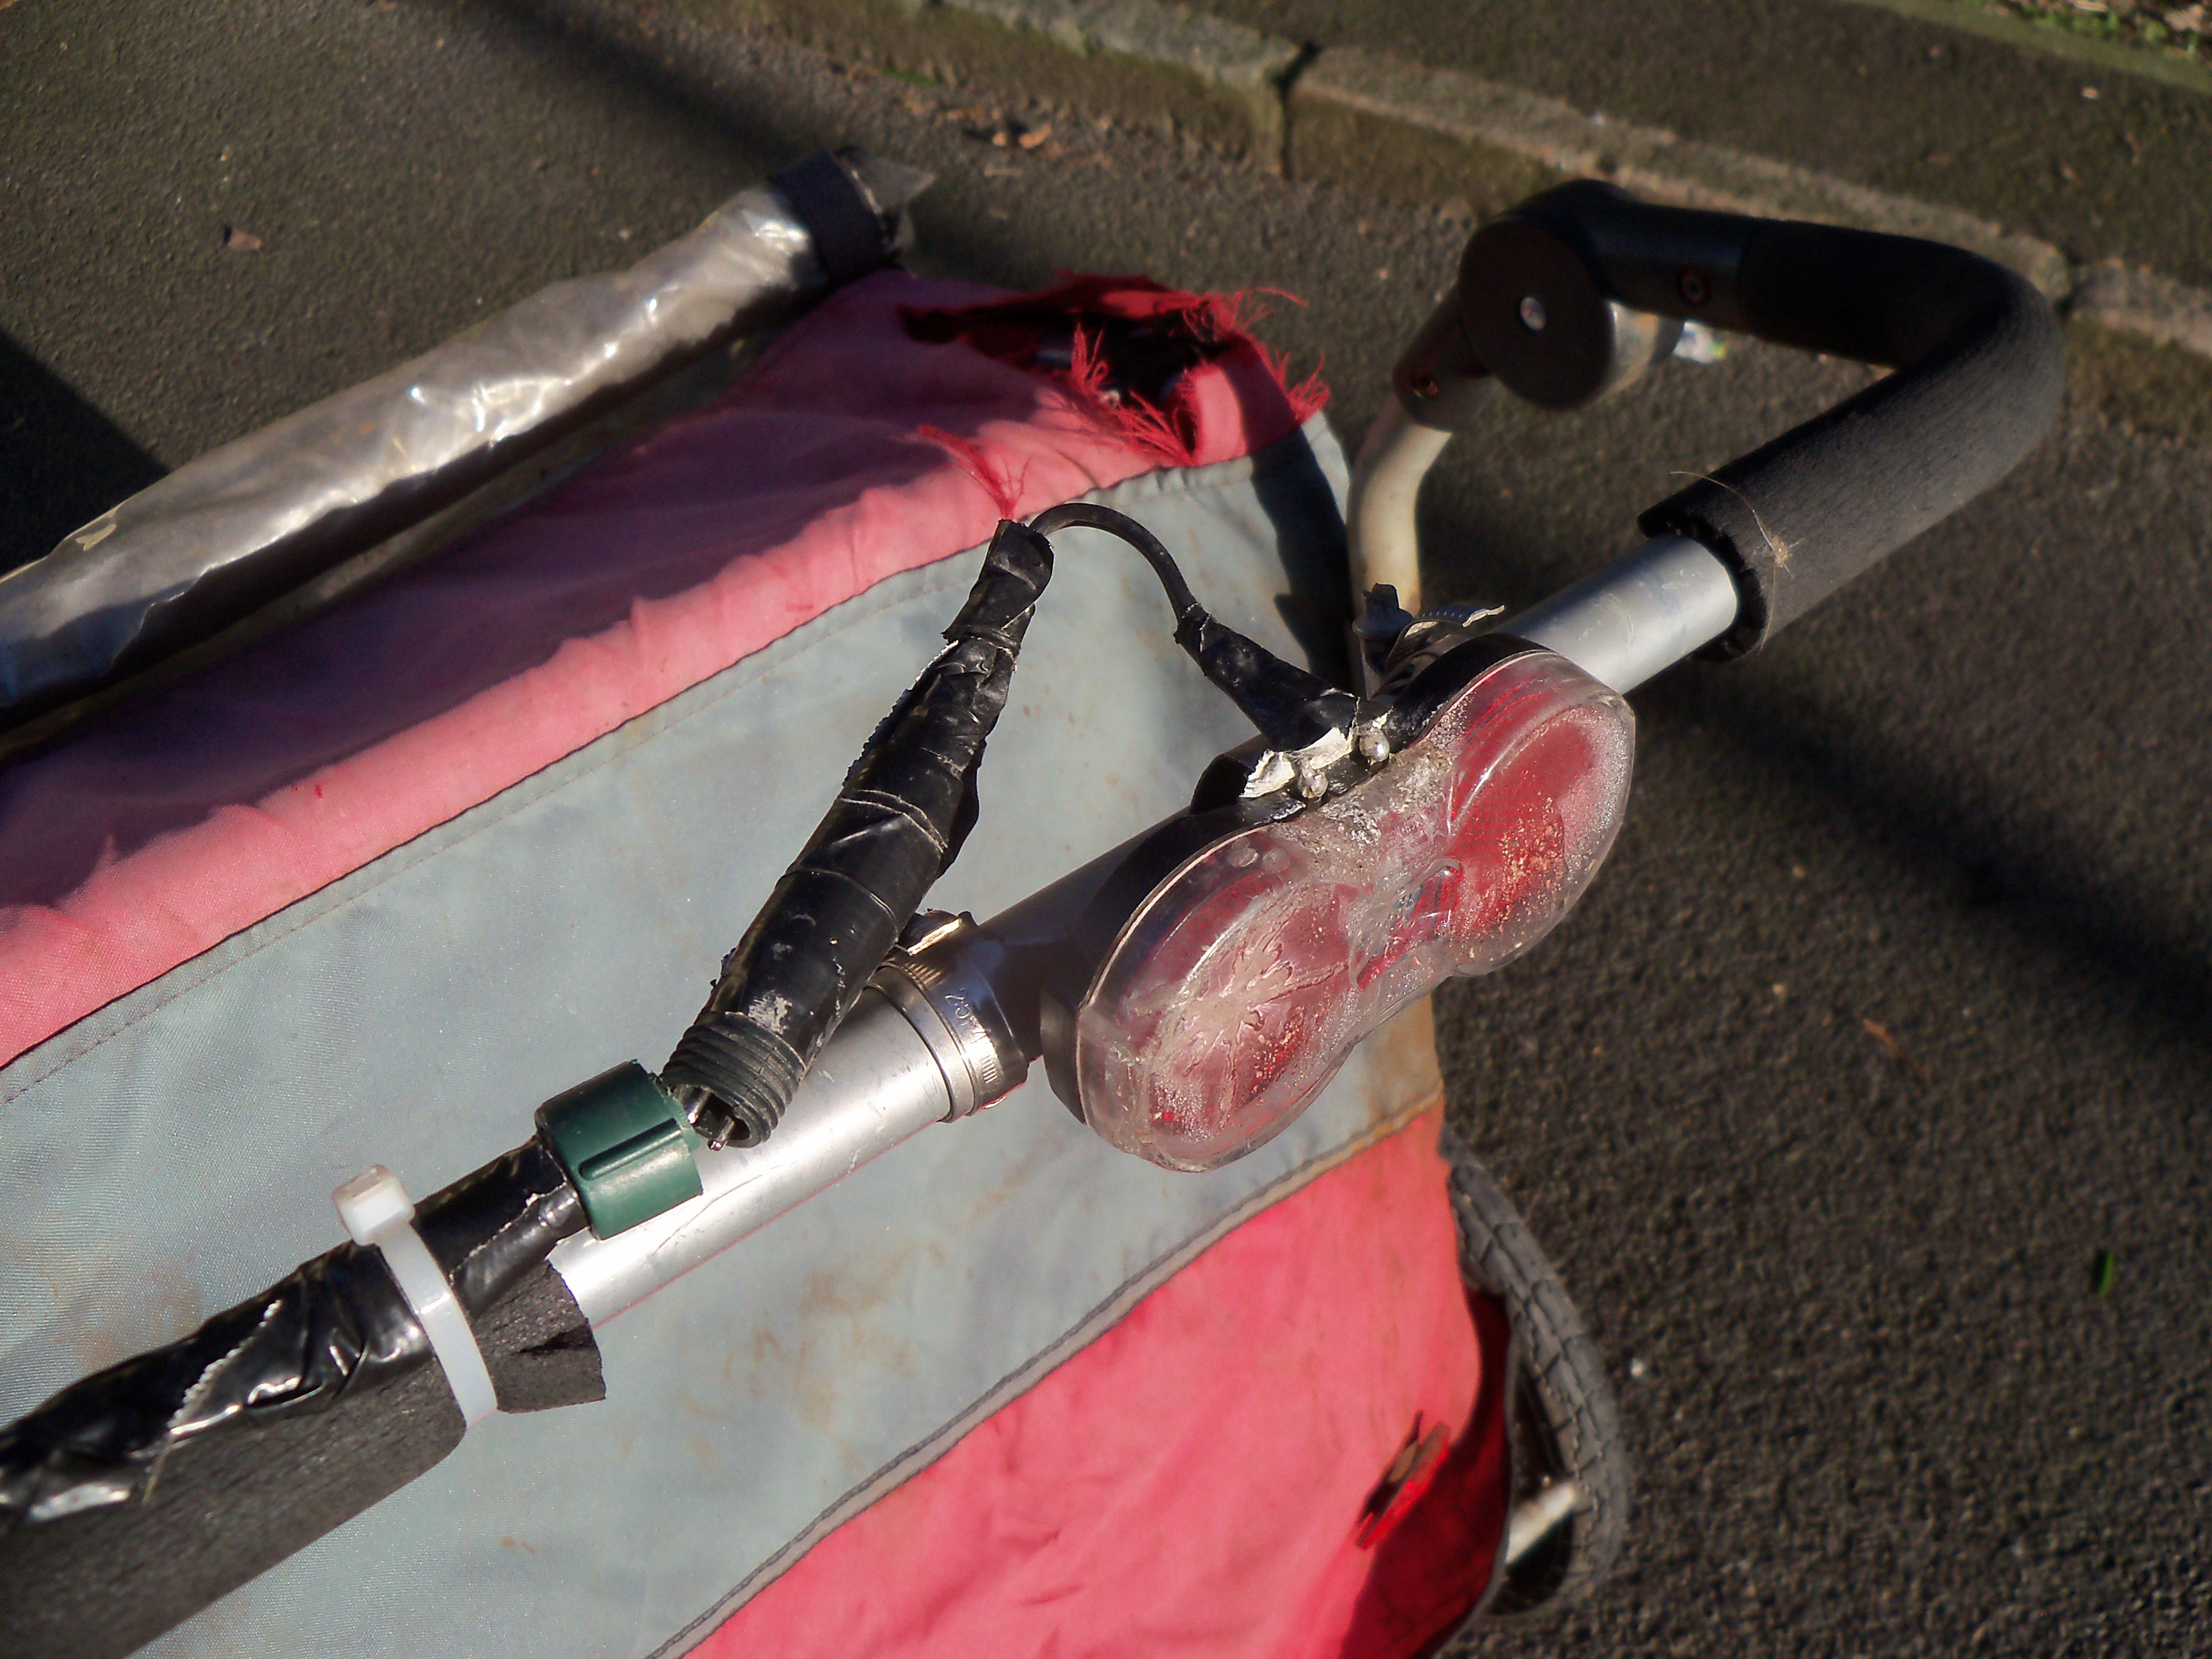
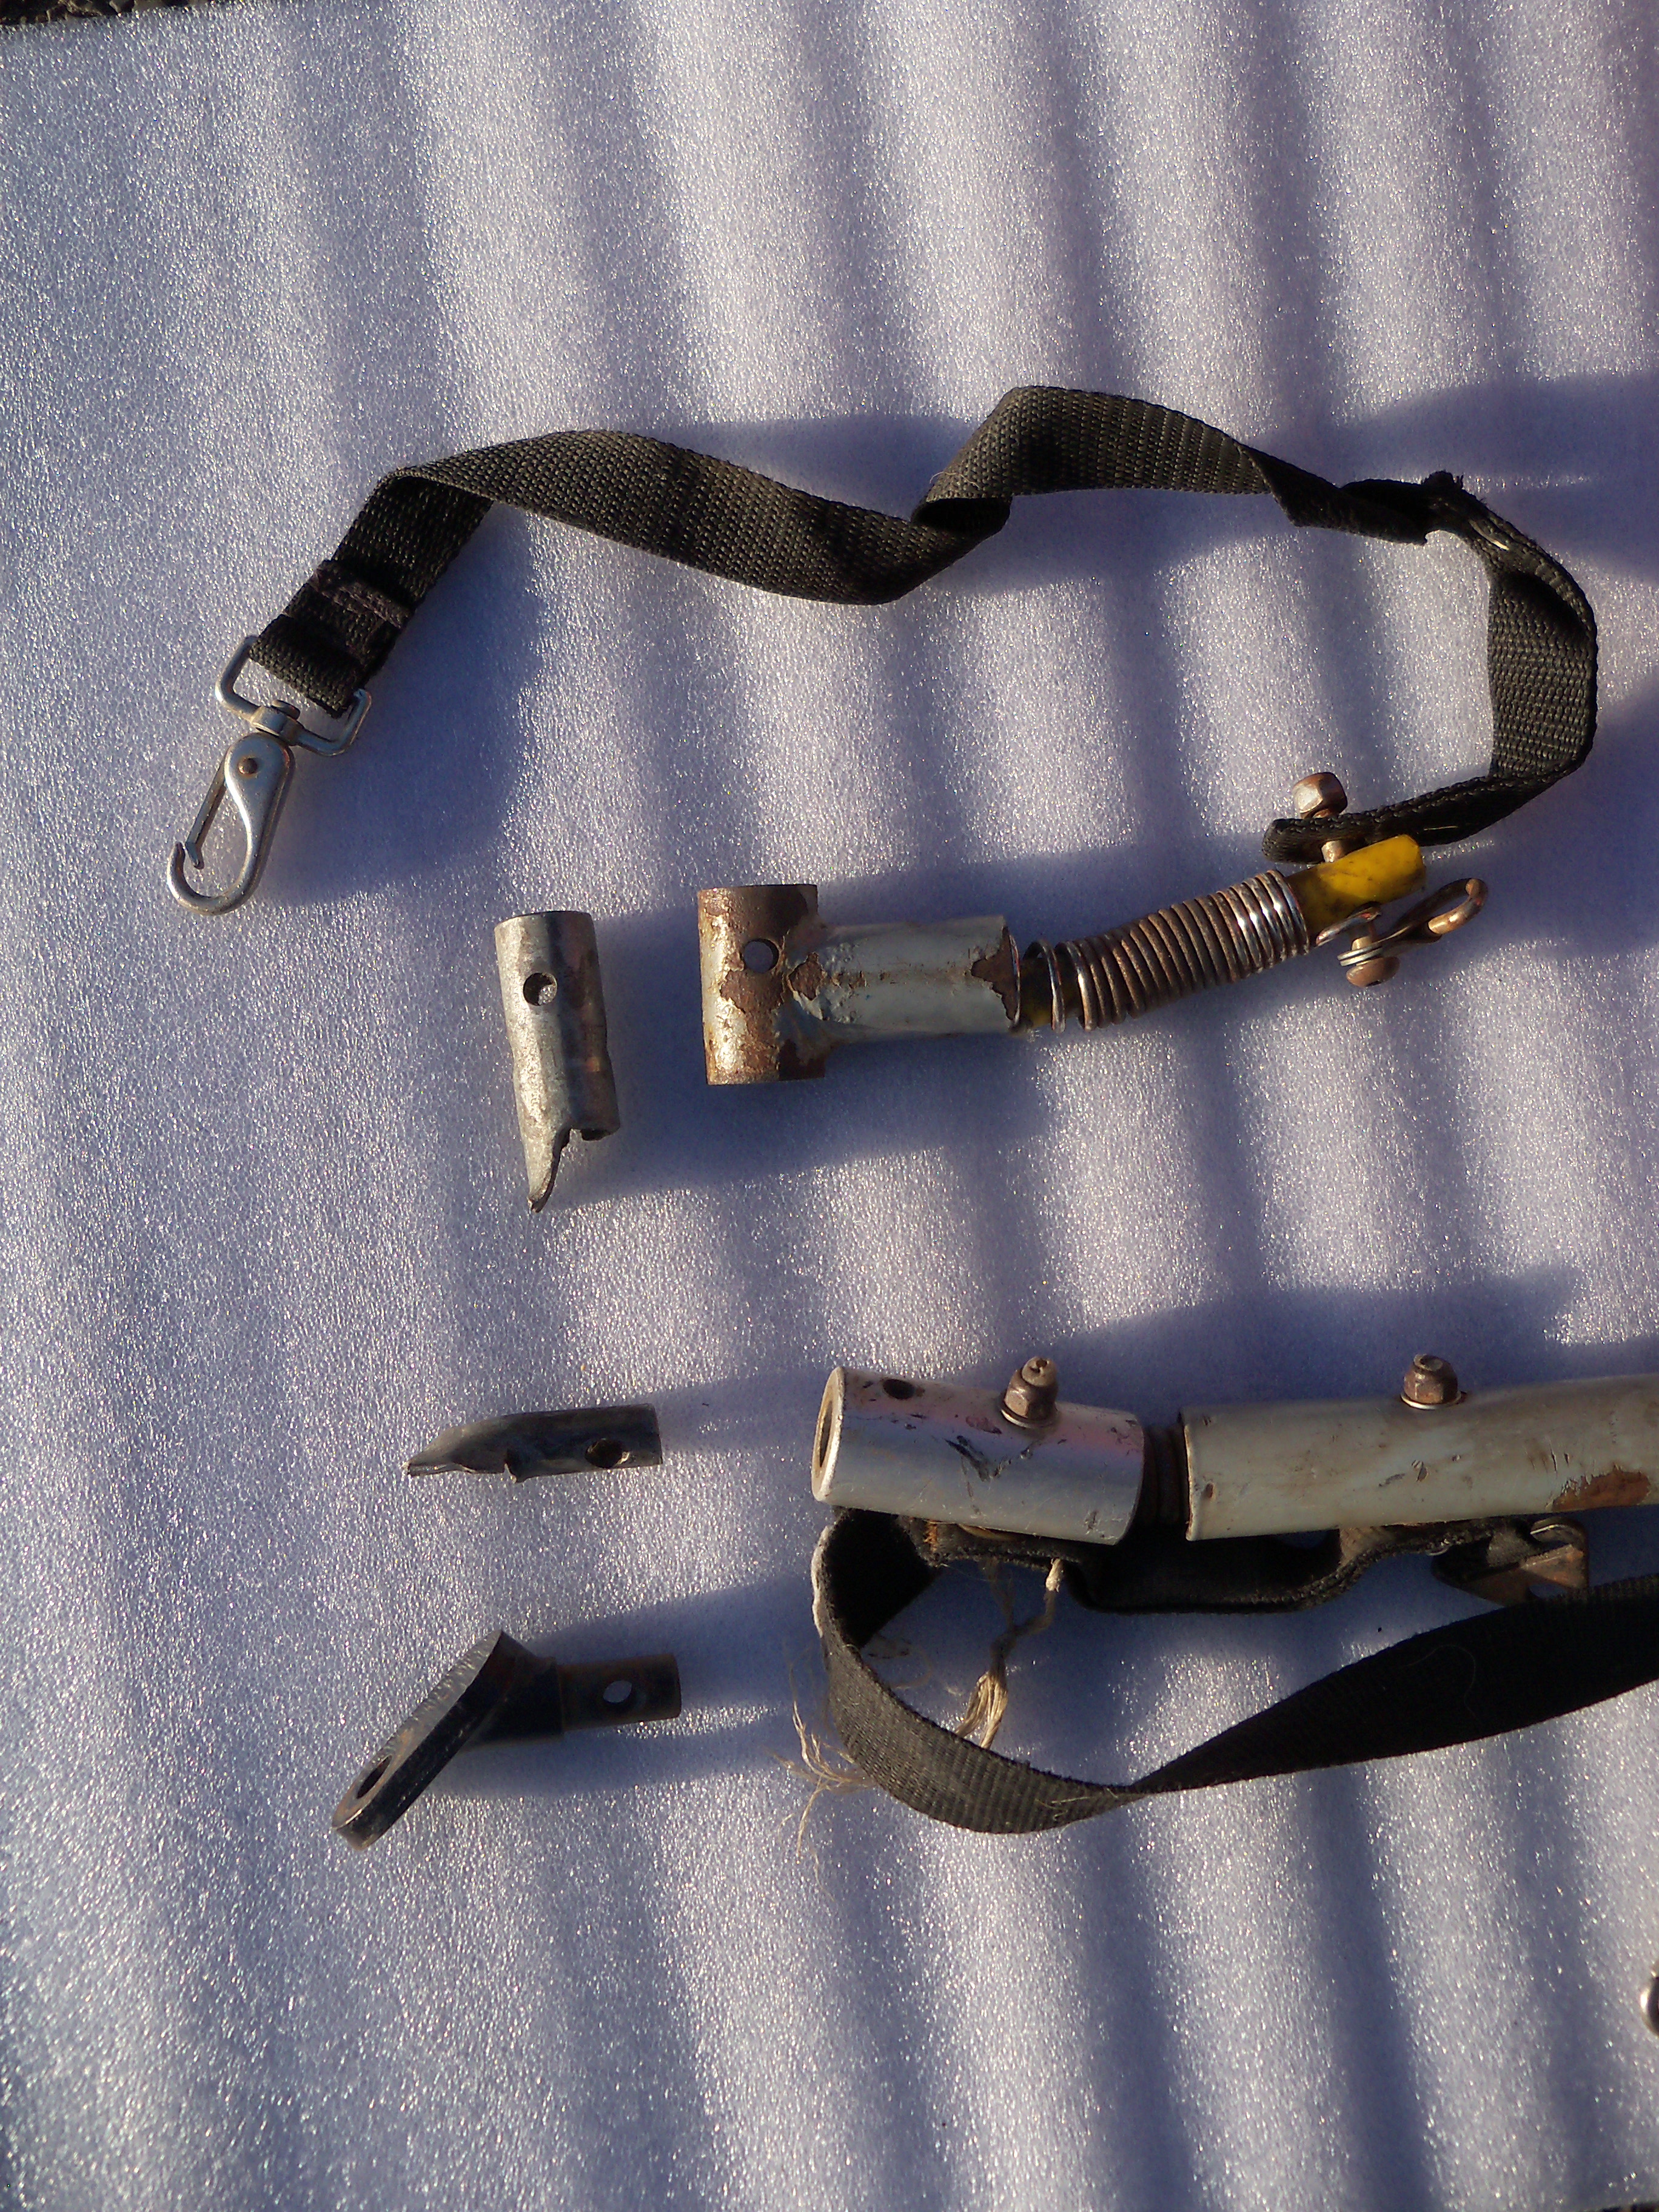
On my rack, I have a back light that is powered by the dynamo, but when I pull a trailer, that trailer covers the back light, so cars cannot see me from behind. An easy solution would be to put an additional battery-powered light on the trailer, but I don’t like battery-powered lights very much, as I always have to think about charging and replacing them. My first solution was to put the light a bit higher and attach it to the back of the box. This worked for the small trailers of the Biketour, but it was also unpractical, because when I wanted to cycle without my stuff while we were staying in a city or project, I had to unscrew the light and screw it back to my rack. When I got the dog trailer, this solution didn’t work anymore at all, because the trailer is so tall that it covers the light again.
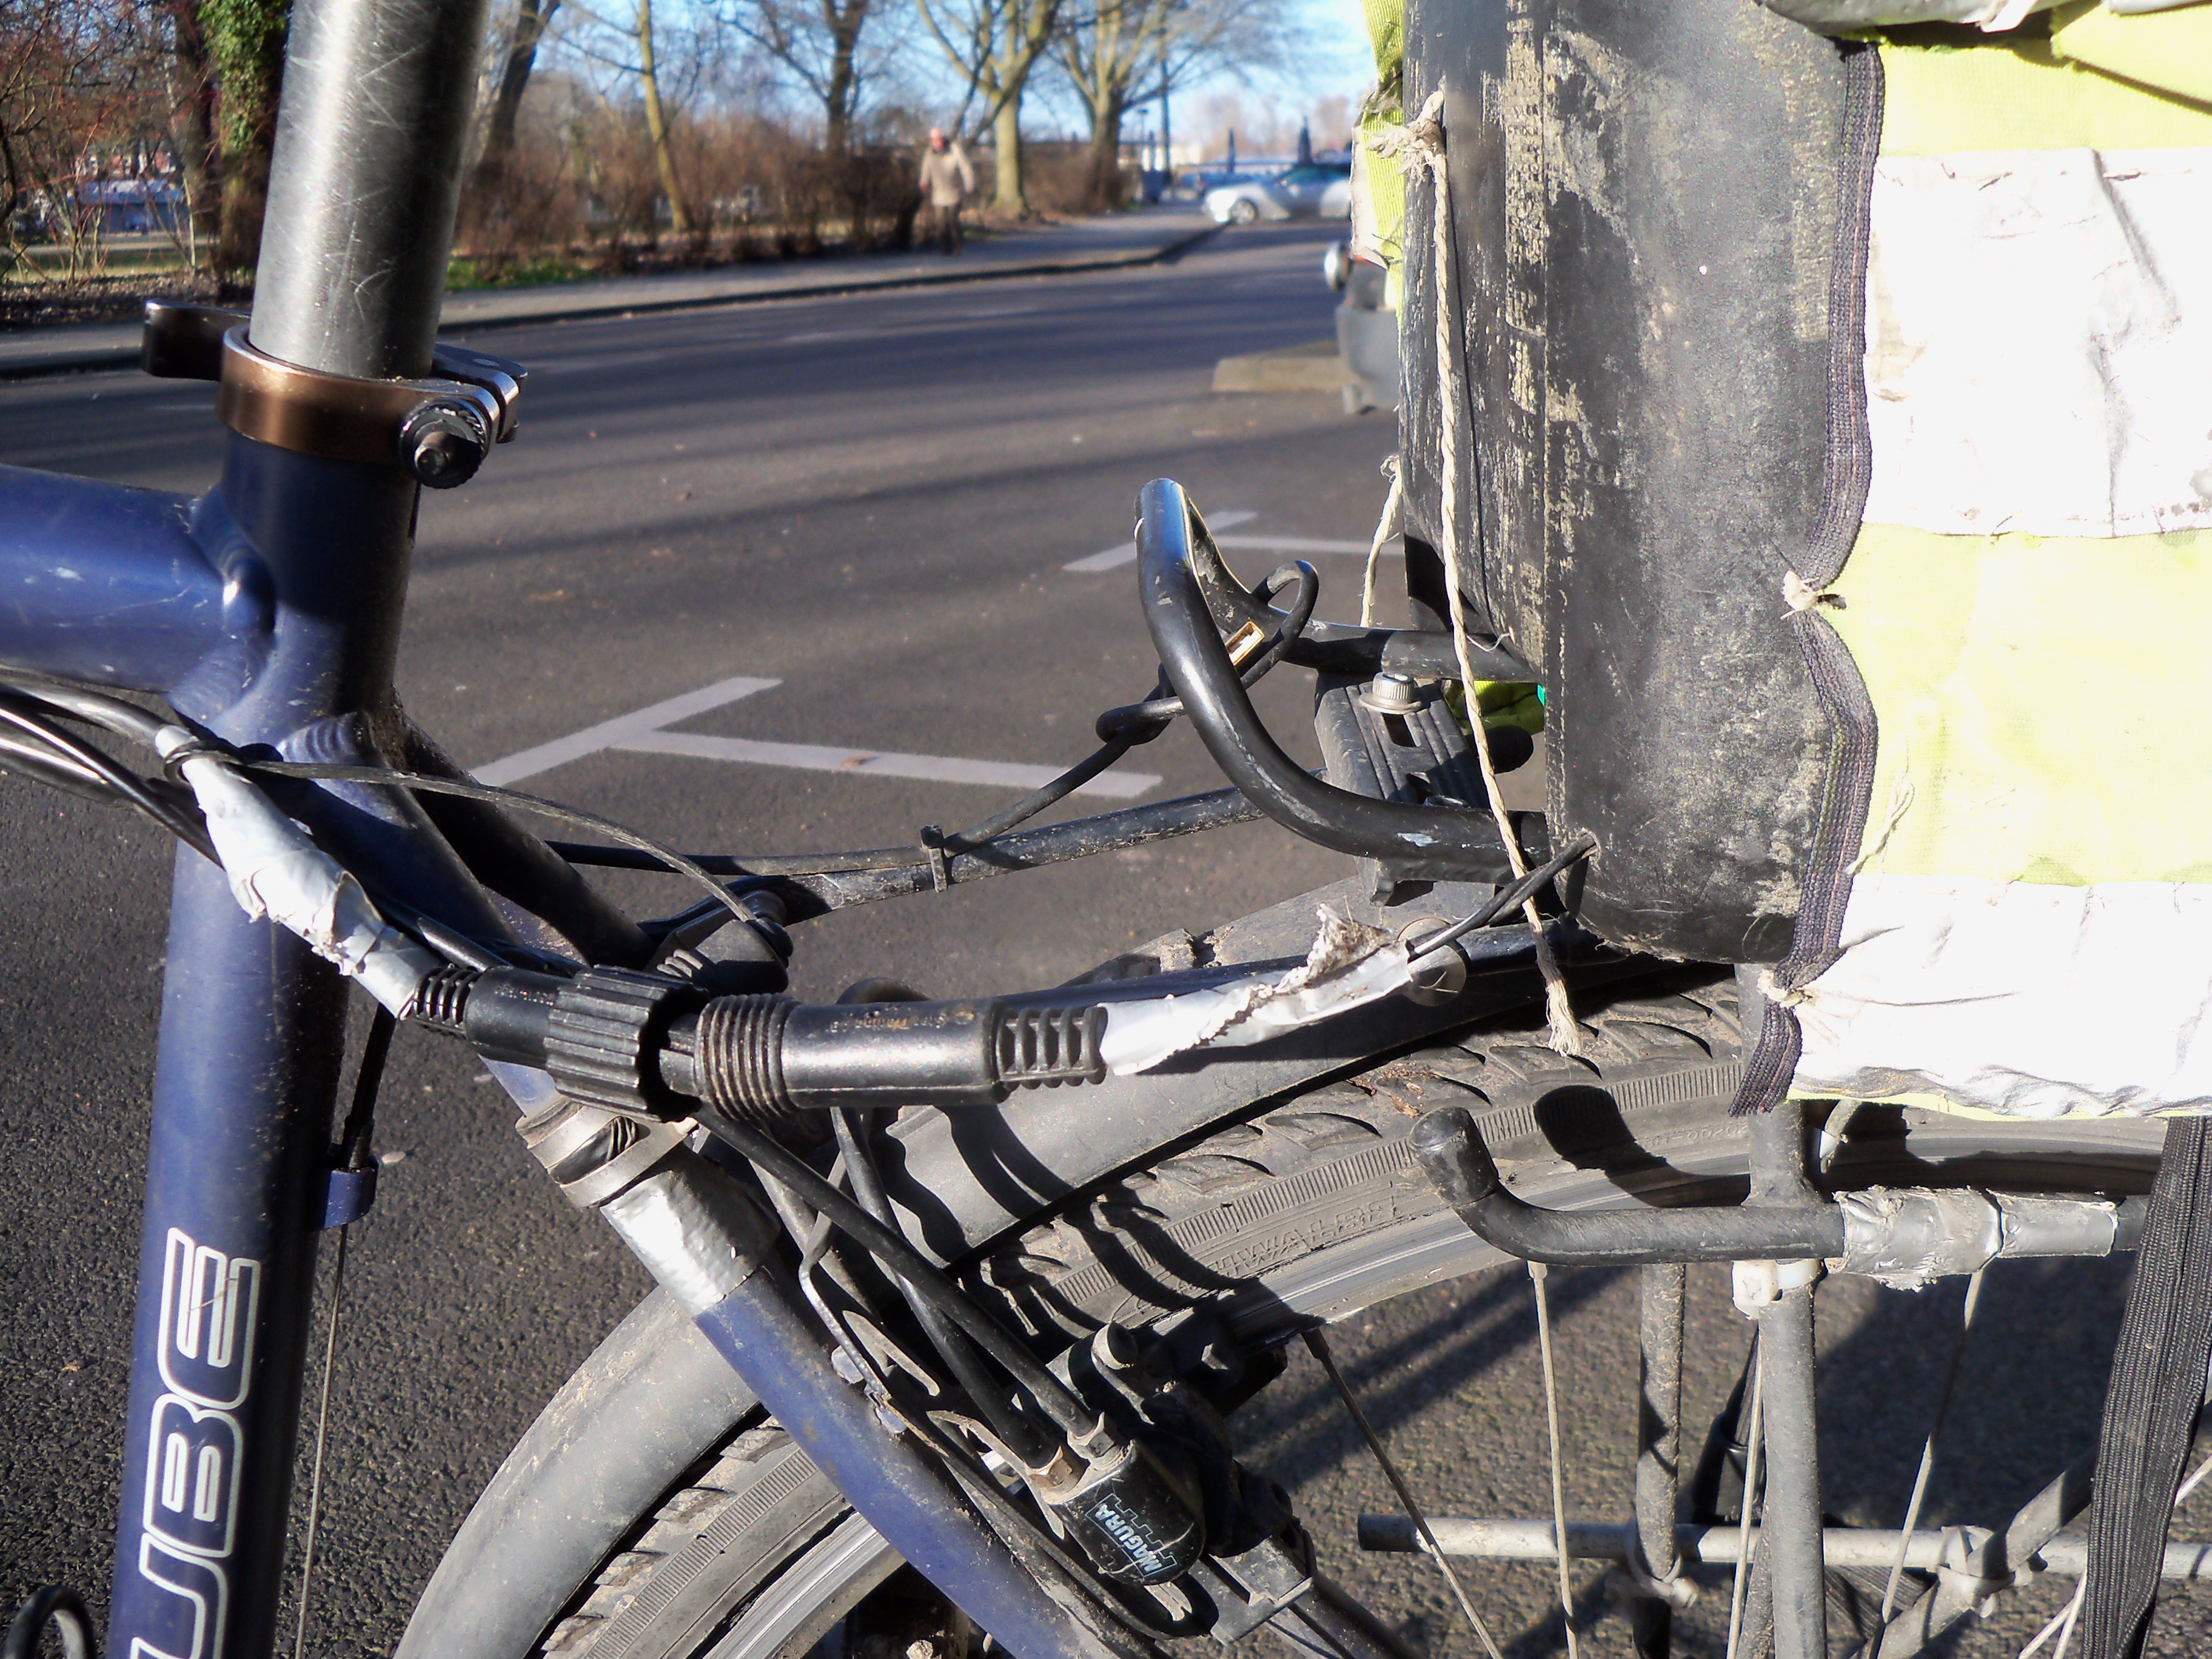
I found an old stainless steel baking tray in the metal bin, and cut and bent it into shape to make three holders where the light can be plugged on to. One I put on my rack, one on the box, and one to the back of the trailer. I cut a counterpart that I screwed onto the light. In a dumpster for electronics, I found some old light chains for a christmas tree. As they were made to be used outside, they had waterproof screwable cable connectors attached, so I took those off and put them on my light and to the cable that comes from my dynamo. I soldered together an additional extension cord that runs to the back of the trailer. So now I have three different places where I can attach and connect my light!
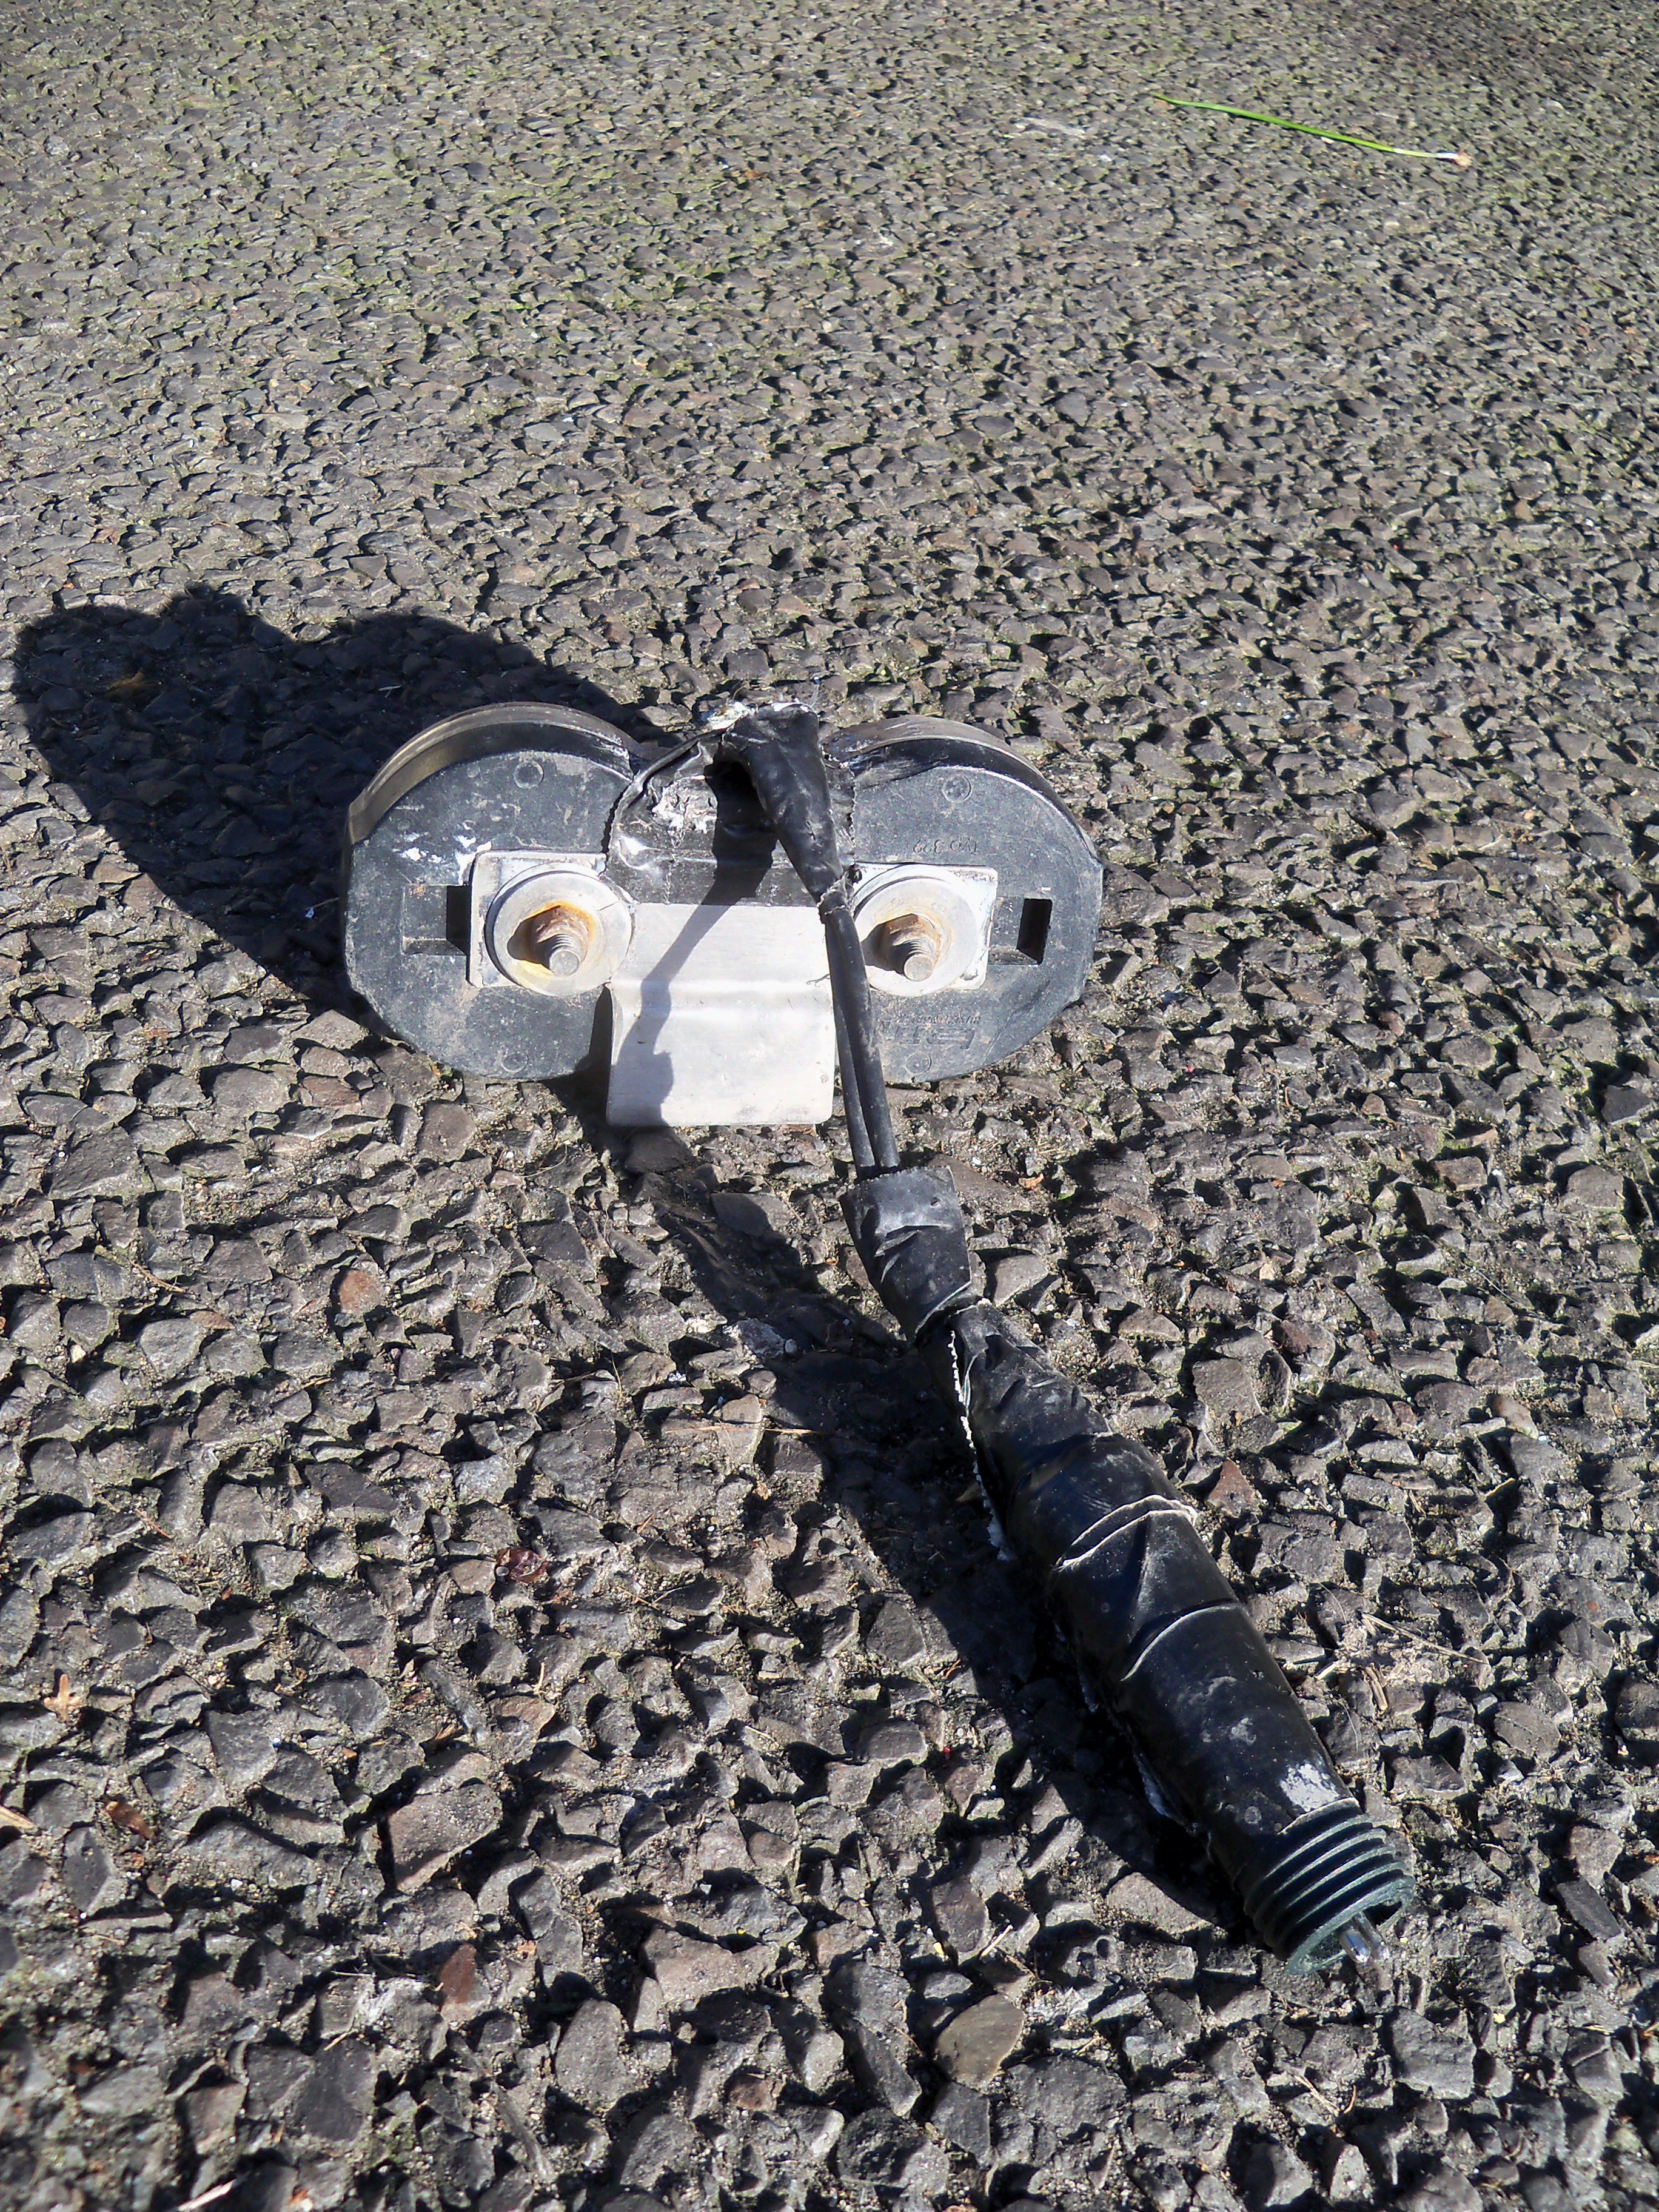
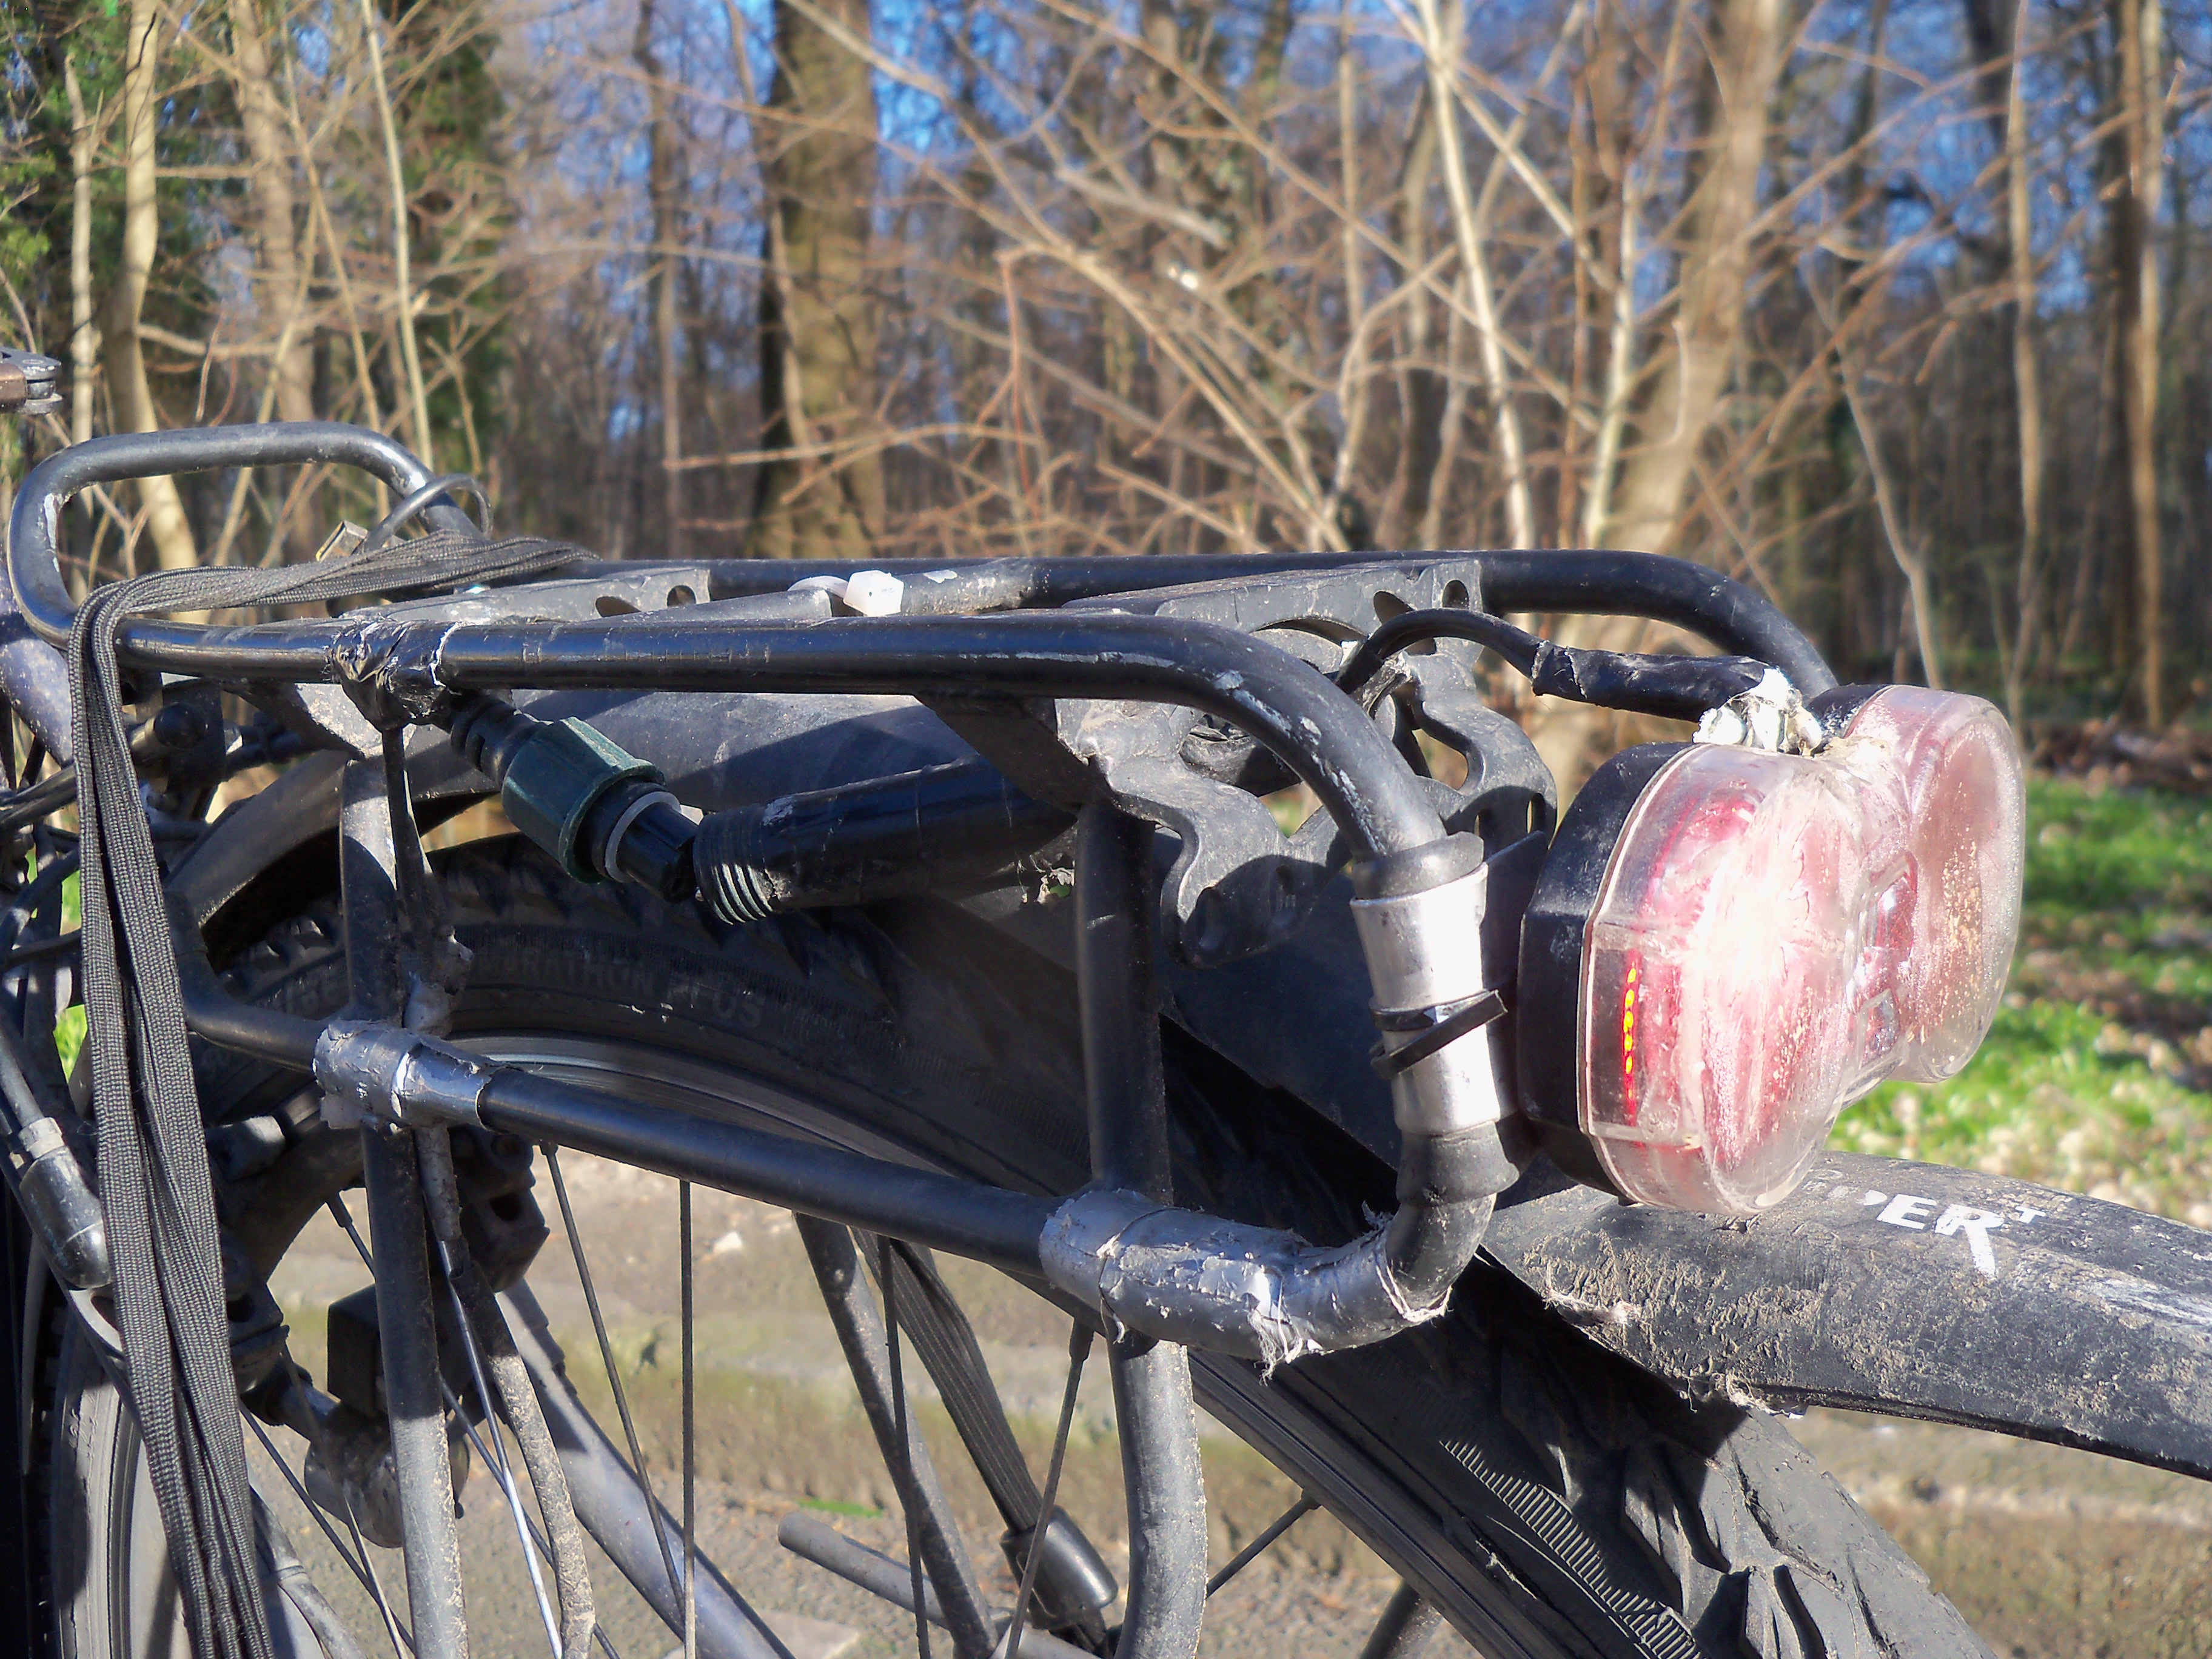
One thing that didn’t work so well is that I had to put the light upside down to fit into the holder, and it turned out that it is not waterproof this way round. I hopefully fixed it now with some hot glue, but now there is some sand stuck inside the light. Another thing is that the light is now in a more exposed place on the rack, so once I hit it against something when pushing my bike backwards and it cracked. I put some superglue on it that will hopefully keep water out.
The trailer
The dog trailer itself is actually out of the trash. I found it in a metal container in Copenhagen (the city where people put new bikes to the trash because they have a puncture). It had obviously lately been used for dumpster-diving (judging by the smell). It used to be a child trailer, but someone cut out the back support so that more stuff would fit in. It is quite a crappy trailer, it is really heavy (it even has suspension springs that are so strong and heavy that they have no use but to make the trailer heavier), the connections are not very sturdy so everything is moving, it suprises me that a trailer like that would be allowed to be sold to carry children.
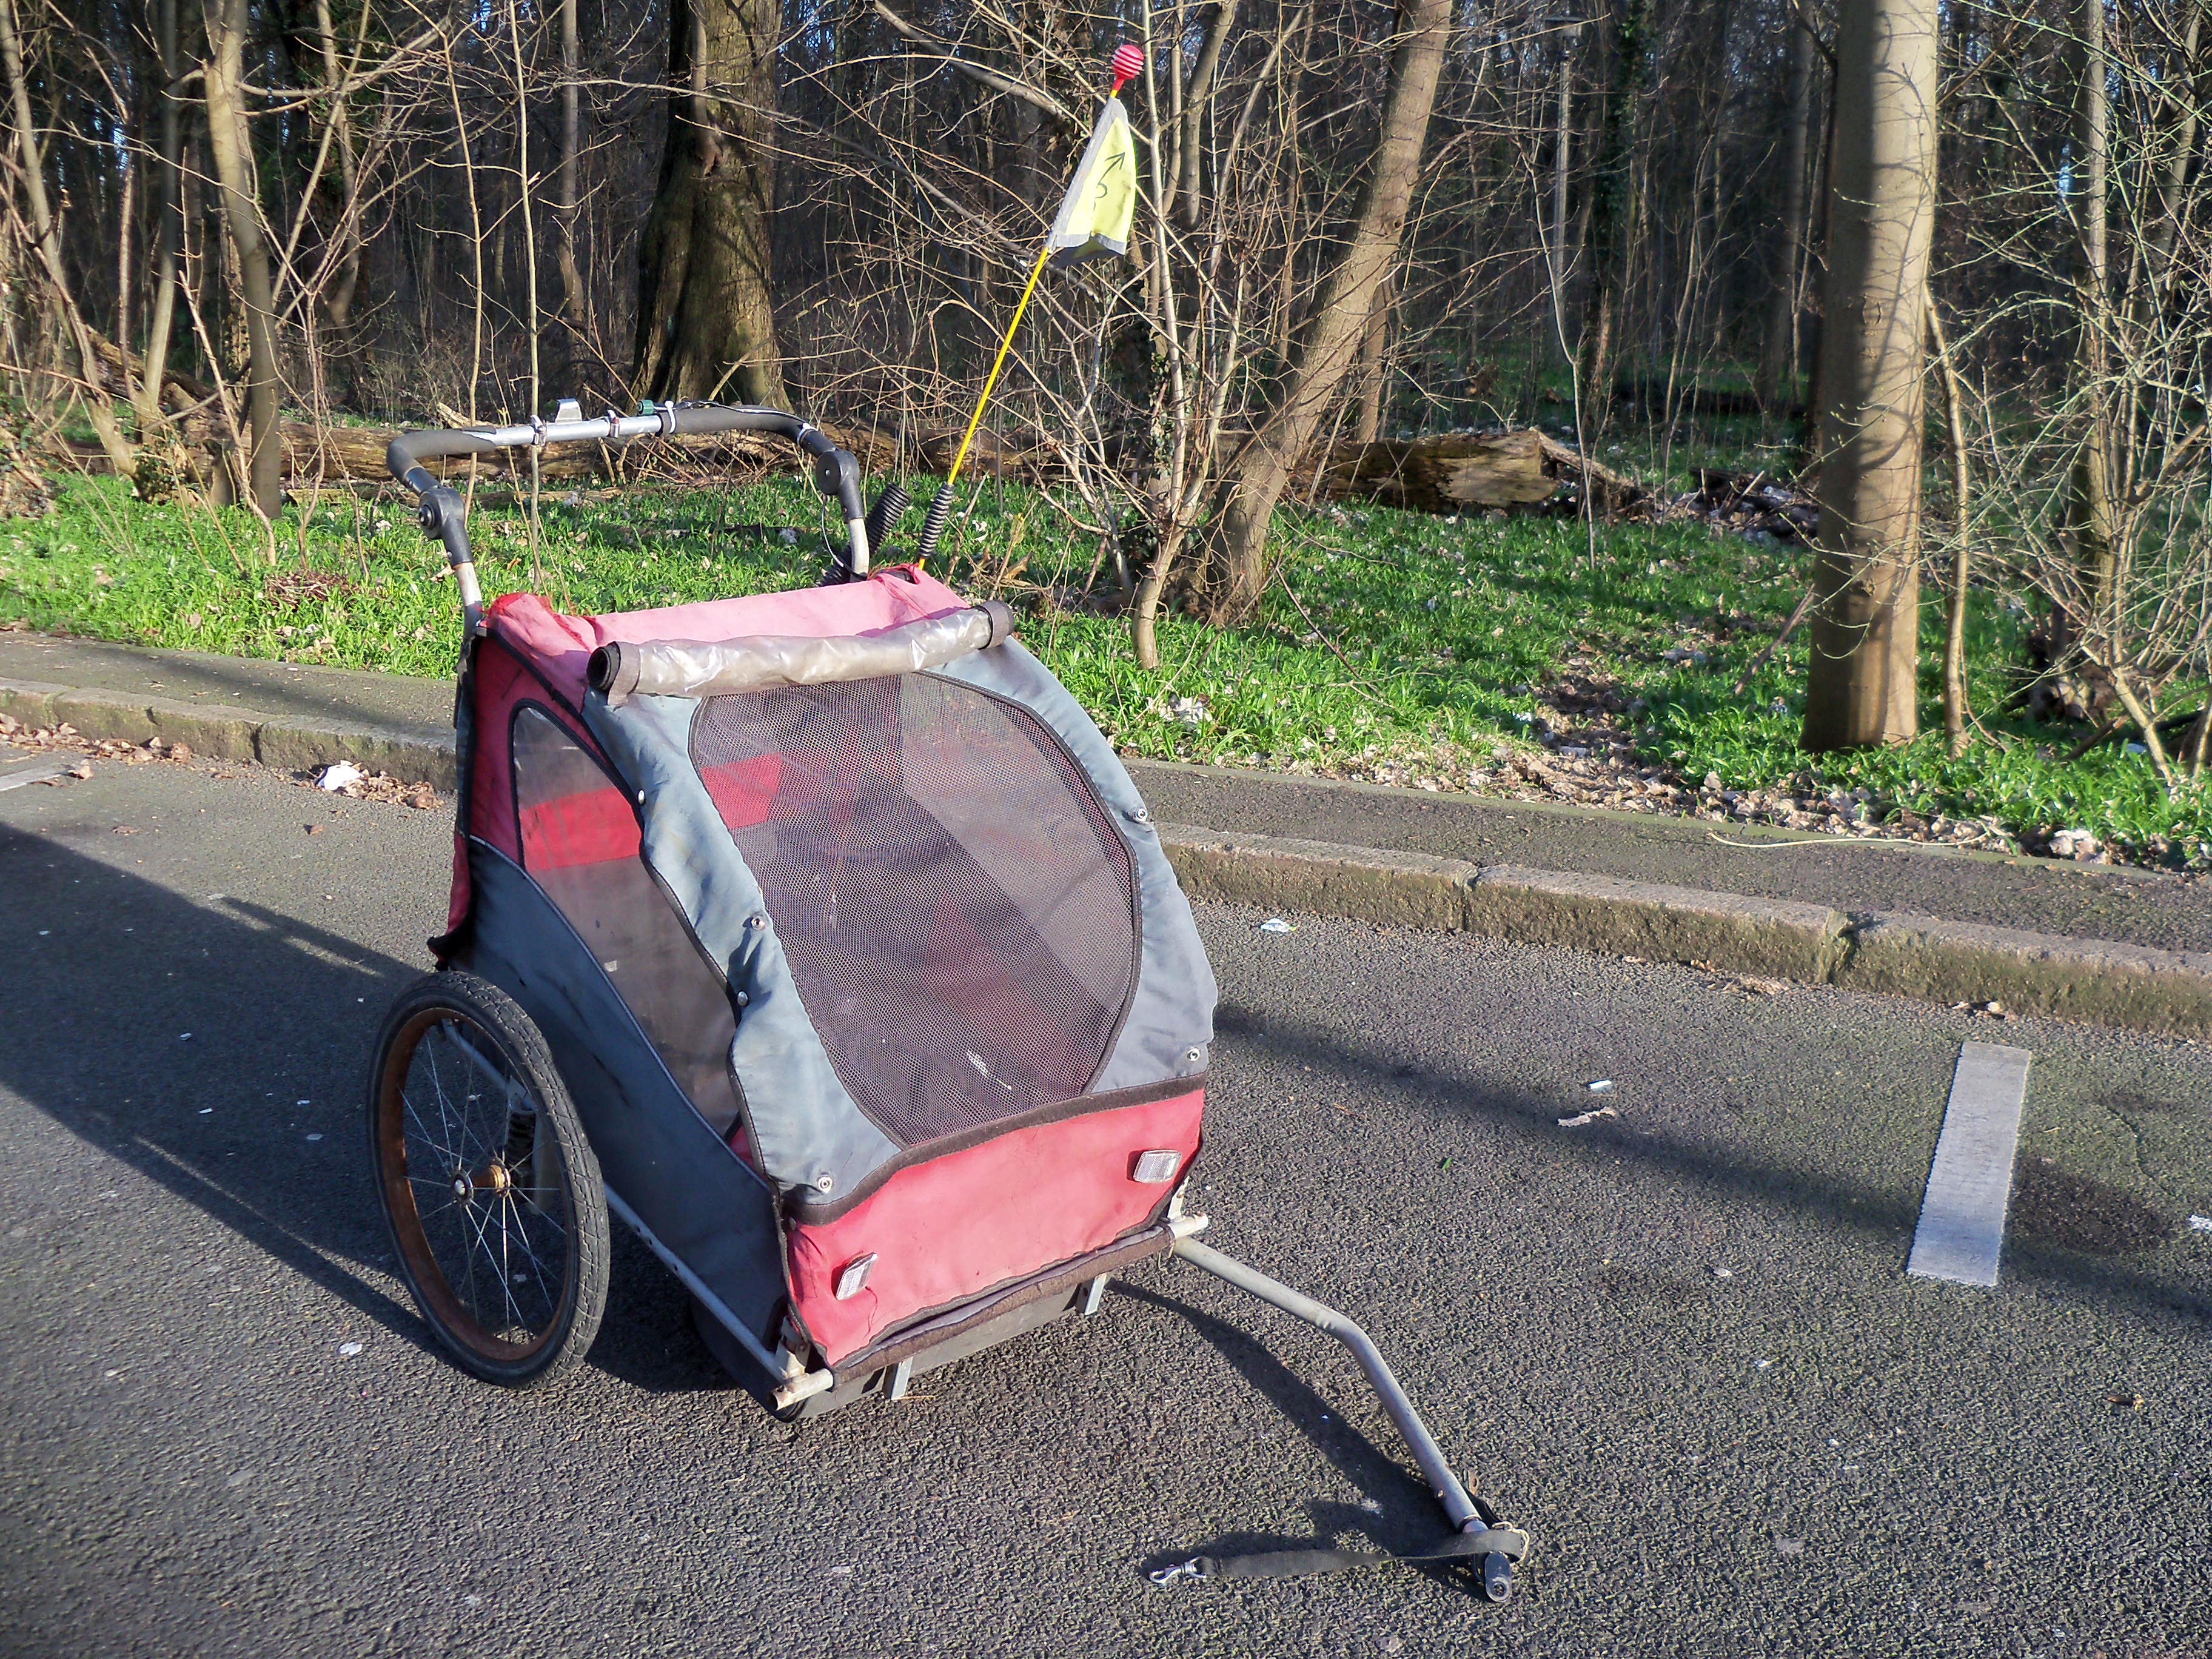
The flag is sewn from an old high-vis, inside the trailer is a pillow made of rubber foam from an old car seat wrapped in a sheet of construction felt that I found somewhere.
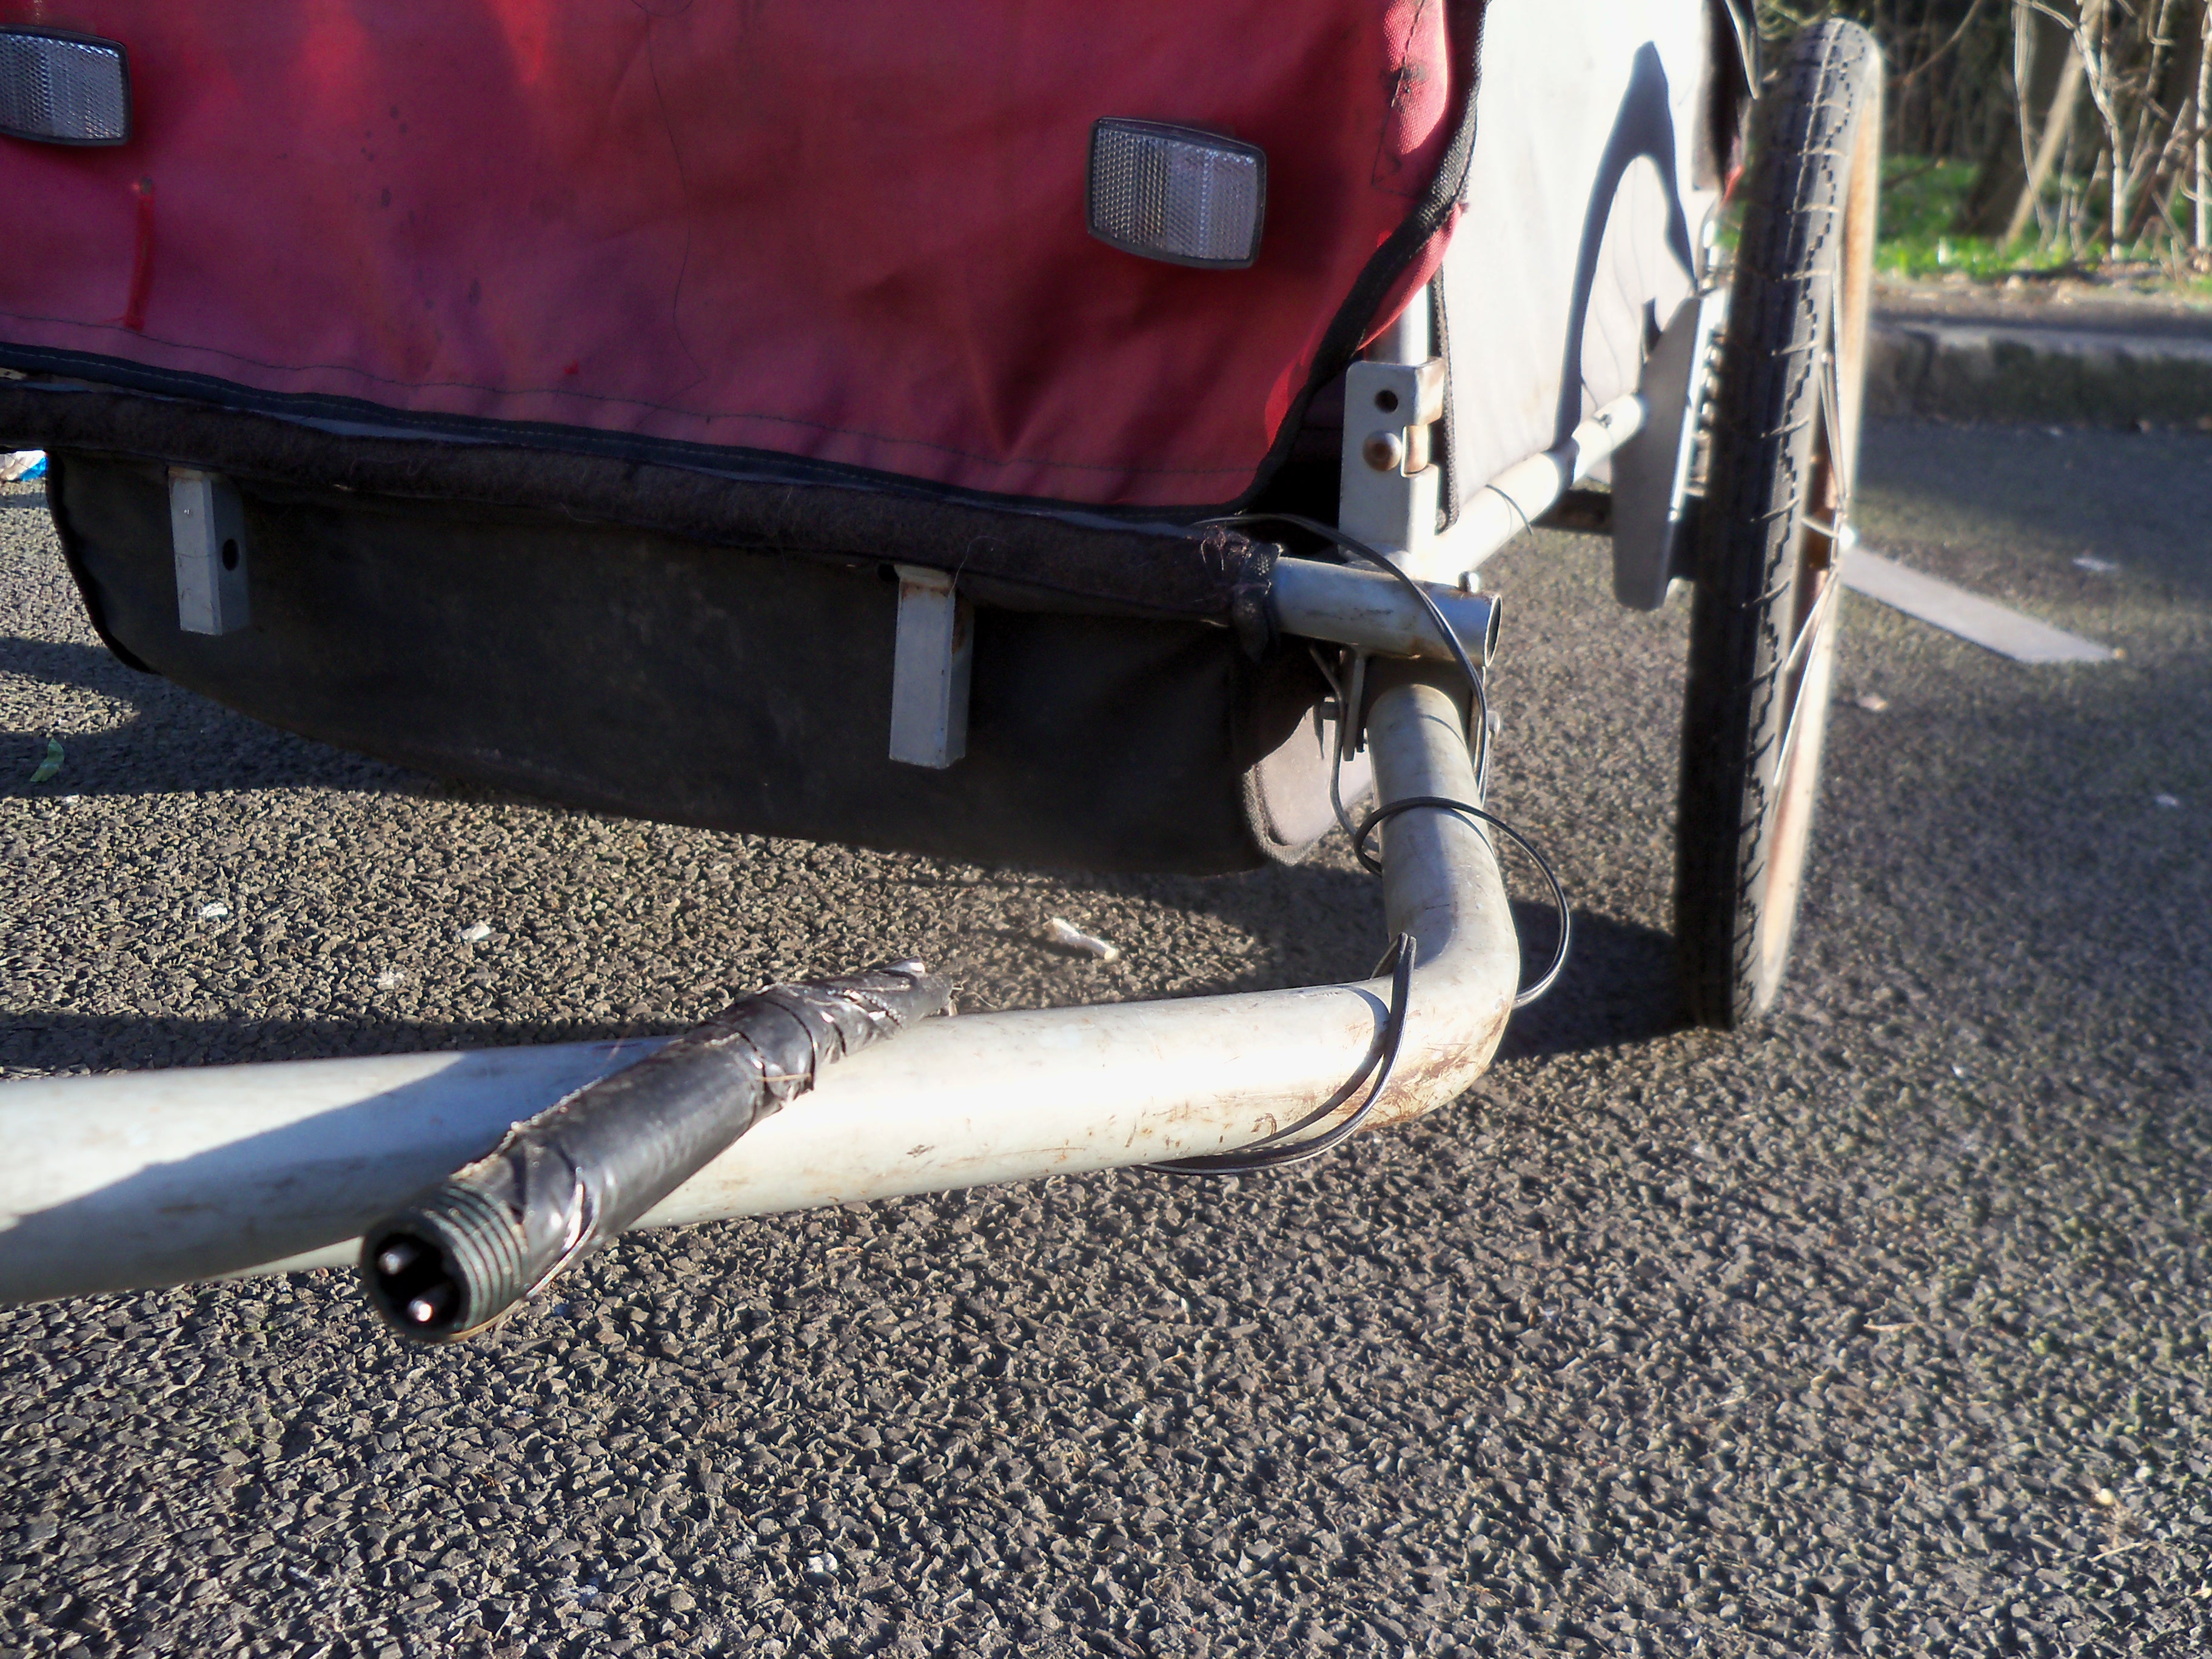
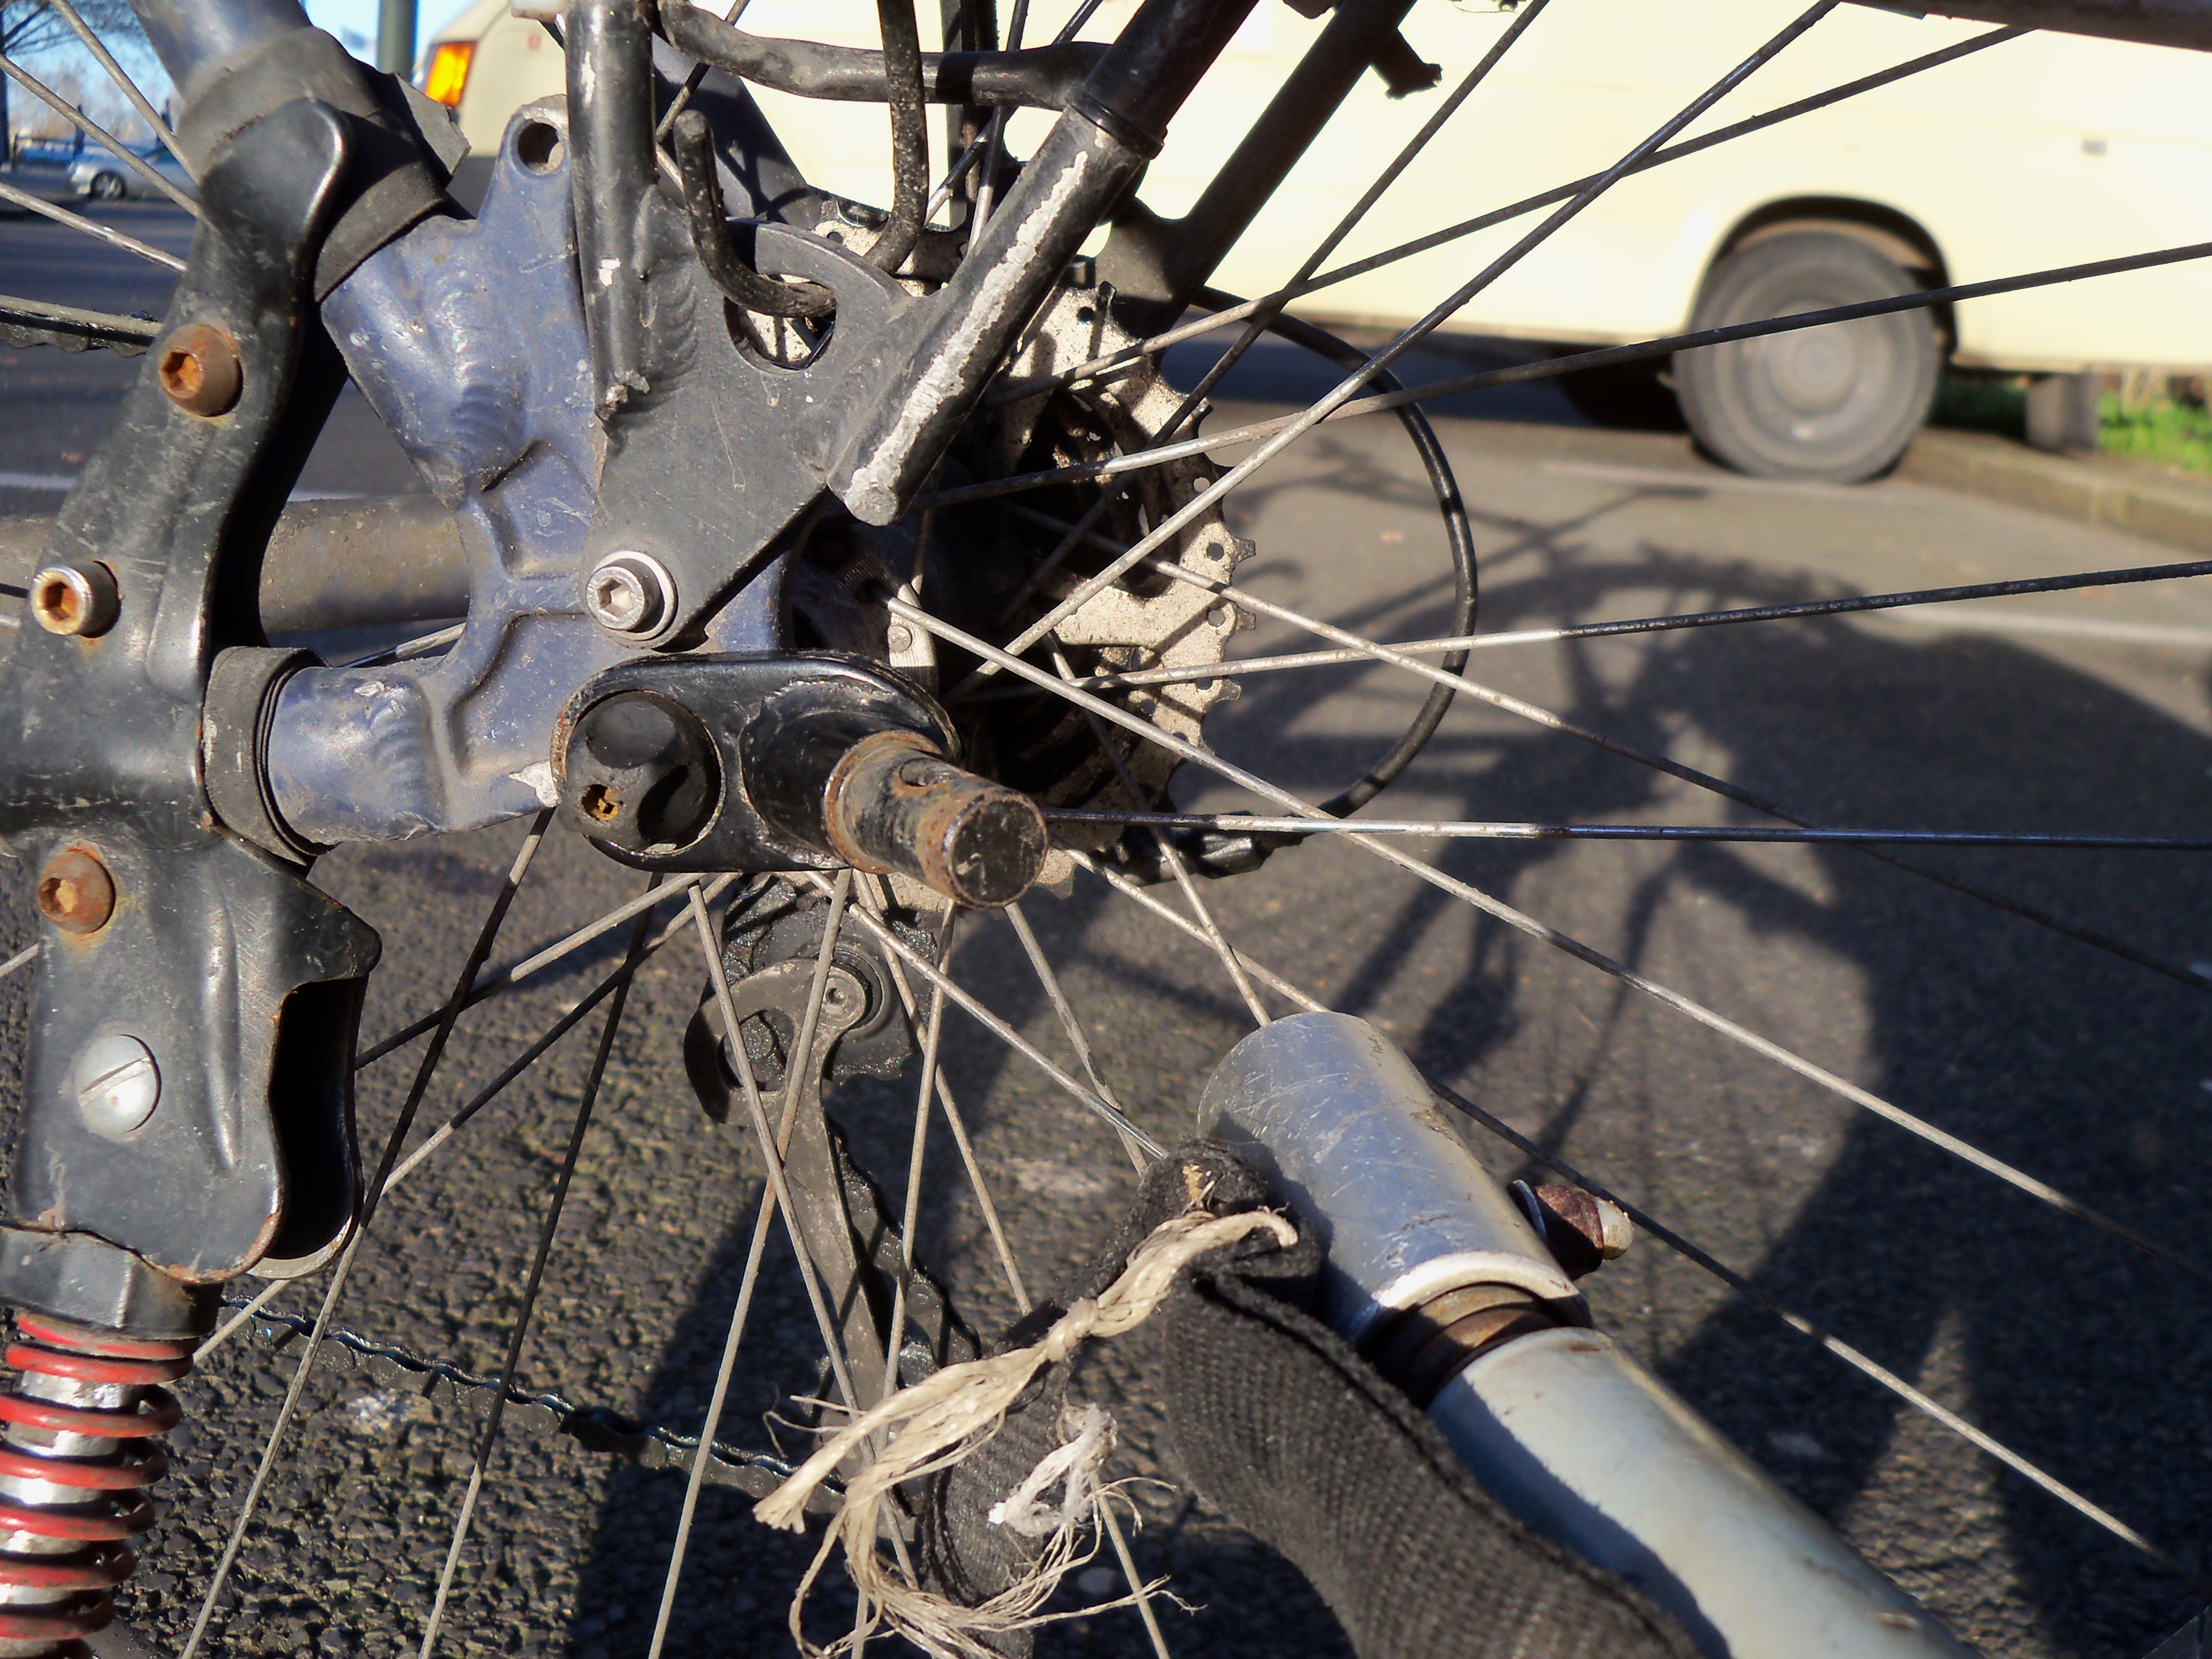
What was missing from the trailer was the attachment bit that goes on the bike. So I used an old galvanized steel water pipe, angle-grinded and bent it into shape and drilled the necessary holes through it. After I found the trailer, I actually found another similar trailer broken next to a bus stop, so I took the trailer part of the attachment off and made another attachment bit for the bike, in case the first attachment would break.
It turned out to be a clever decision, first the spring of the trailer part of the first attachment bent when I went down a too steep hill, then the DIY bit on the bike broke shortly after in the middle of Belarus. So I changed it for the spare one, but the self-made part also broke after a week. Fortunately, this was just before Vilnius, and in Vilnius I actually found the bike attachment for this particular trailer in a shop. The trailer attachment is one example where the DIY way was not successful, because there was too much stress on the angle of the bent part. I guess it would be possible but quite complicated to weld a part like this from thicker metal, but I wouldn’t trust it to last very long either. In this case it was worth to buy the original part.
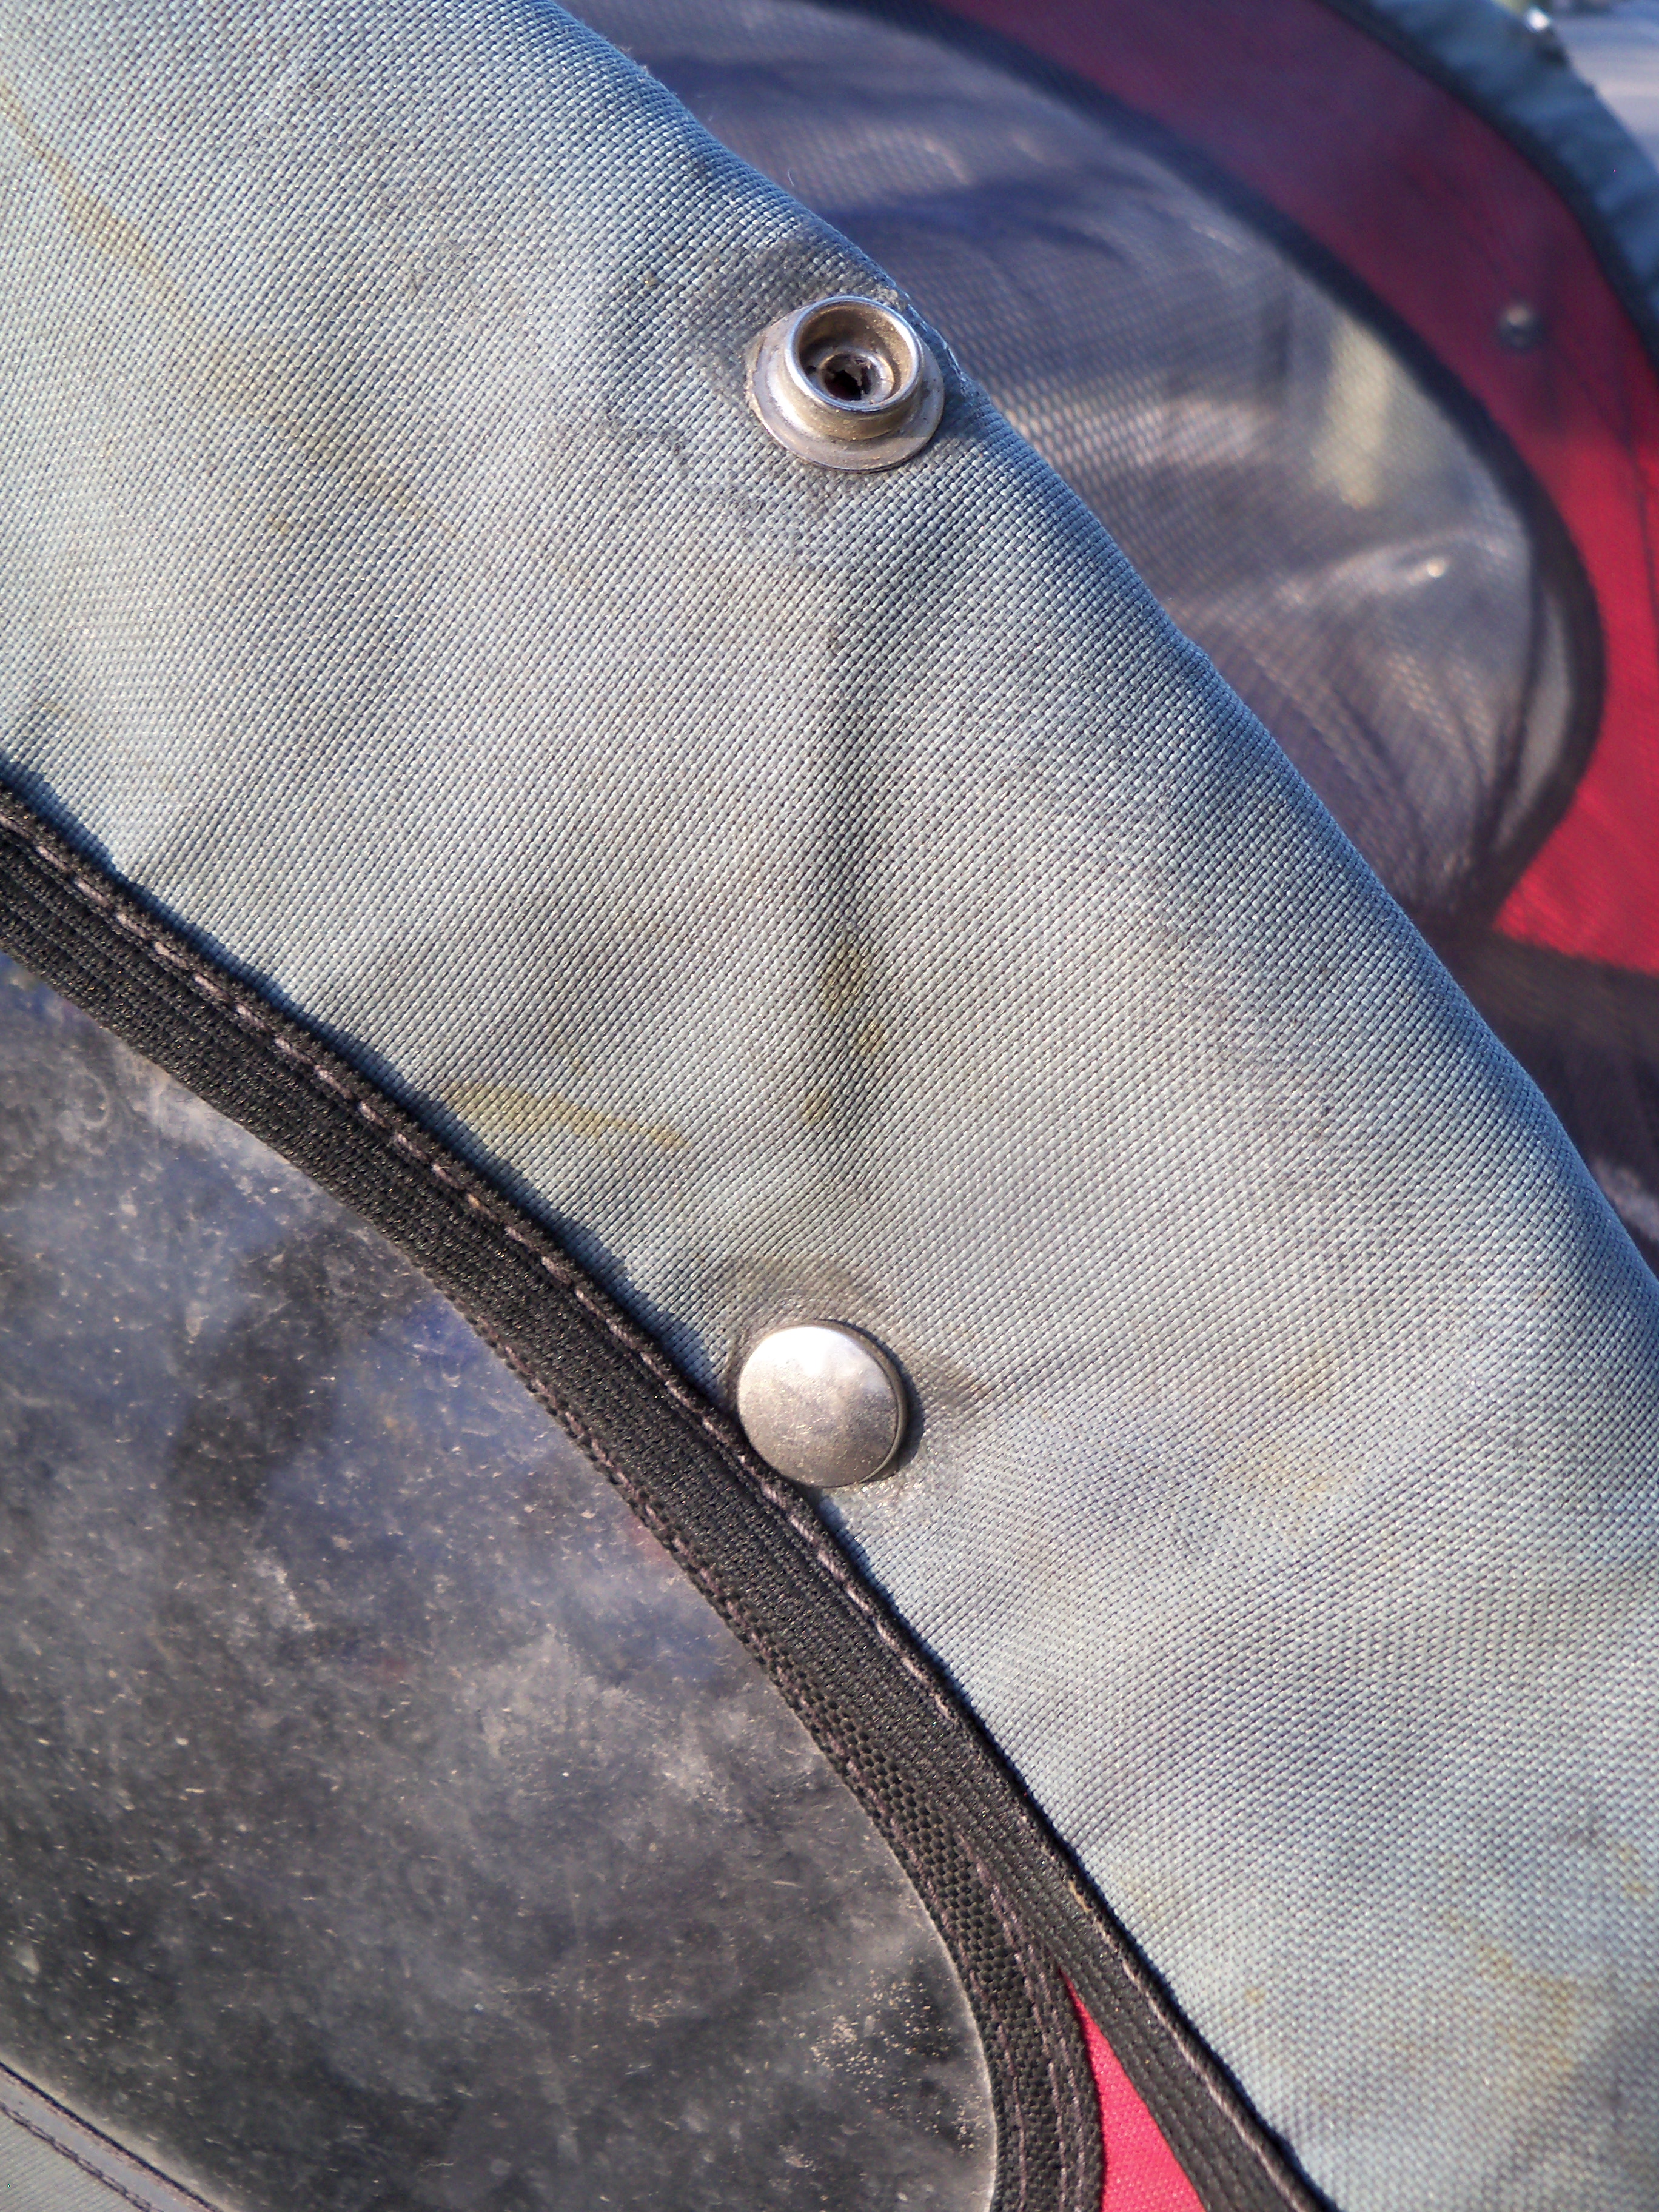
The front of the trailer is closed with some hook-and-loop fastener (is that how you call it?), but it was so worn out that it would just open by itself in the wind. So I bought these clips in a shop to make sure it can be closed properly again, and they have lasted since. Unfortunately, they were quite expensive, and it would have been better to take them off some old clothes, but then it would be harder to attach them to the fabric.
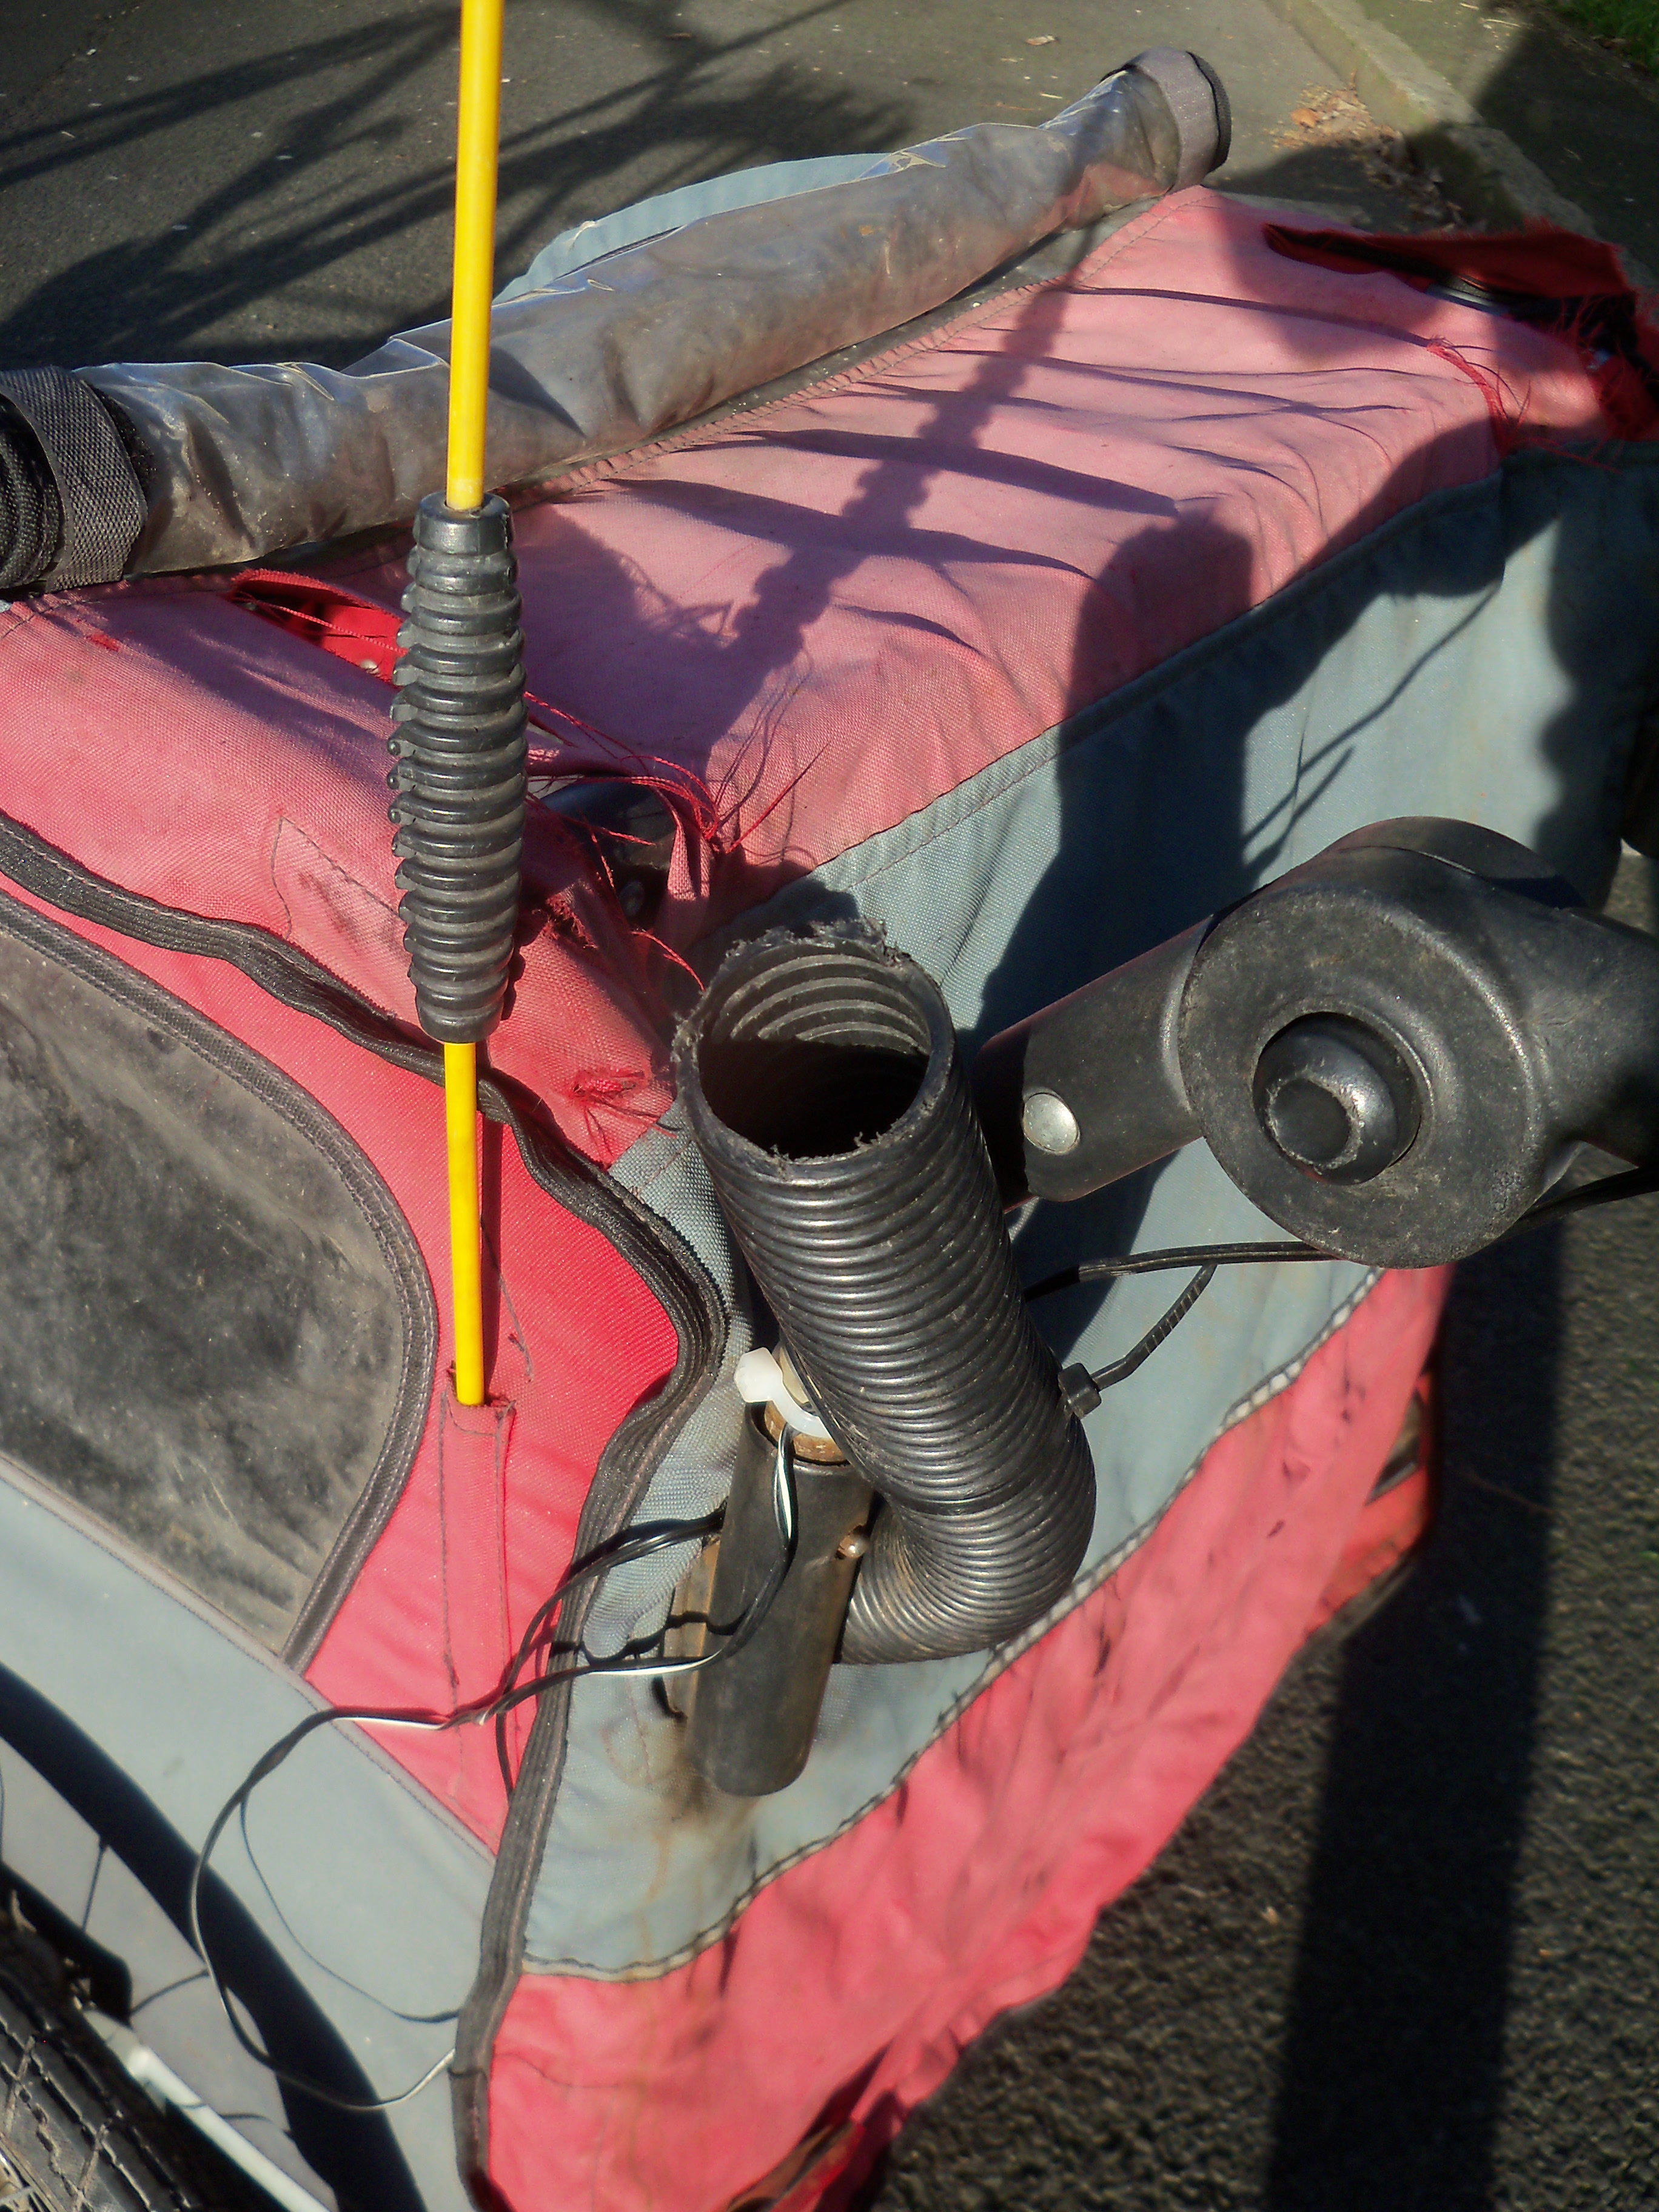
This strange pipe is part of an old vacuum-cleaner pipe that I found on the street. I installed it there as a feeding tube for the dog, because he is very protective of his trailer and tries to attack anyone who comes too close, so we tried to show him that when someone comes, he will get some snack, so it is good that someone comes (and people can give him the snack without getting their hand bitten off).
The charger
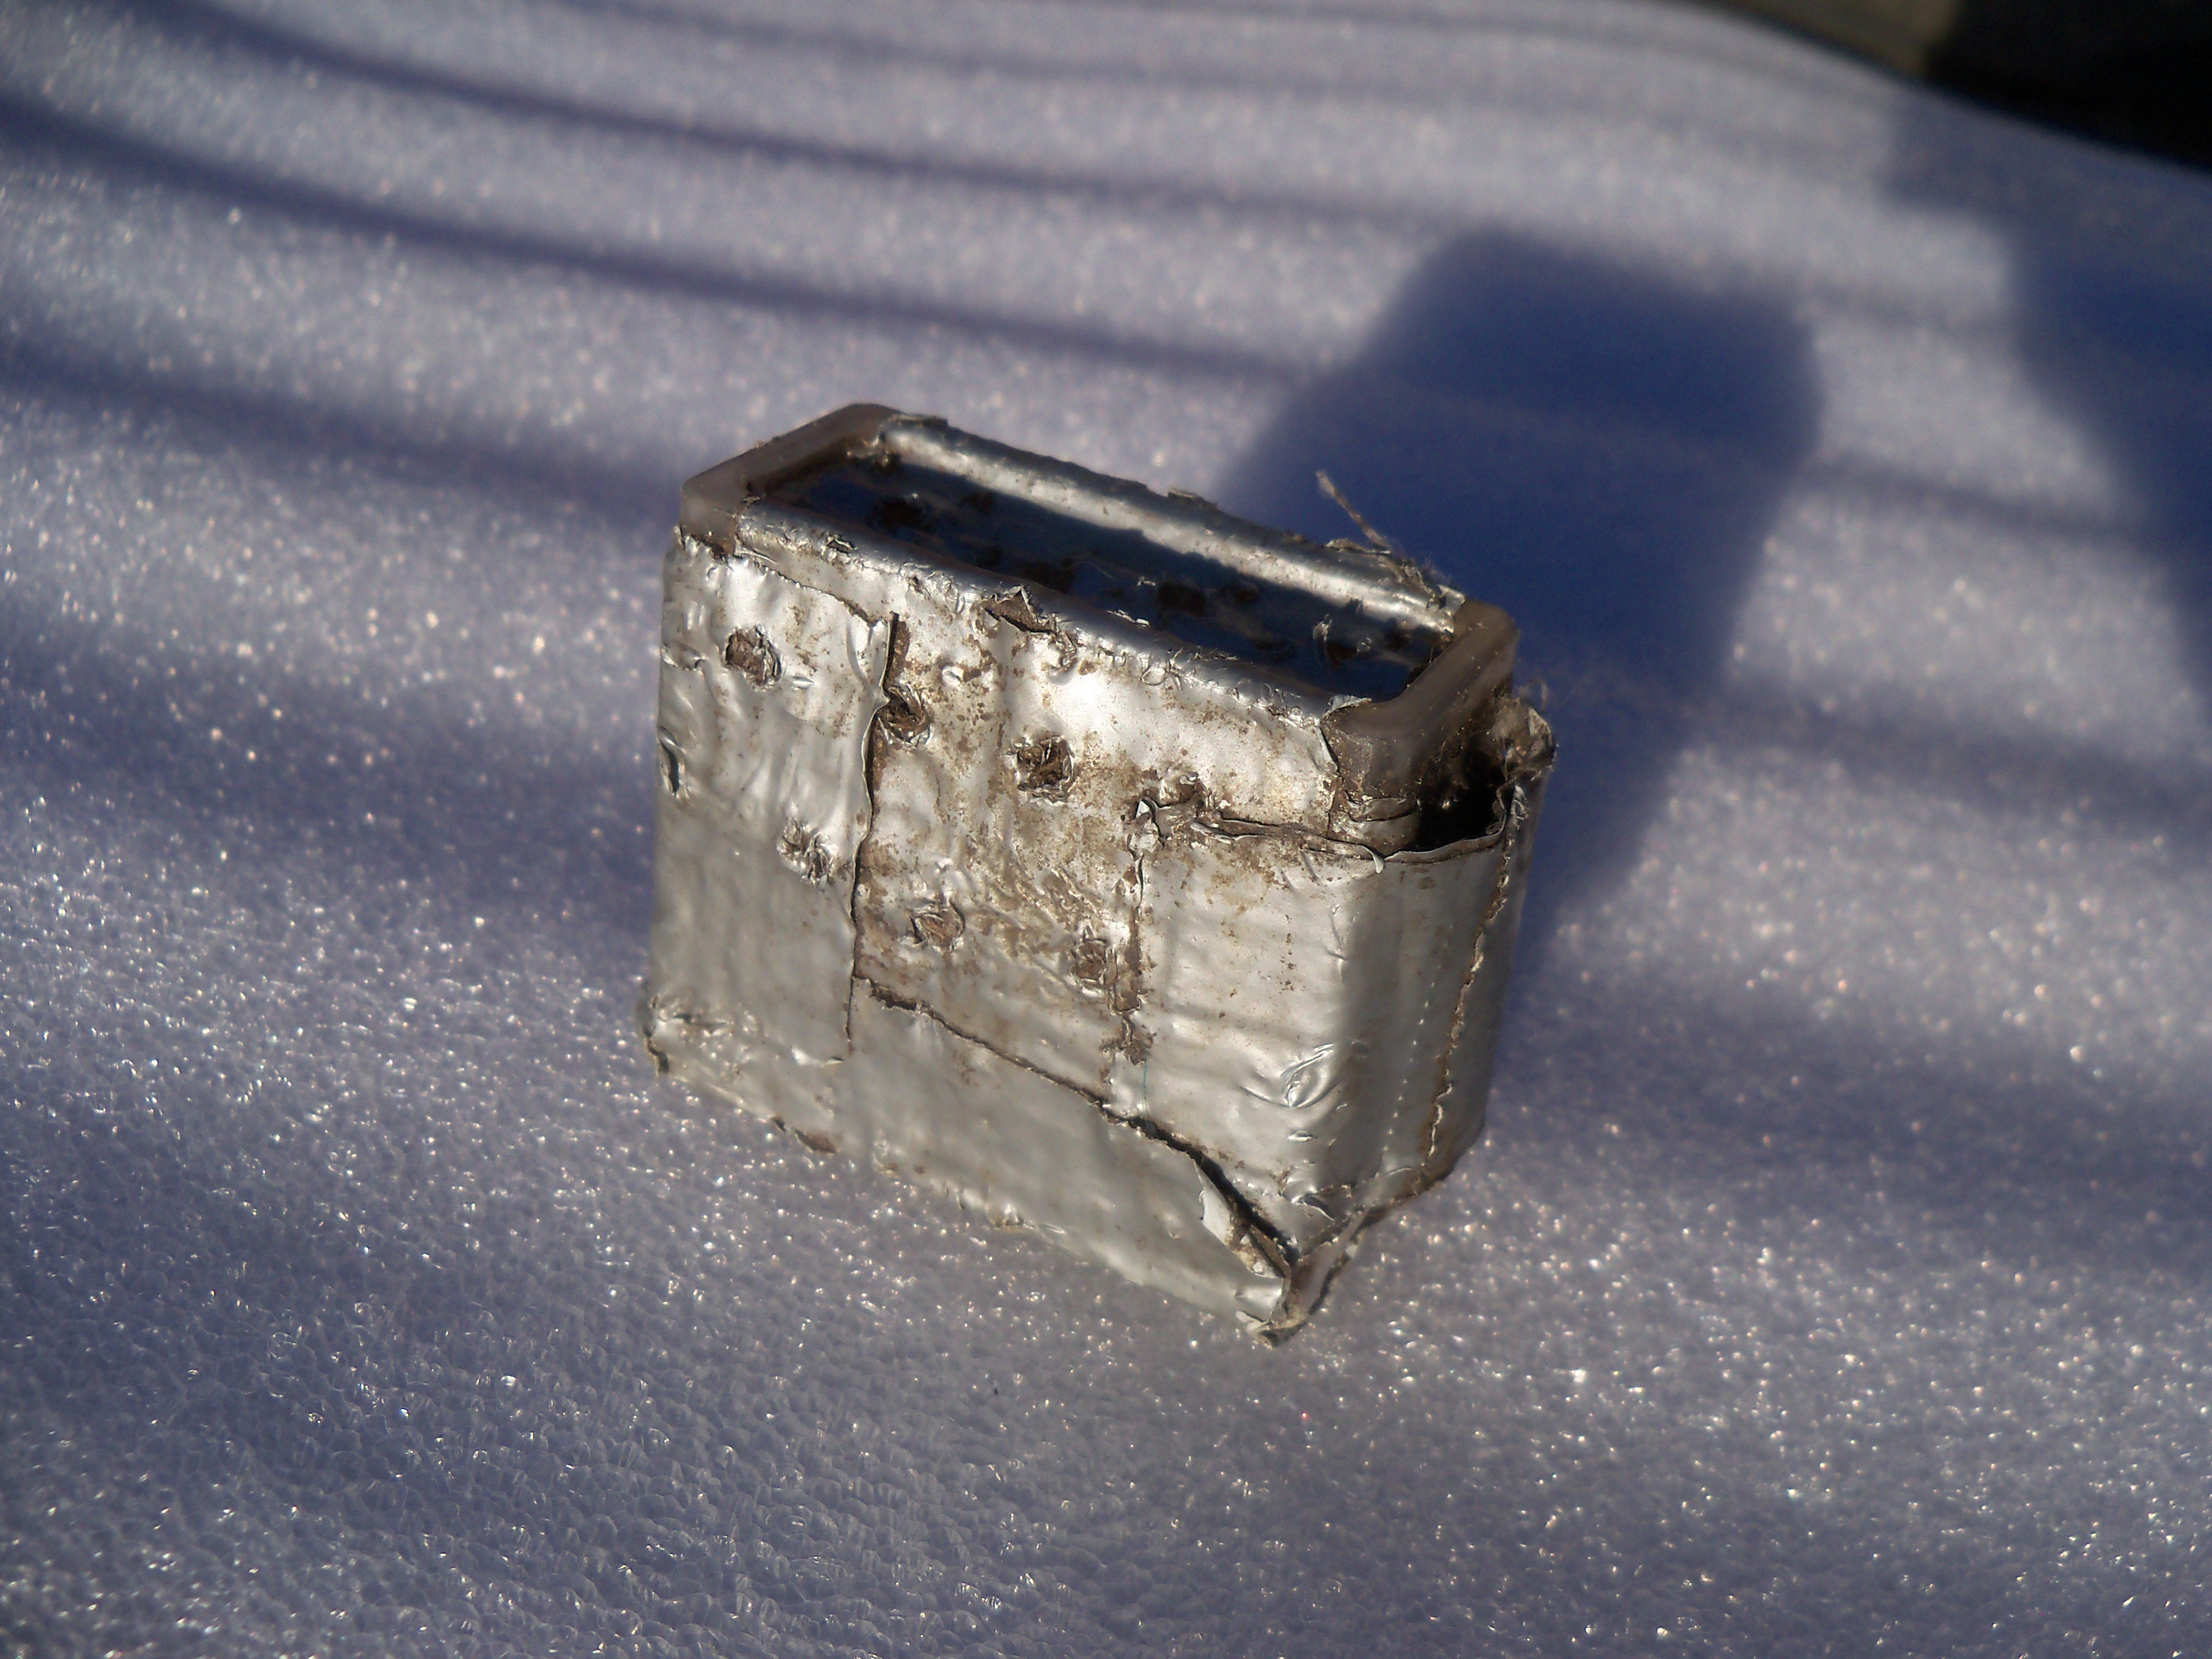
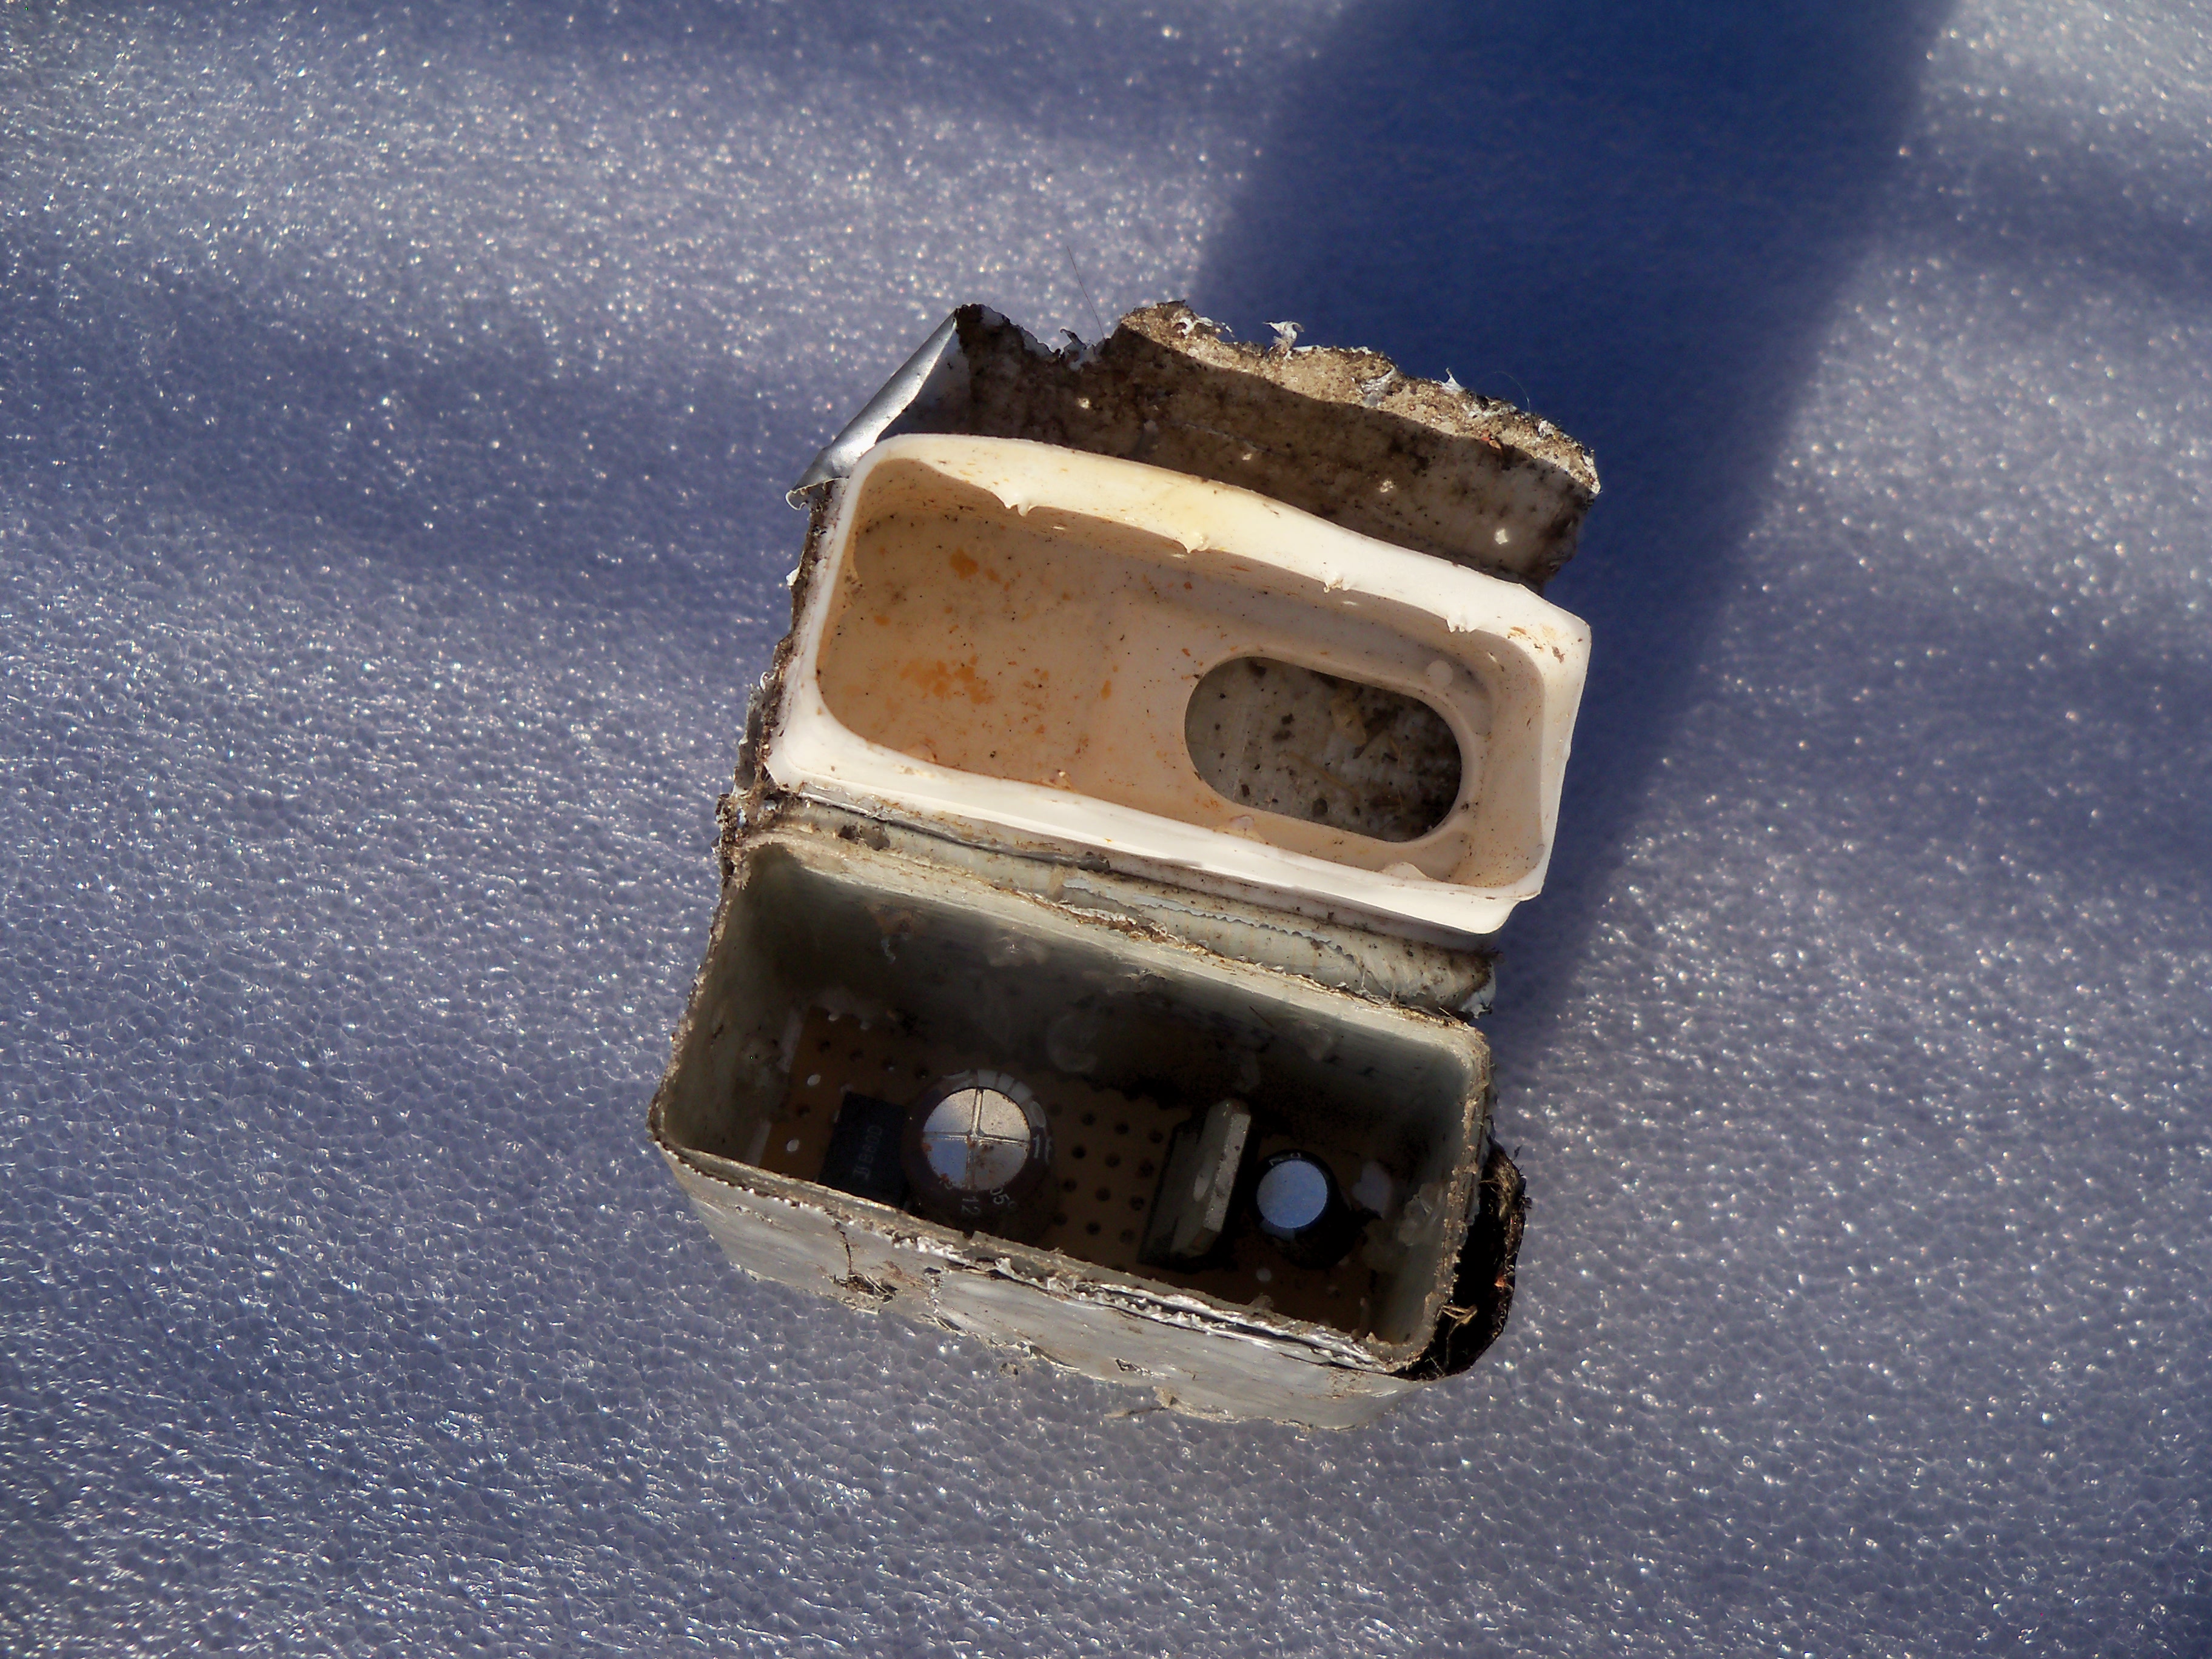
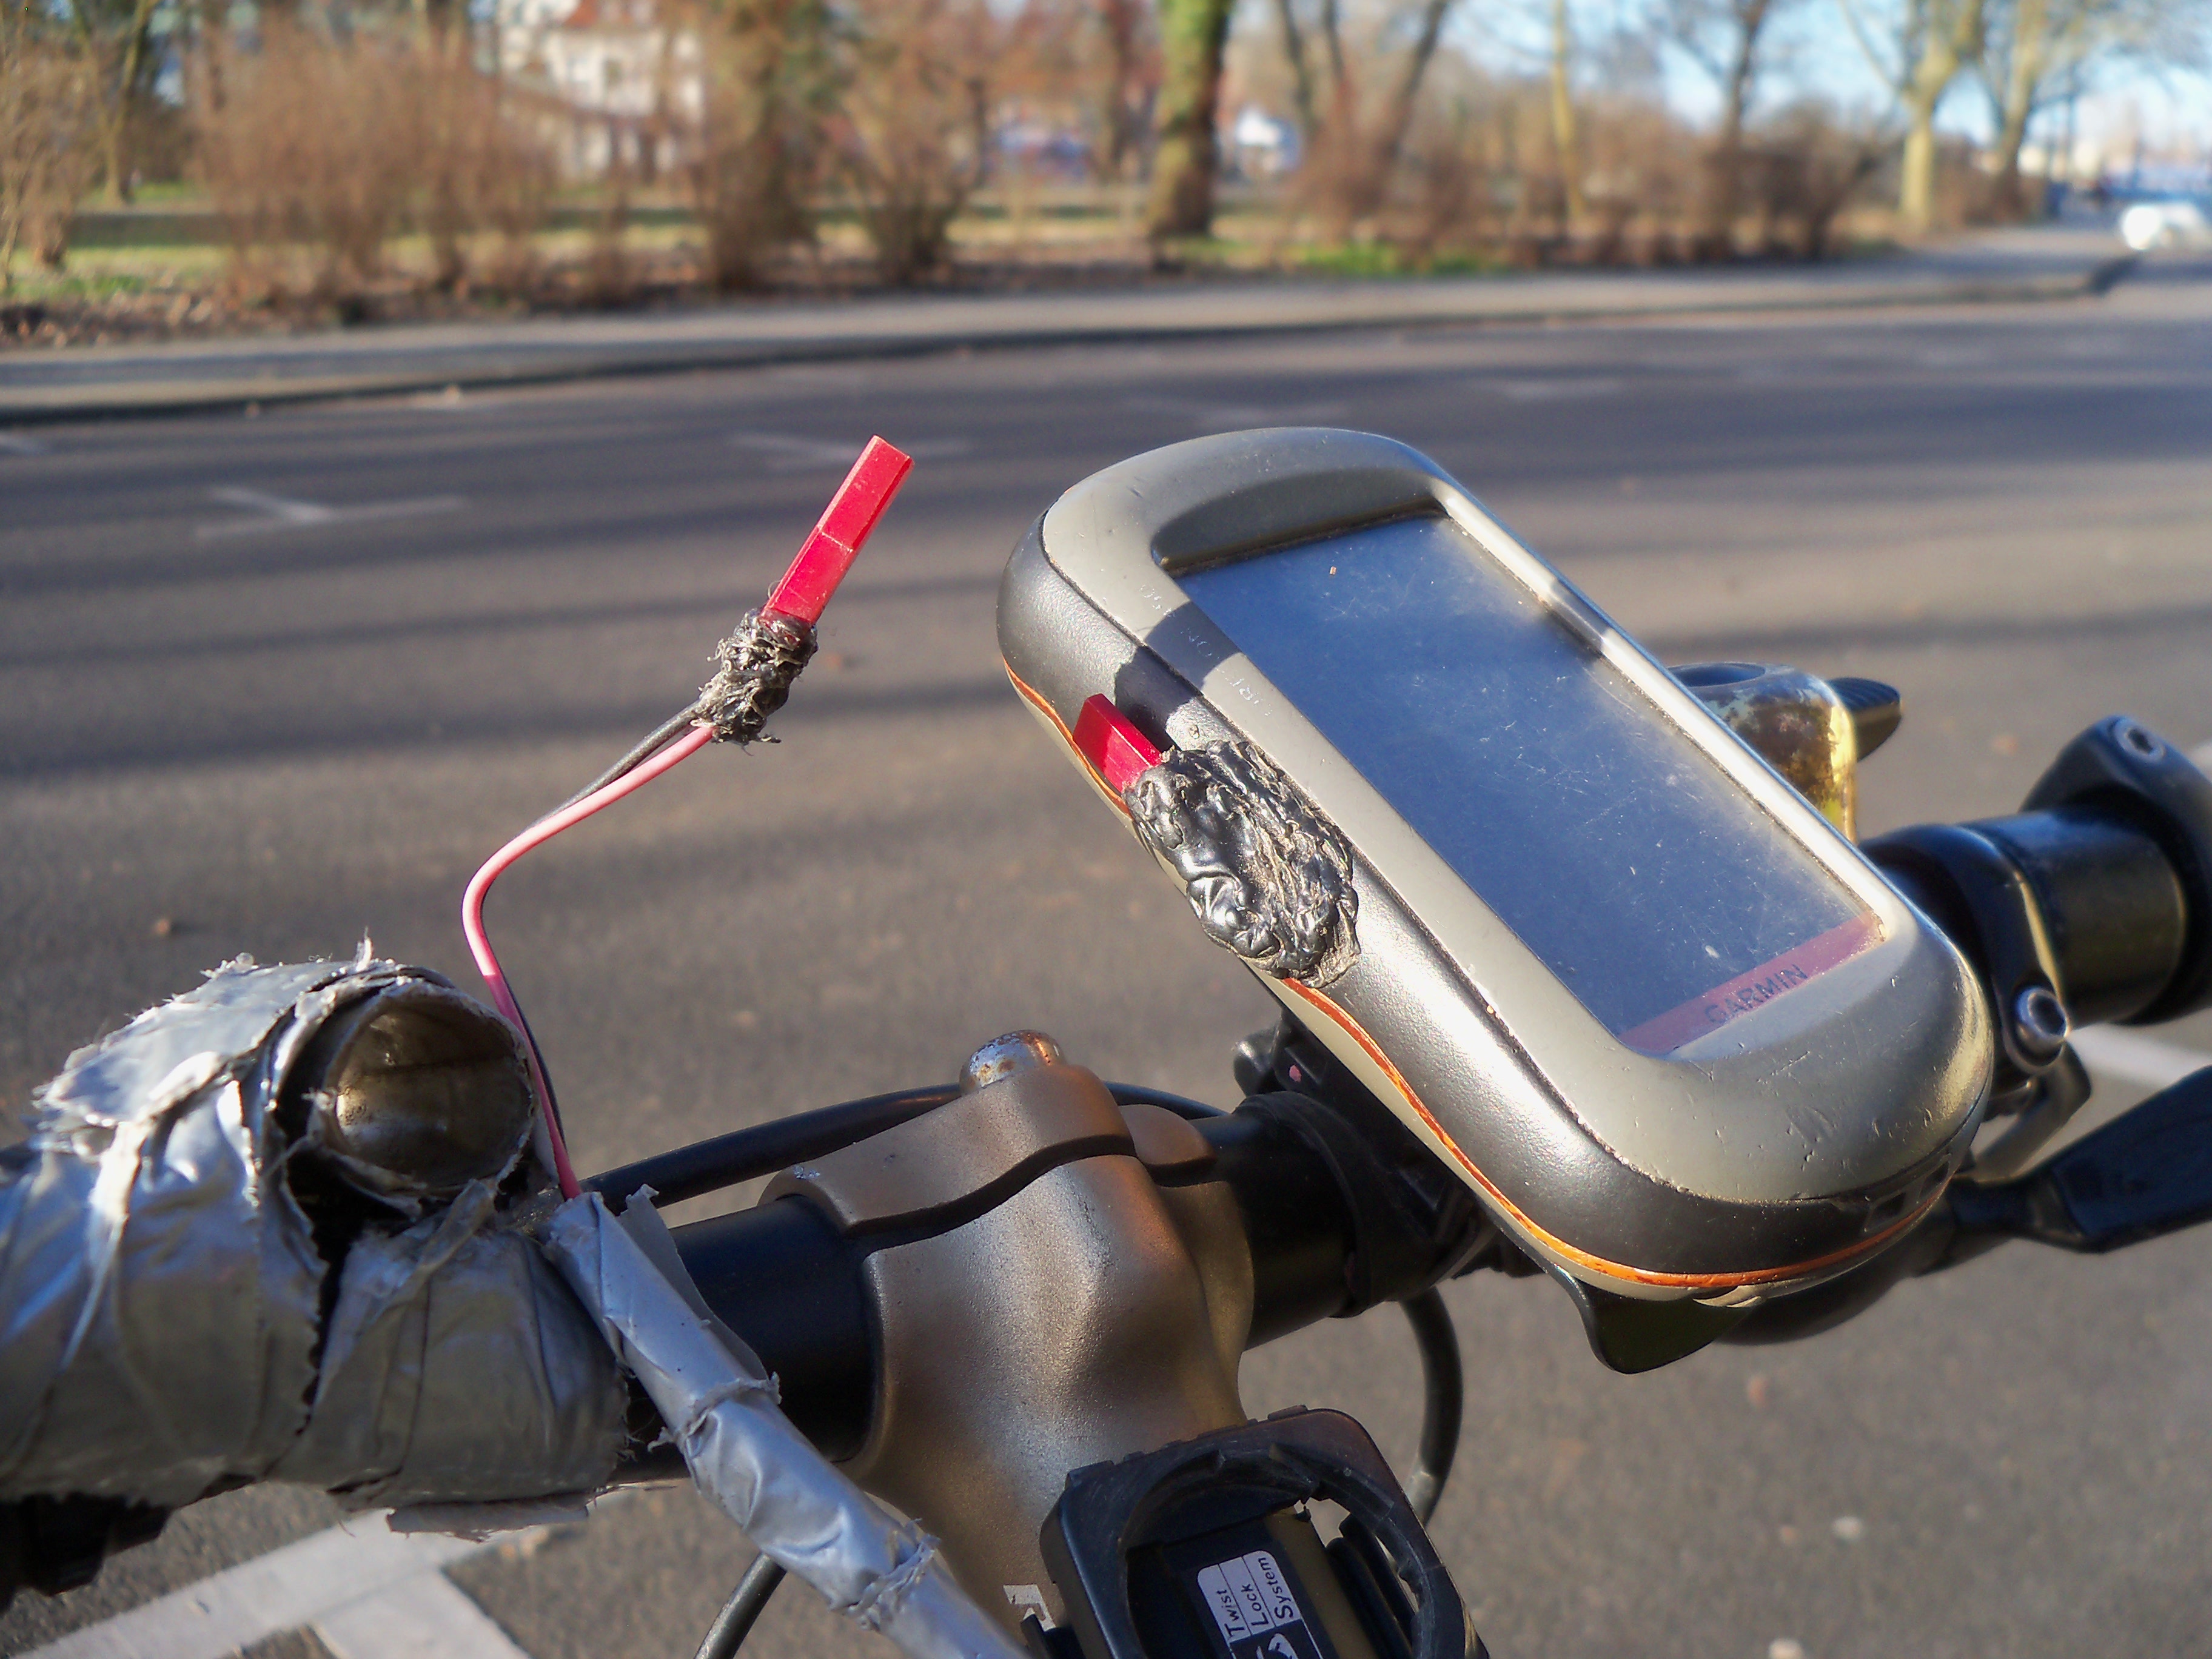
I have an old Garmin Oregon outdoor GPS device on my handlebar, which I use to navigate. It runs on AA batteries. Because it uses up around one pair of batteries per day, I first made a device that enabled me to charge rechargeable AA batteries using my dynamo. On my fork, I put a switch that I can use to change between my light and a USB port that is connected to a step-down voltage regulator that had just the right size to stick it inside the fork. I used a rocking switch that I wrapped in a balloon to make it waterproof, but the balloon decomposed in the UV light after several weeks. On the third and fourth picture, you can see the voltage converter that I used before I got the step-down converter. It is a simple DC-DC converter in an old tic-tac box wrapped in gaffer tape with some holes for ventilation.
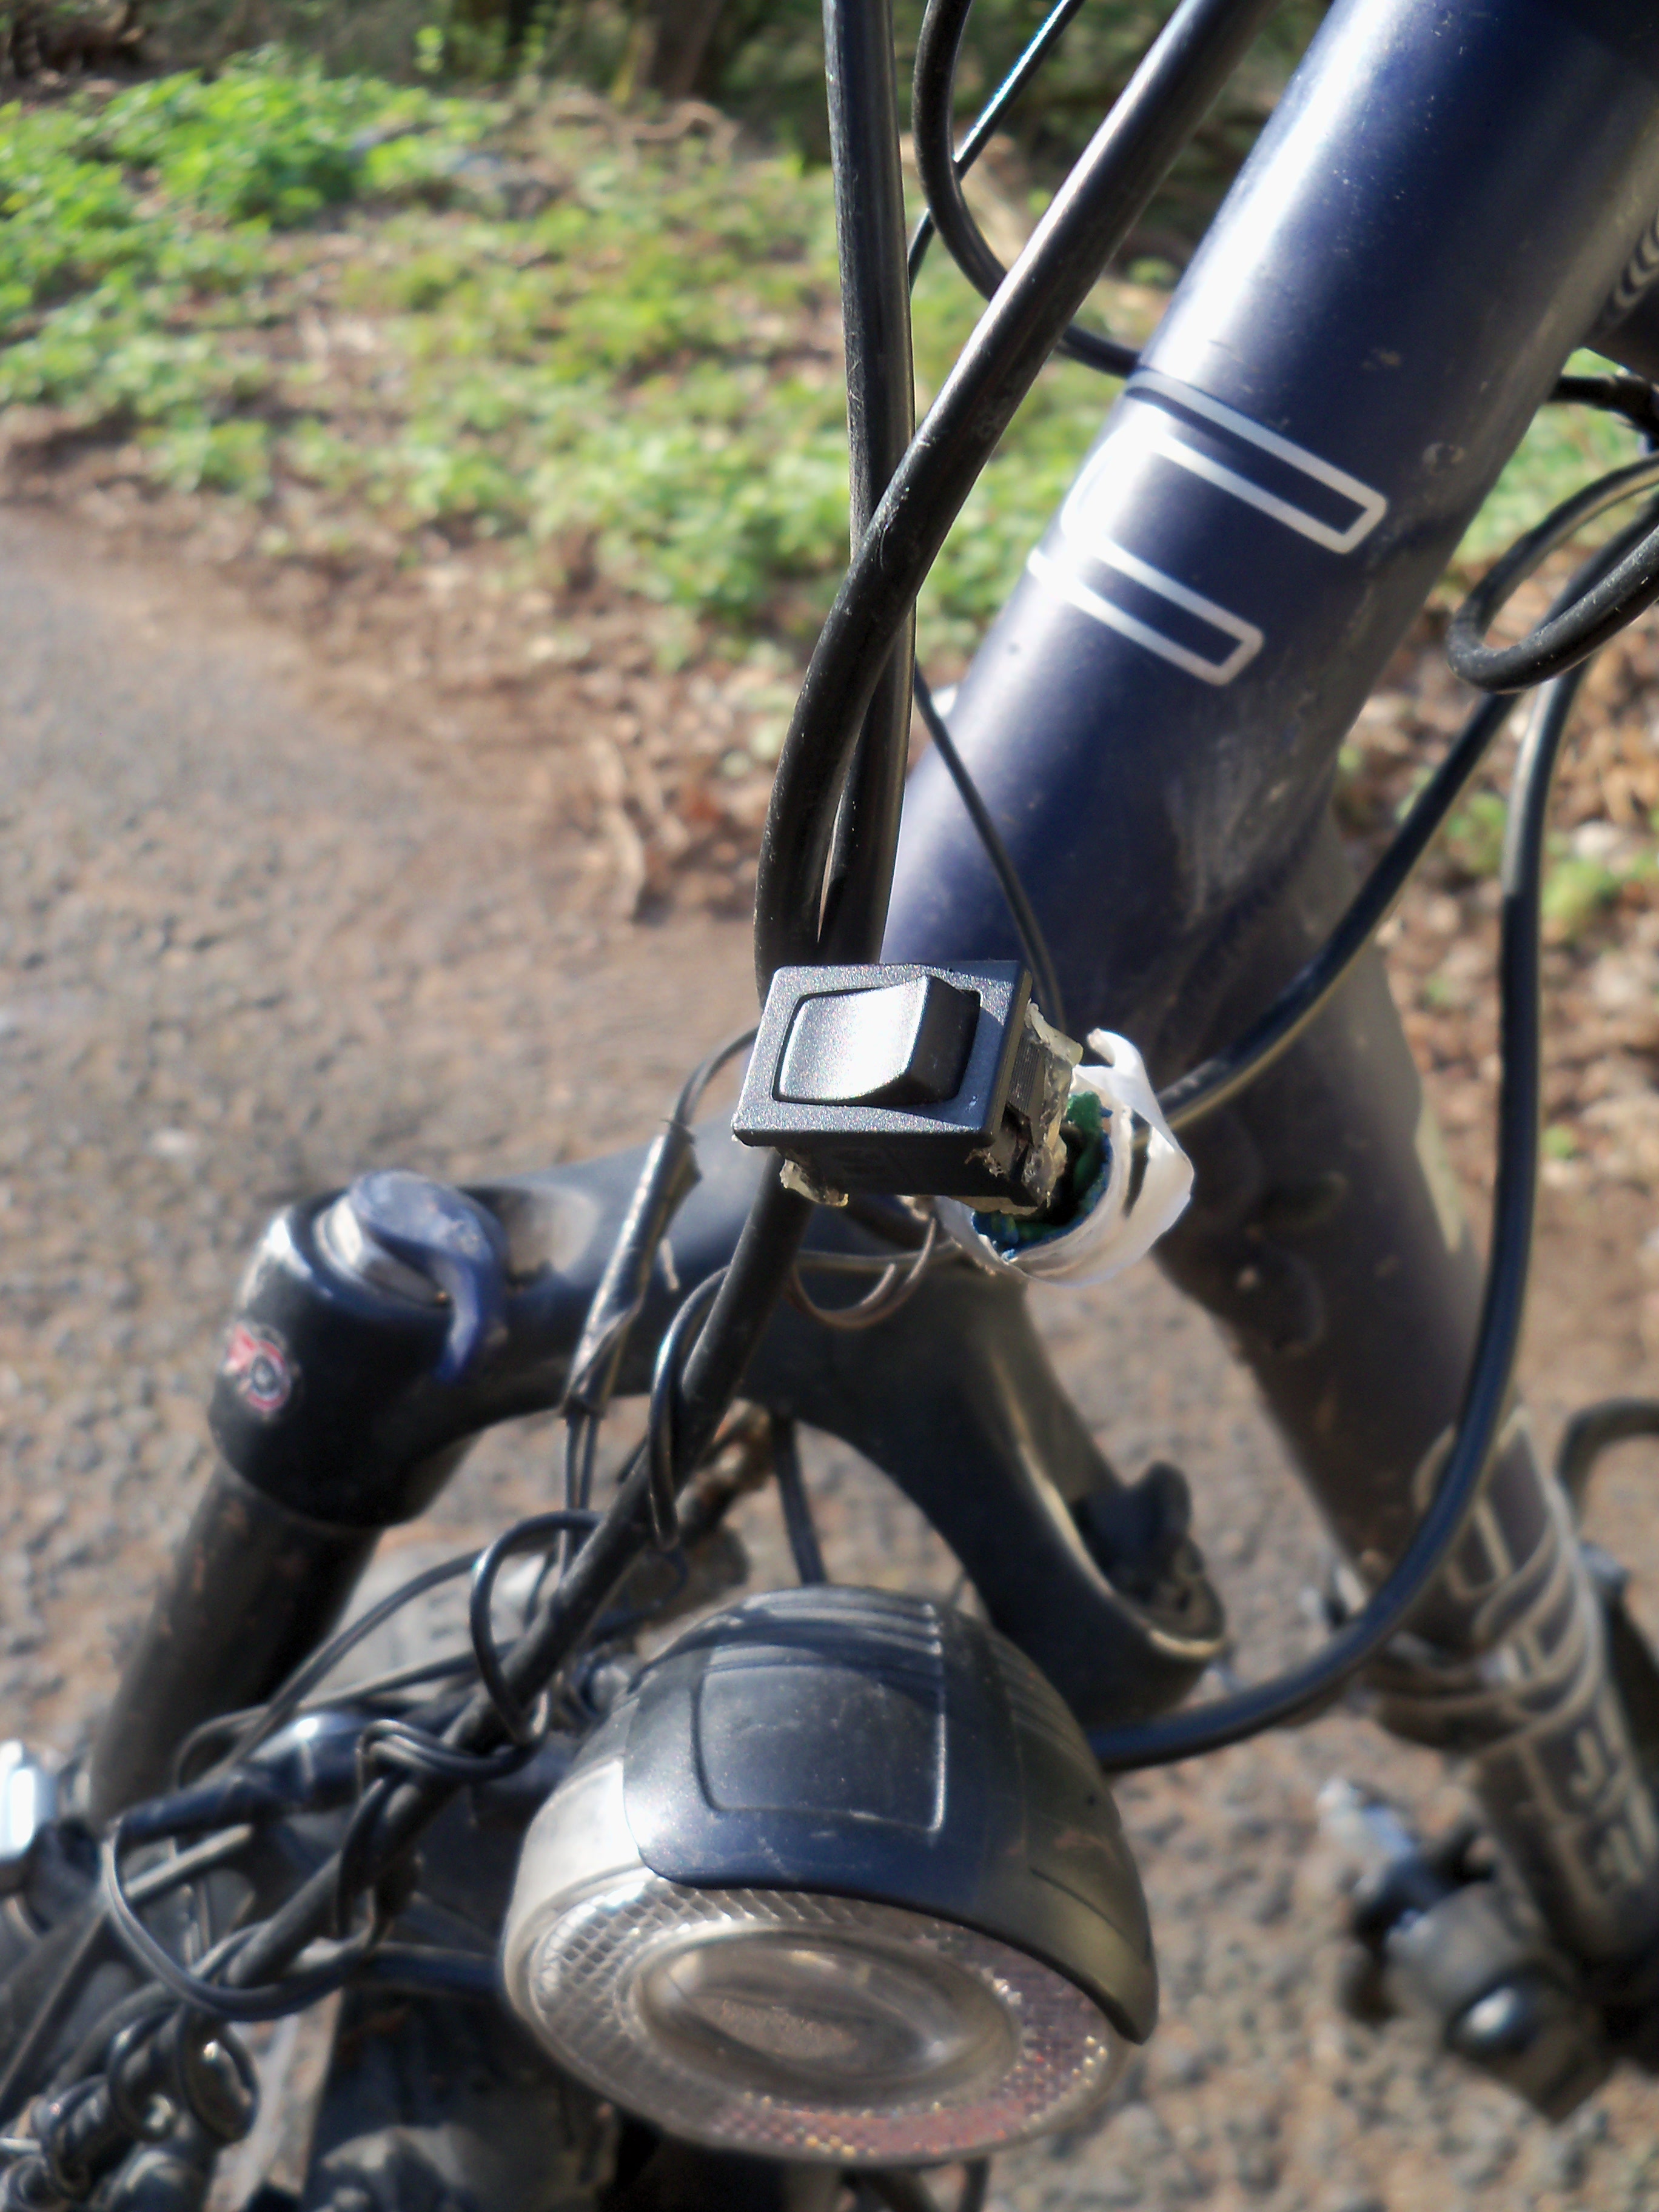

In addition to the USB port on the fork, another cable runs back along the frame to my rack, where it can be connected to the box using another one of those christmas-light water proof plugs. Inside the box is another USB port.
I have a charger for AA batteries that works with USB (Varta 57070, I can recommend it). Because the charger is controlled by a micro processor, it needs a constant voltage of 5 Volts. But when I cycle slowly (particularly when I start cycling), the voltage is below 5 V, so the charger gets confused and turns off. Like this, I cannot charge any batteries. So instead I connected a power bank to the USB port, and then connected the charger to the power bank. The power bank came with the small solar panel that I have on my box, and it can thus also deal with low voltages. (Unfortunately, they don’t sell this model anymore.)
In practice, I discovered that the power from my dynamo is often not enough to charge the batteries of my GPS. One reason for that is that dynamos just don’t produce a lot of electricity, the other is that when charging batteries, a lot of power gets lost. In this case, particularly a lot gets lost, because it first goes from the dynamo into the power bank, then from the power bank into the batteries, and then from the batteries into the GPS. I decided to cut out one step and connect the GPS directly to the power bank by putting another cable from the box to the handle bar. I could not connect the GPS directly to the dynamo because it would turn off every time I stopped cycling and the electricity cut off.
Unfortunately, this solution didn’t last long, because the Mini-USB port on the GPS broke from the vibrations while having a cable plugged in. Also, the GPS was not waterproof like this when the cover of the USB port was opened. So I had to operate a replacement plug into the GPS. I used a JST connector for this, whose cables I ran through two small holes that I drilled into the side of the GPS and which I waterproofed with hot glue. Note that I did it the wrong way round, the two JST plugs should be switched. This solution works well, and it is waterproof, the only problem that I had is that the cables of the plugs just broke, which I hopefully fixed now using tape and hot glue.
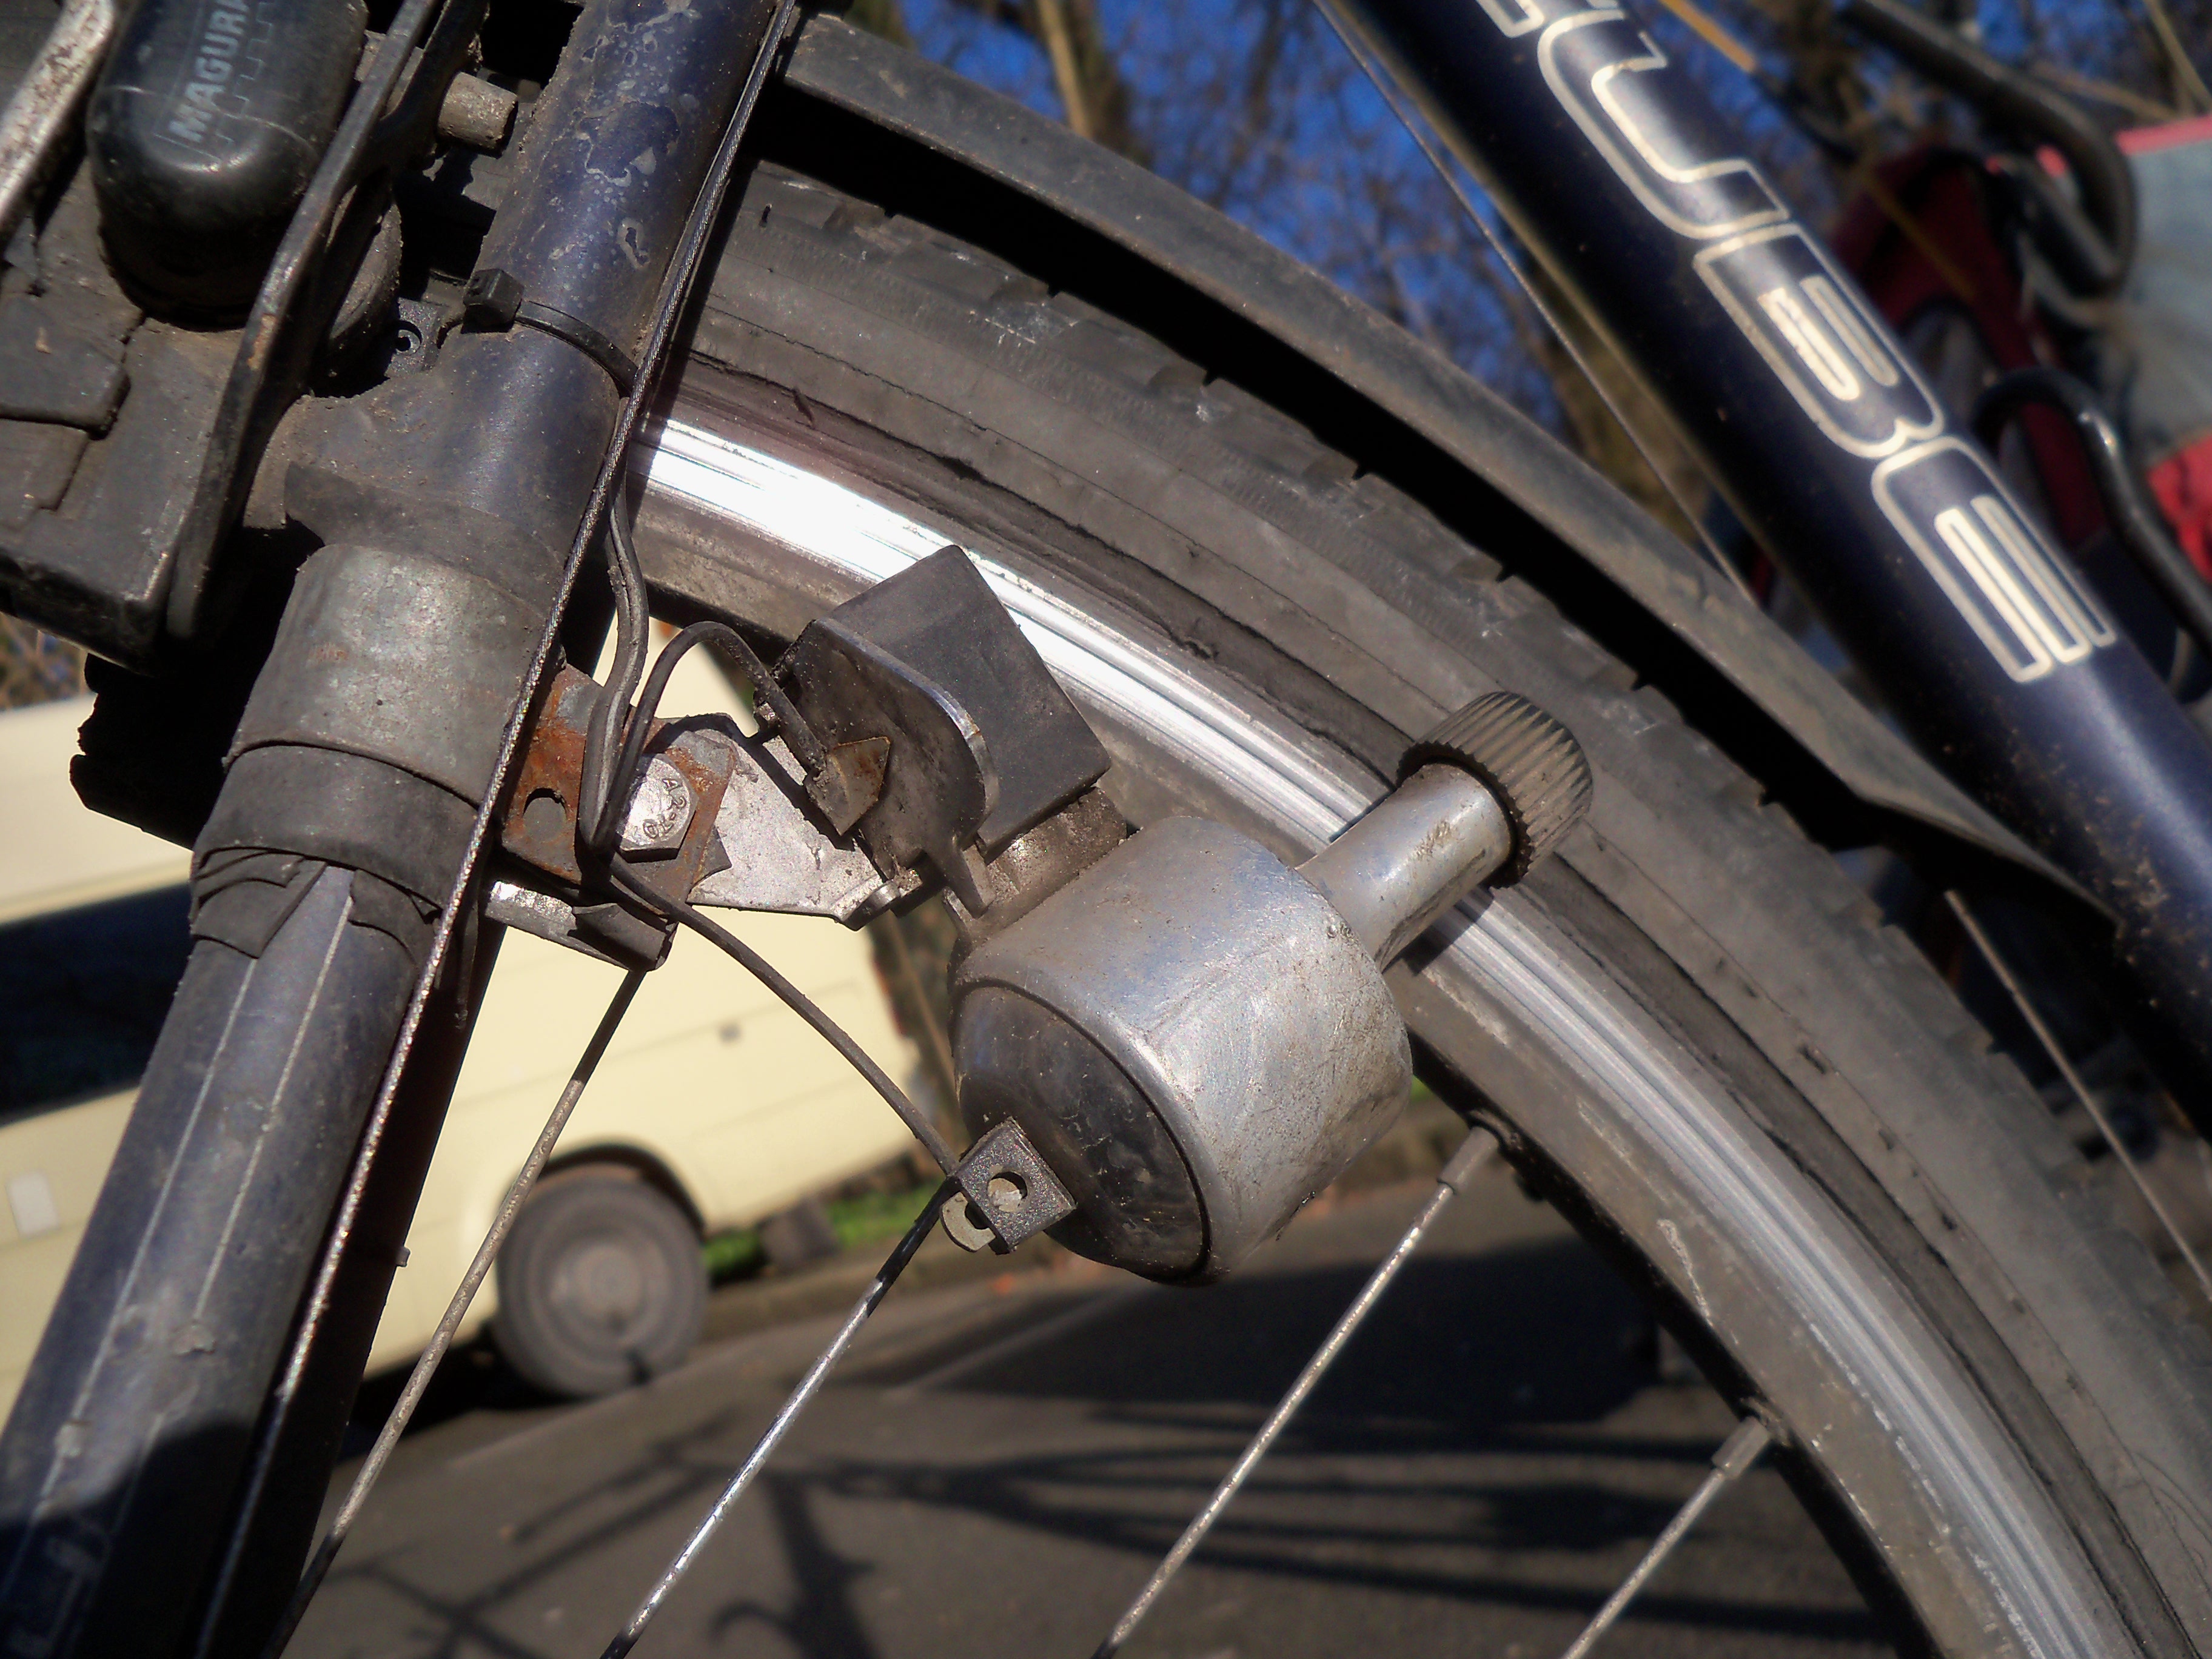
In case the electricity is still not enough, I attached a bottle dynamo that I found in the metal bin, which I can turn on in addition to my hub dynamo when I need it. My bike frame didn’t have an attachment for a dynamo, so I made one myself from an old door hinge and some inner tube.
The rack
I have always had problems with putting panniers on my rack, they either fell off or bent into the spokes. I think part it might be because I have a trekking bike where the seat is quite far in the back and long feet, so the panniers have to be really far in the back. Part of it is because I often have additional stuff on my panniers, so there is a lot of weight on the hooks and they eventually bend open.
To solve these problems I attached two small aluminium pipes to my rack using cable ties to keep the panniers from bending into the spokes. These pipes weigh almost nothing, and you can get them for really cheap in the construction store. I can also recommend to carry some for fixing tent poles.
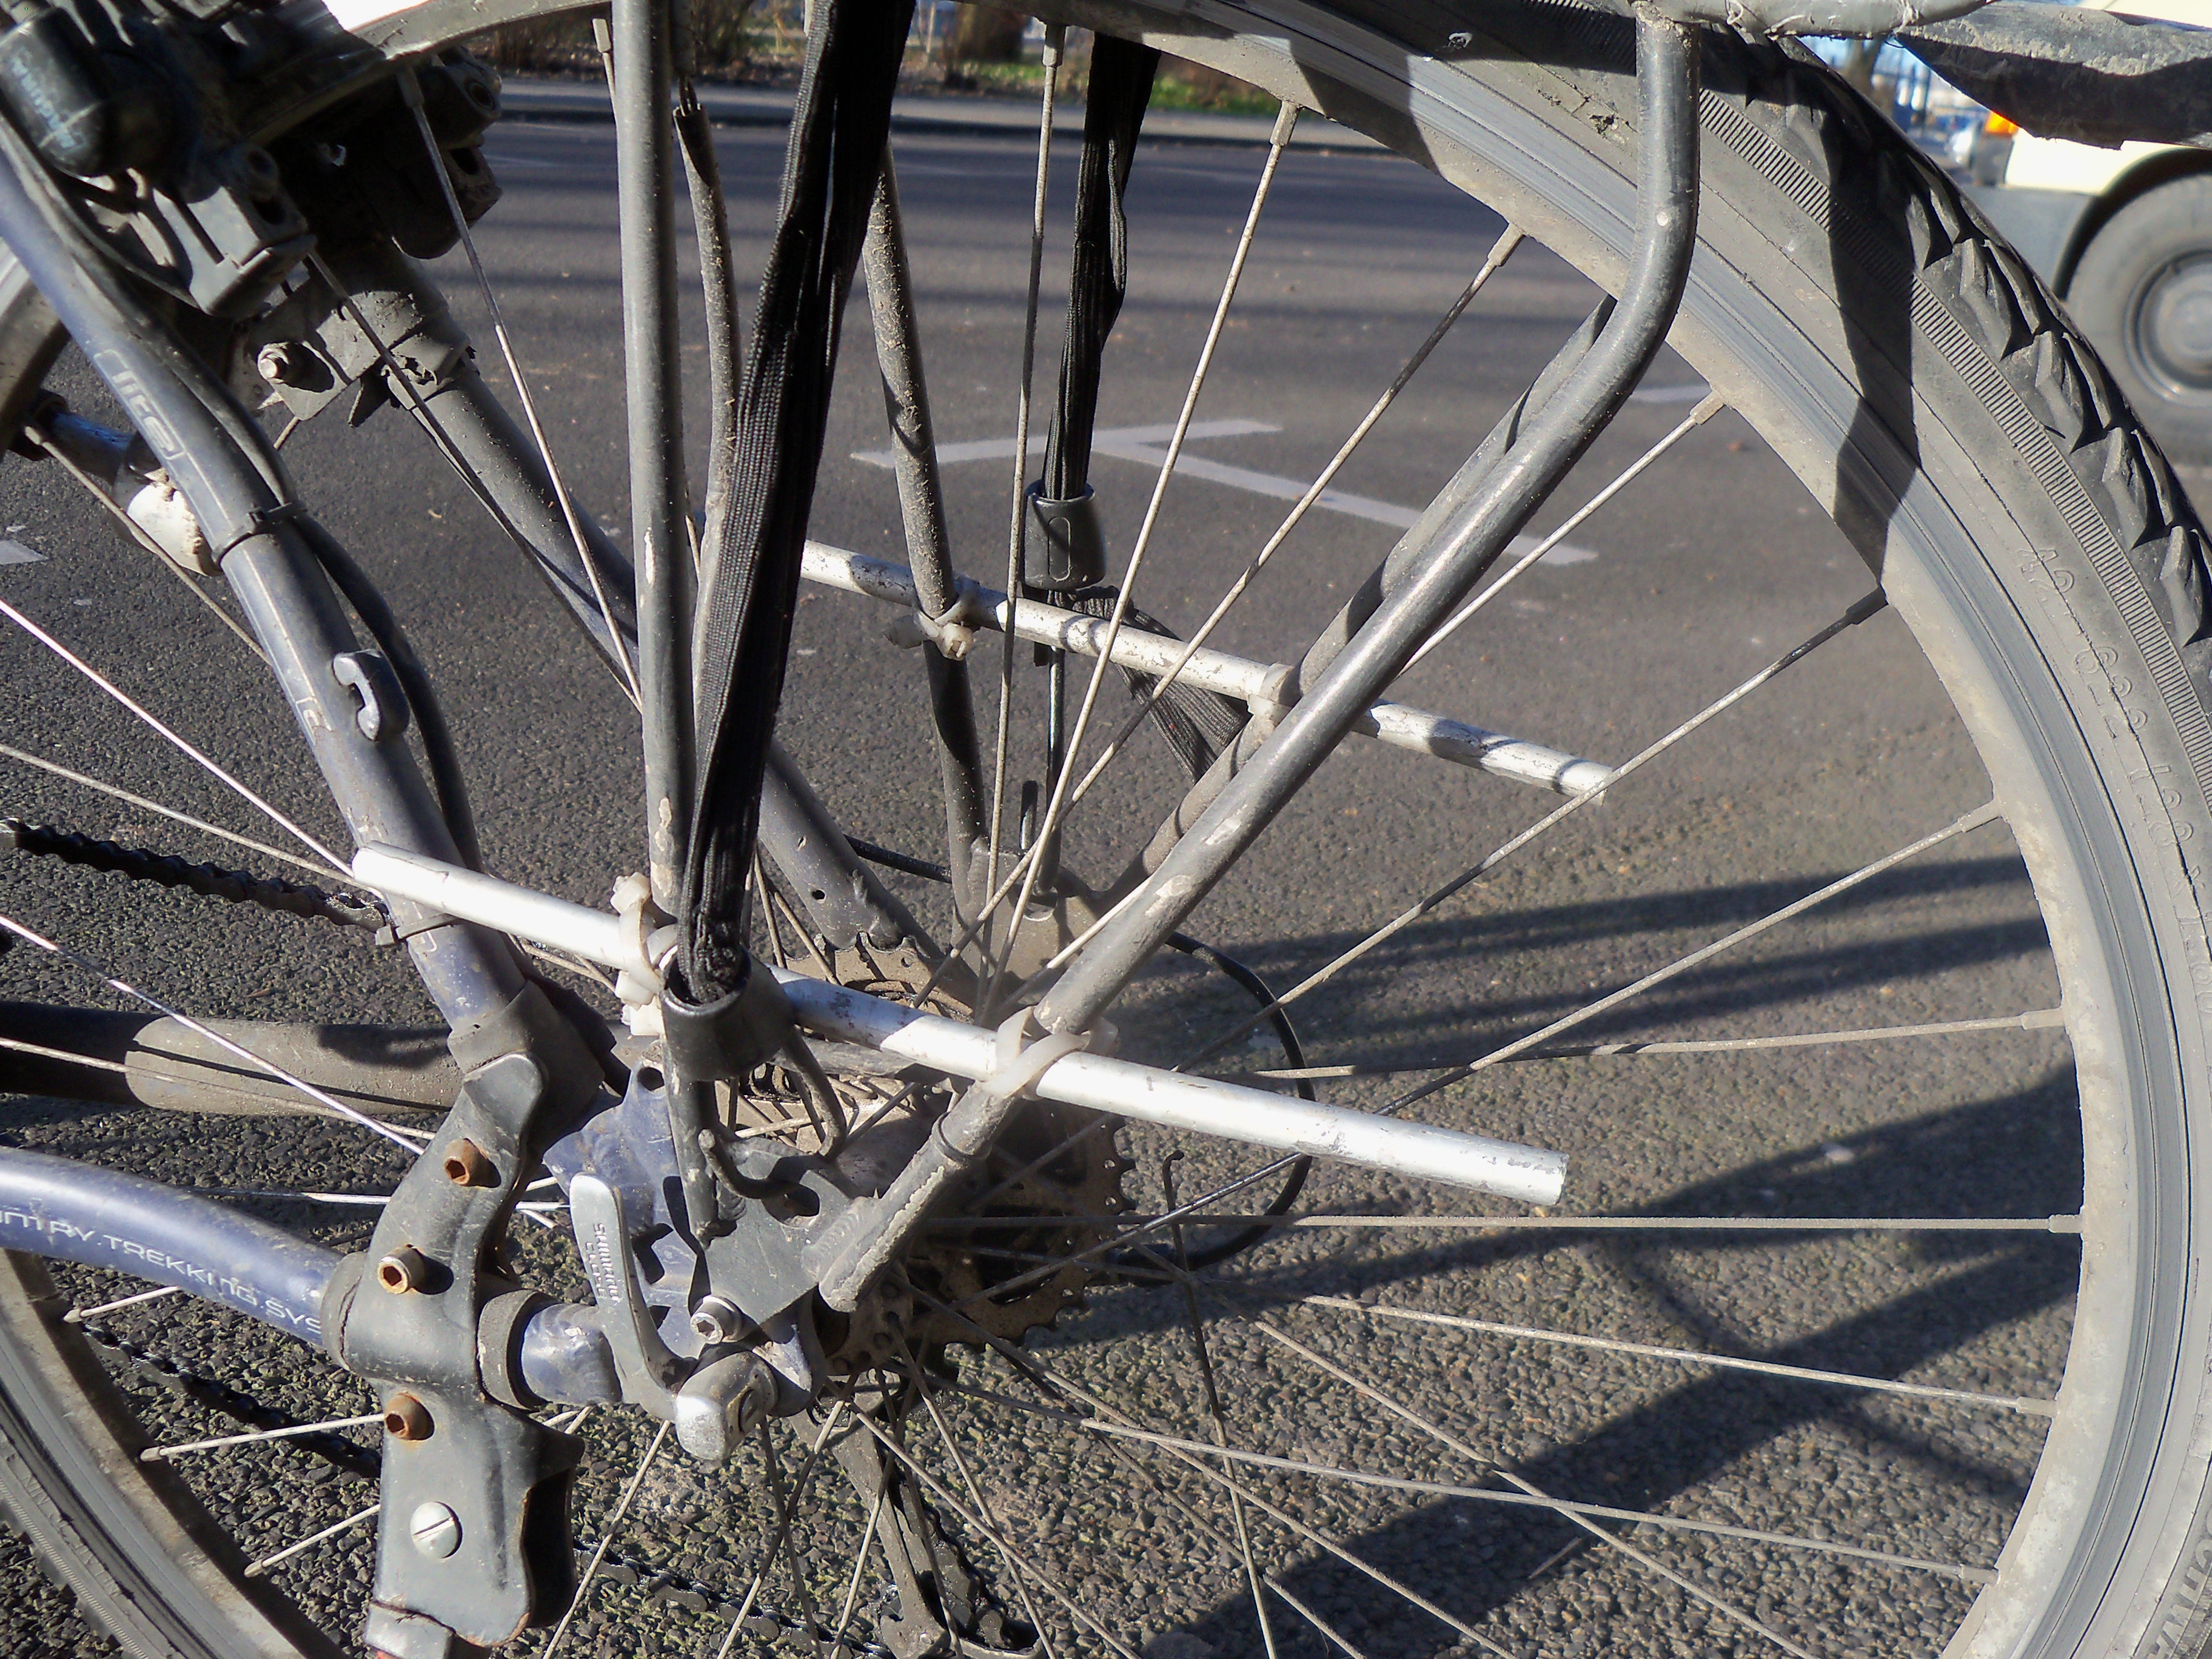
To fix the problem of my panniers falling off, I made the parts where the hooks go on the rack a bit thicker by slicing an old PET bottle, wrapping it around the rack, and fixing it with gaffer tape.
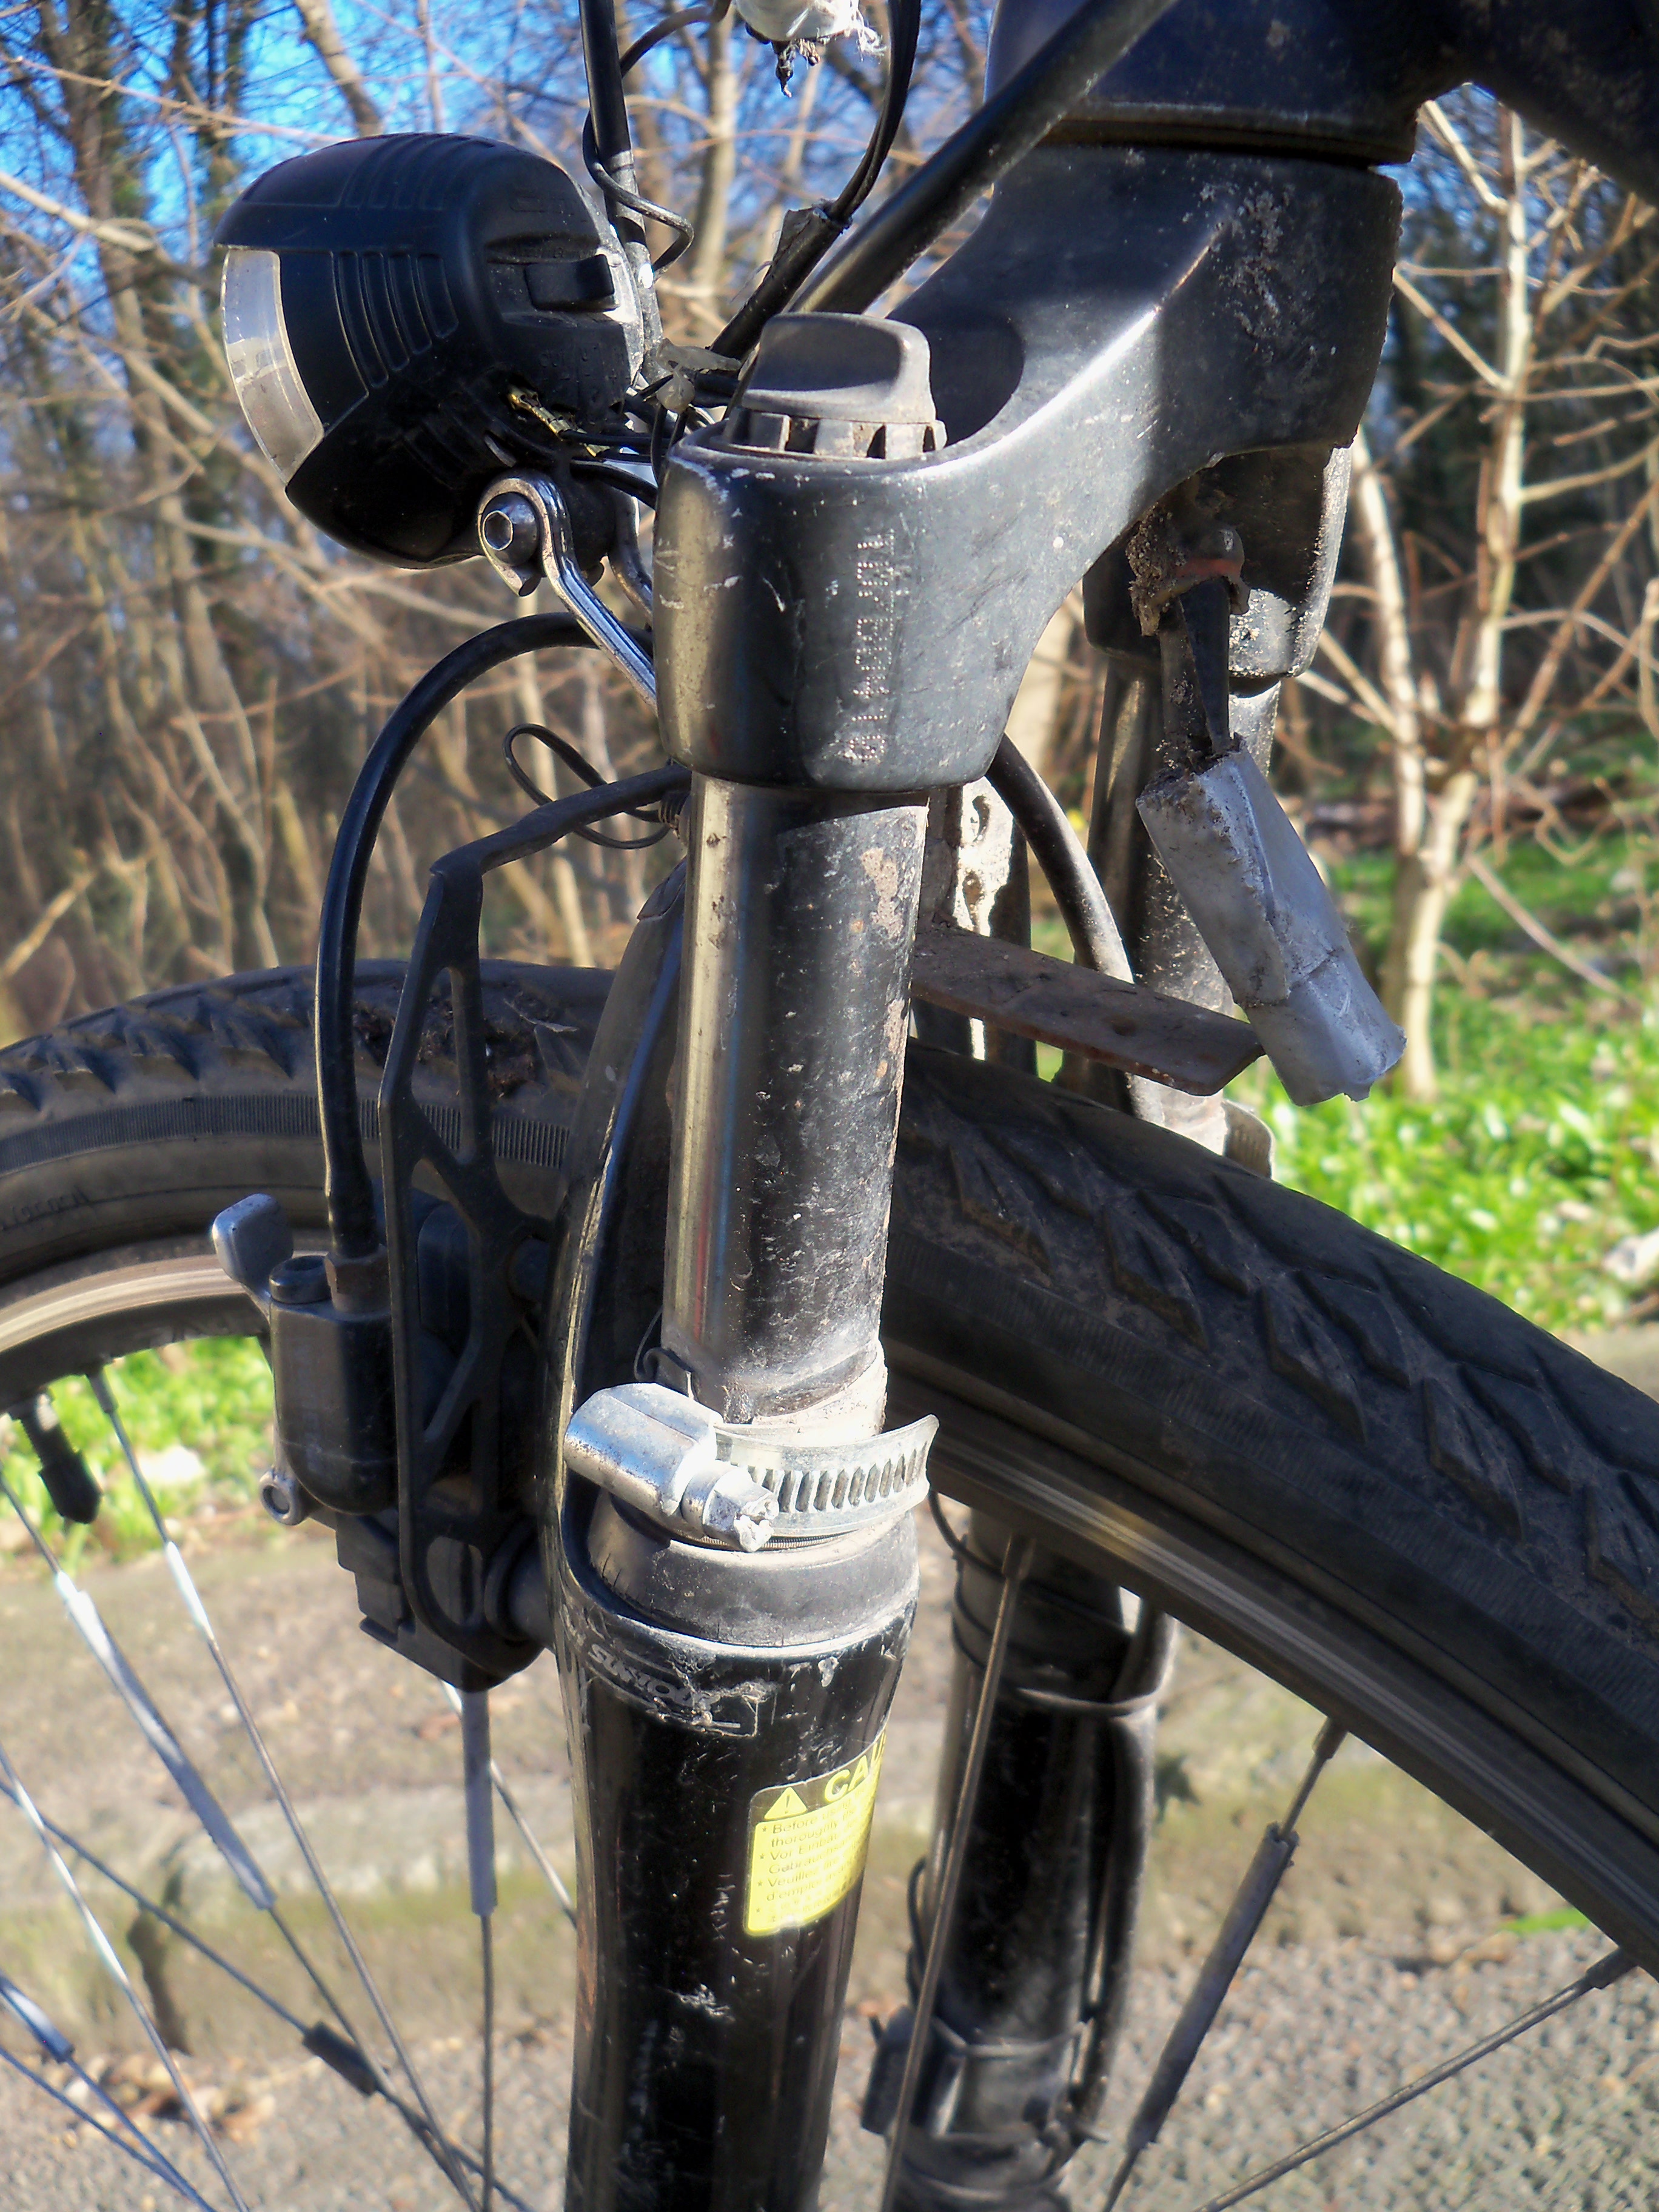
The fork
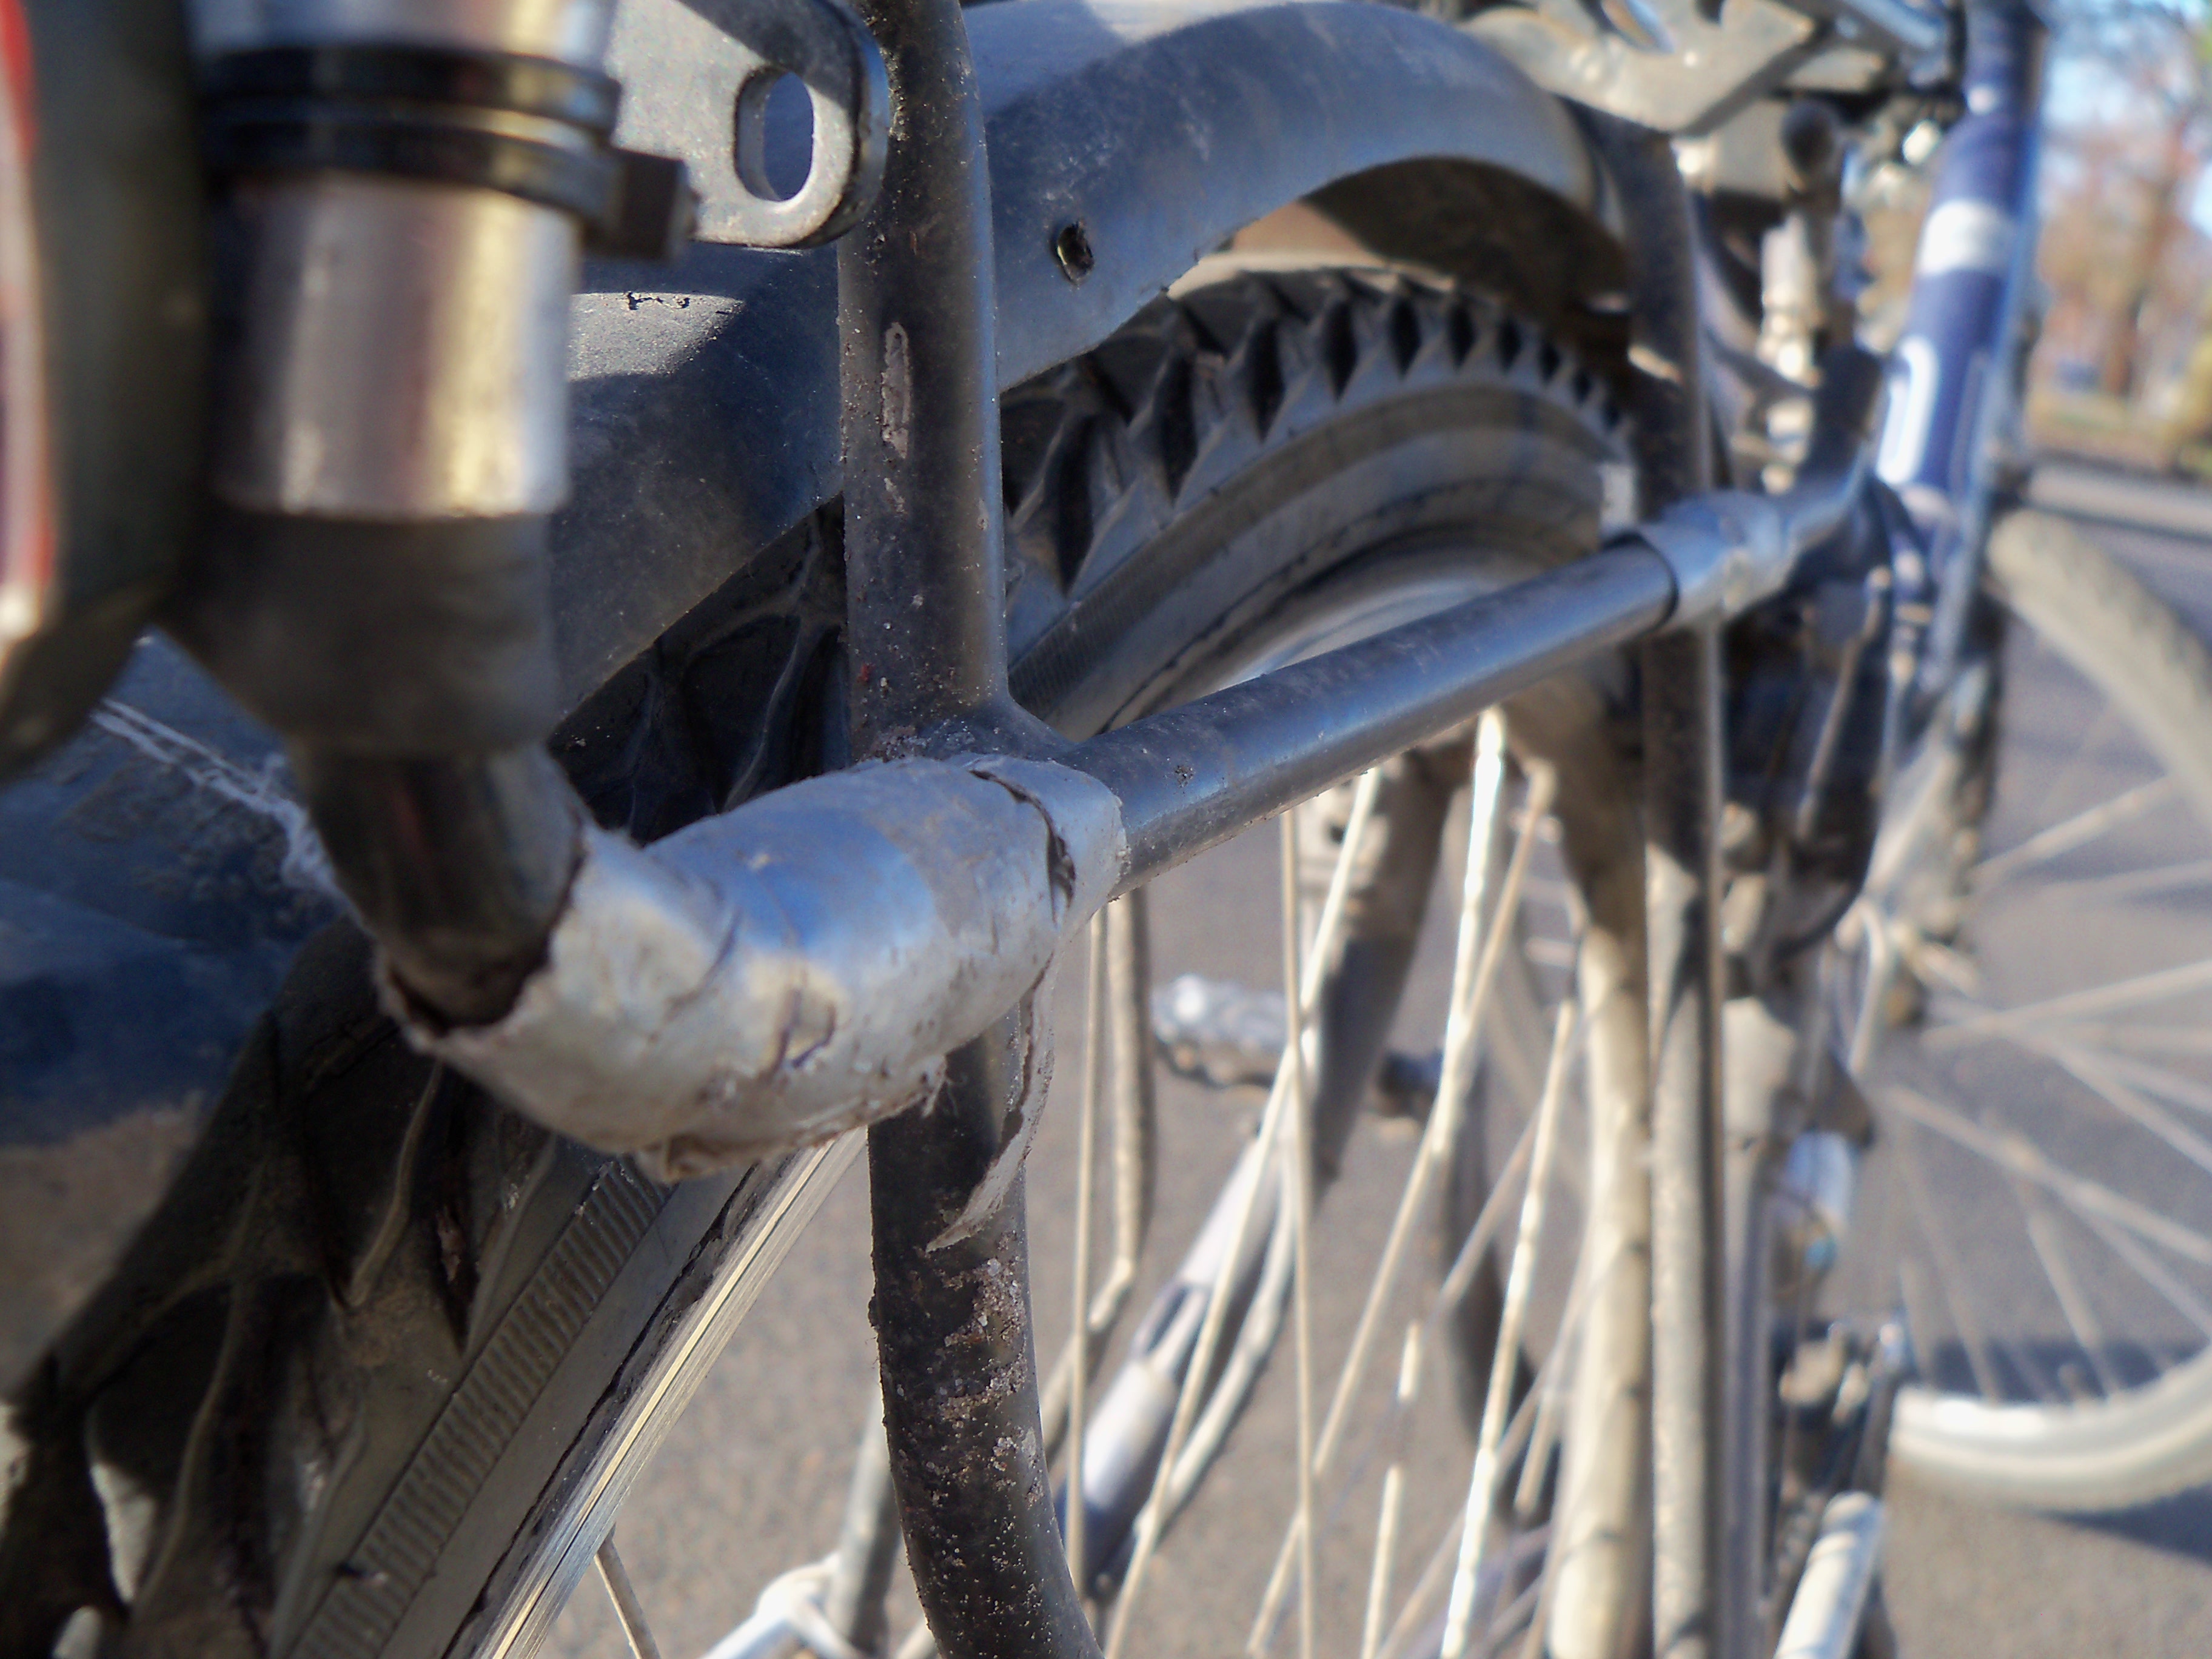
My suspension fork stopped working properly at some point. The plastic parts that keep the top of the fork in the bottom of the fork started slipping up and the whole fork started to wobble in all directions. So I used some pipe clamps with an old piece of inner tube to hold the plastic parts in place. This means that my suspension fork is now a static fork, but so far that has extended its life by at least 10 000 km.
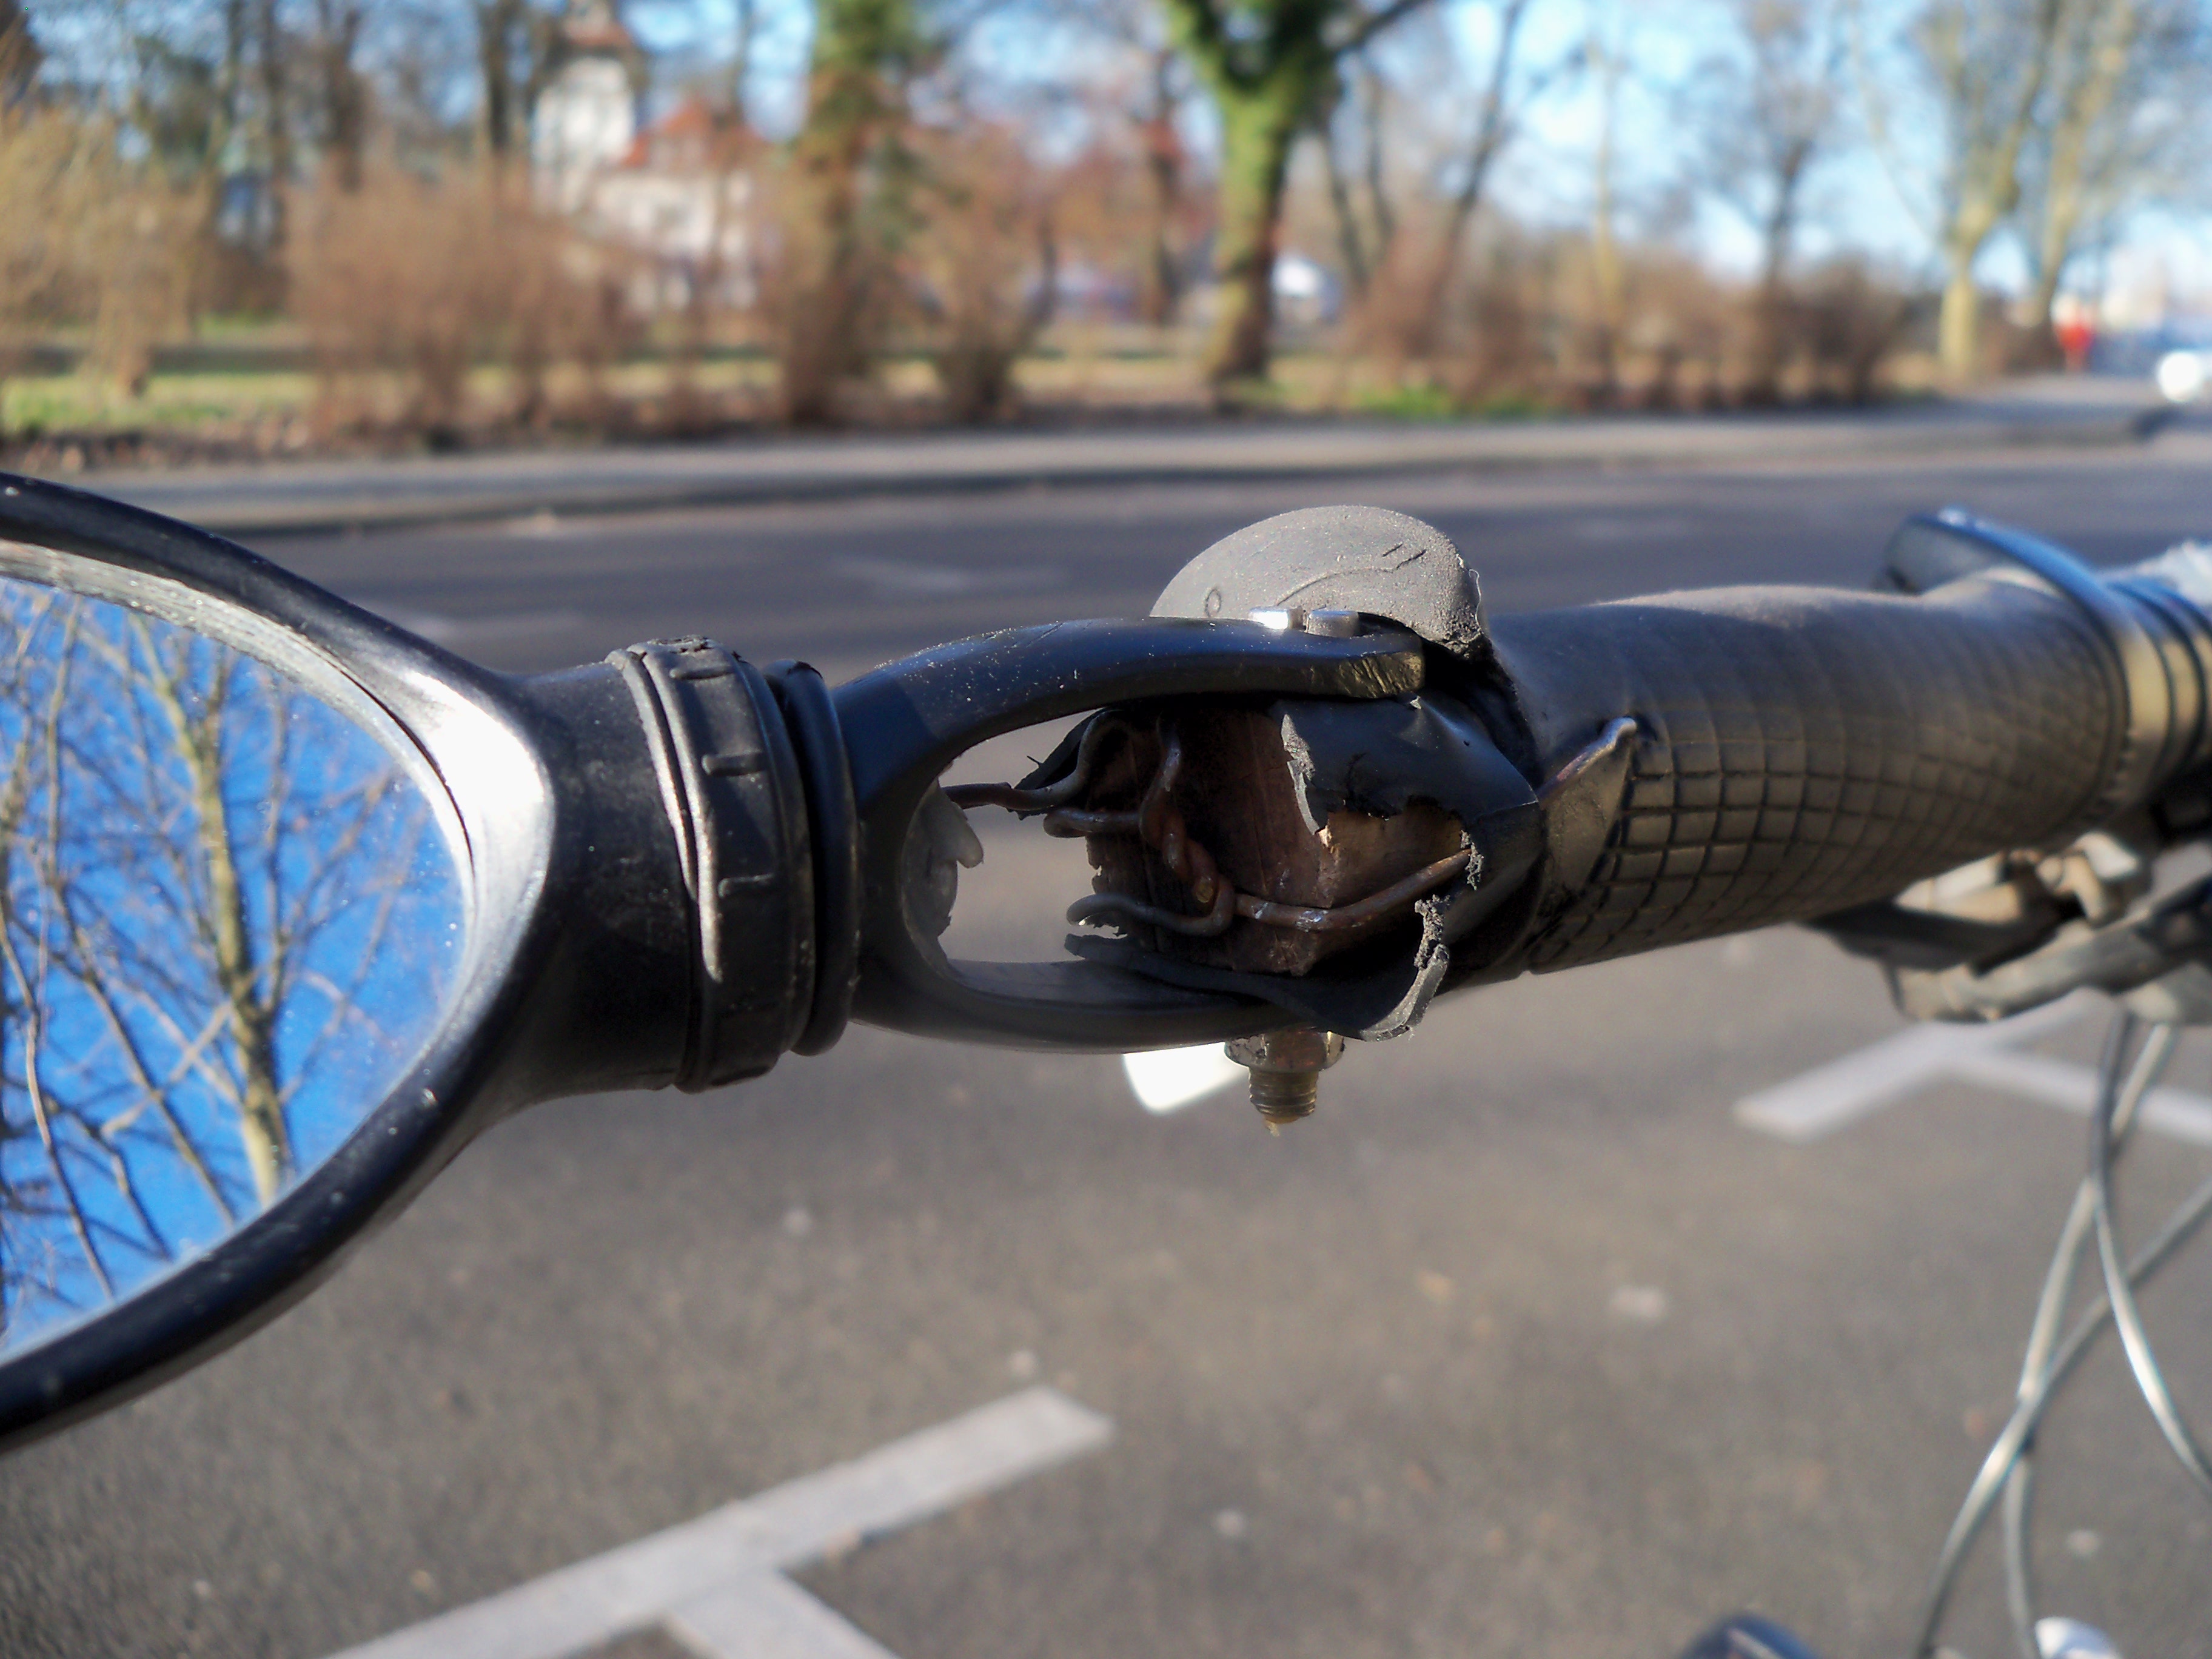
The mirror
The mirror that I have is meant to be attached inside the handle bar tube. The piece that held it in place was made of plastic and never really fit, but at some point it completely broke when the bike fell over. I made a replacement form an old hammer stick. I used a hammer stick because it is made from oak wood, and oak wood is really weather resistant. I drilled a small hole through my handle bar and put a wire through it, to make sure that the wood cannot slip out. A piece of inner tube protects the wood a bit from rain and makes it less slippy, so that the mirror doesn’t move so much on bumpy roads.