


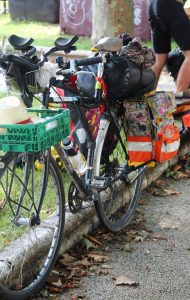
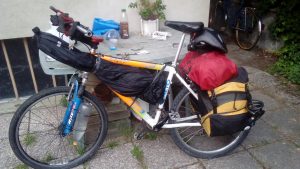
When you travel with your bicycle it is useful to be able, to carry your stuff on your bike instead of your back. Therefore you can get some expensive bags, that are made for that purpose, or you build something yourself!!
In general, there is 2 options: Either you make something that hooks on your rack. Or you have a construction that allows you to easily attatch your backpack or whatever other things you have to transport.
For the first option, you can either look for exisiting bags and add some hooks that they can hang on your rack:
It is good if the thing you want to put on your back has a stable back so it doesn’t hang into the spokes of your wheel. Then it is enough if you attatch two hooks on the top, hang it on your rack and make sure that it is also fixed at the bottom and that it doesn’t fall off.
You can also make your own bag out of (ideally waterproof) fabric. Same here, make sure it has a stable backside and a way to hook it on.
-

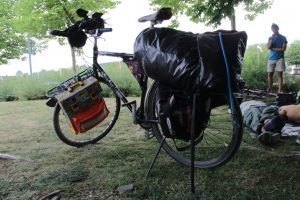
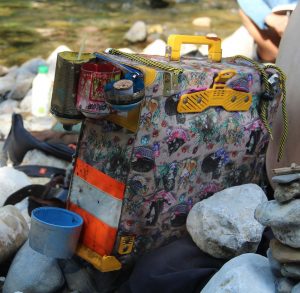
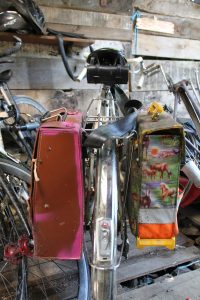
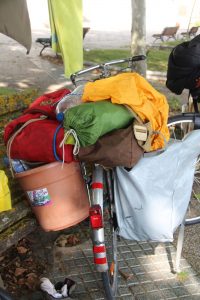
- the grey thing on the right is a DIY sewed pannier bag.
-
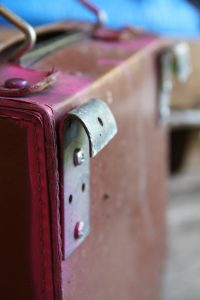
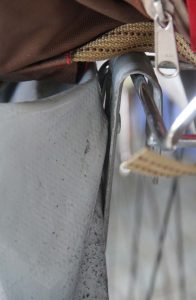
- The hook on the rack
-
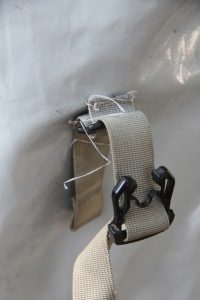
- closing system
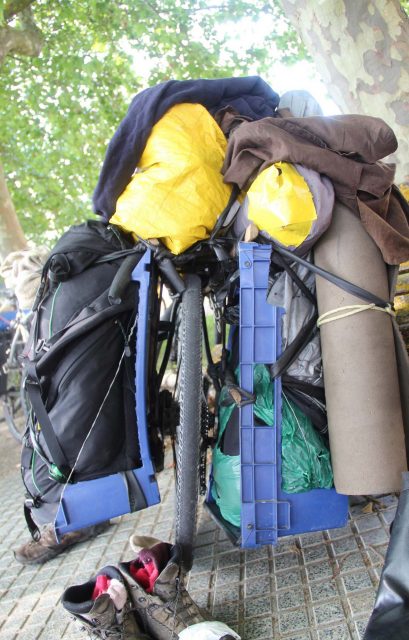
For the other option, basicly the same rules apply: You need something stable that avoids, that your stuff enters your wheel or falls off. People have put wooden boards on their bike on which they could strap on their bagpacks.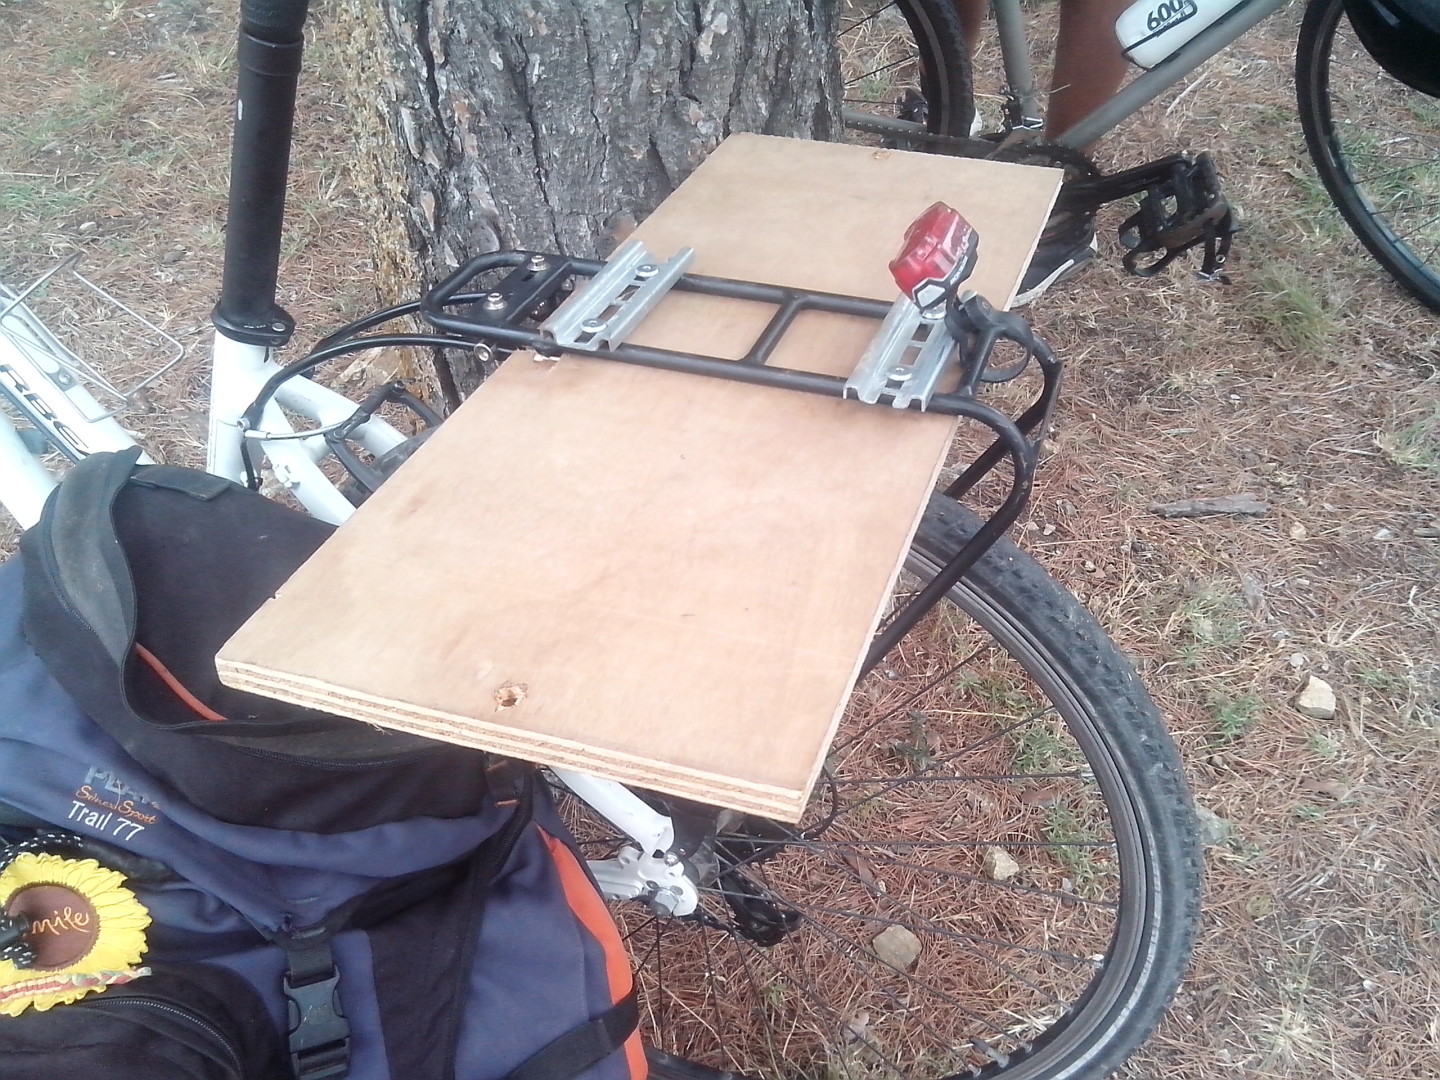 Although it is better if you carry your weight closer to the ground for stability reasons. One partcipant cut up a plastic-box into 2 L-shaped parts and put them on her rear-rack. In there, she can put her backpack, a guitar, tent and sleeping mat.
-
- The boxes attached to both sides of the rack can also provide a big stable surface to transport for ex. a travel backpack…

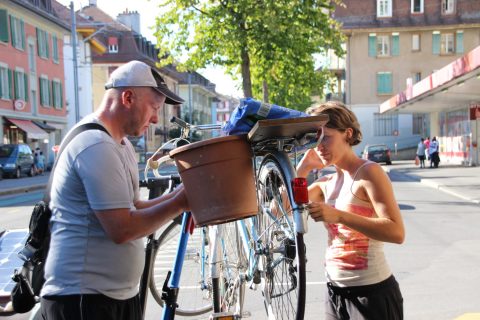
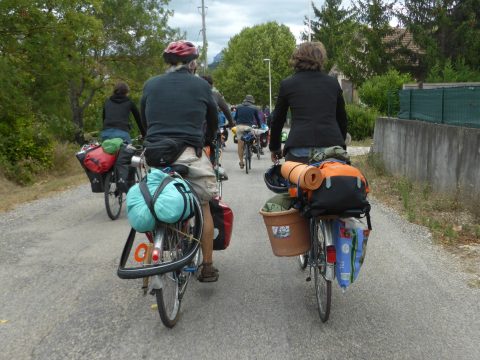
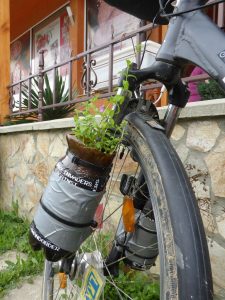
Another well proofed soulution is the good old flower pot:
-
- combined with the backpack-board in this case
-
- on the road
In general you can use wire, screws with washers, innertubes or zipties to fix stuff to your bike. If you come with your DIY thingy, it is useful to bring some spare fixing material whenever you have problems on the road or want to modify your construction. Very important is also the stability of your rack. If it easily moves around and the bars are too thin, you might want to either exchange it or reinforce it. In and case
, if you have the possibility it is useful to have a testride before you join ;)
-
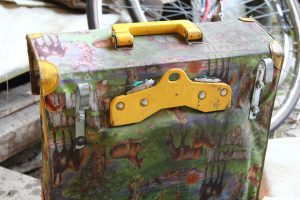
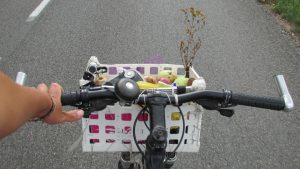
- box for the handlebar
-
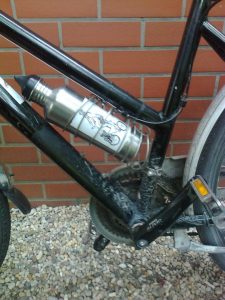
- bottleholder
-
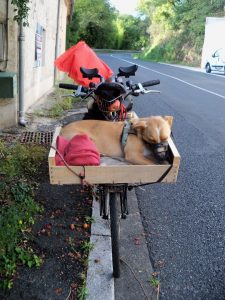
- second passenger
-
- nice way to carry your guitar
-
- garden!
How to repair your broken panniers:
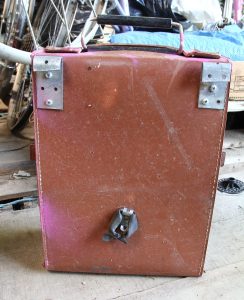
In 2016 I equipped myself with both front and back panniers from Vaude. After one month of cycling on Polish, Belarusian and Lithuanian paths and roads paved with sand, grass, dirt, gravel and broken asphalt my bags started losing it’s attachment hooks, pins or just randomly unlocking from the rack by itself. (So much for the fabled German engineering.) In the end one of the plastic hard shells of the back panniers holding the hooks cracked, so I had to use old tubes to strap it to the rack.
After the tour I thought long of what I could do to solve these problems. Asking to replace the badly designed product by the producer would be only a short-term solution, so I decided to do my own DIY attachments. I looked up different systems from other bag producers for inspiration and came up with my own solution!
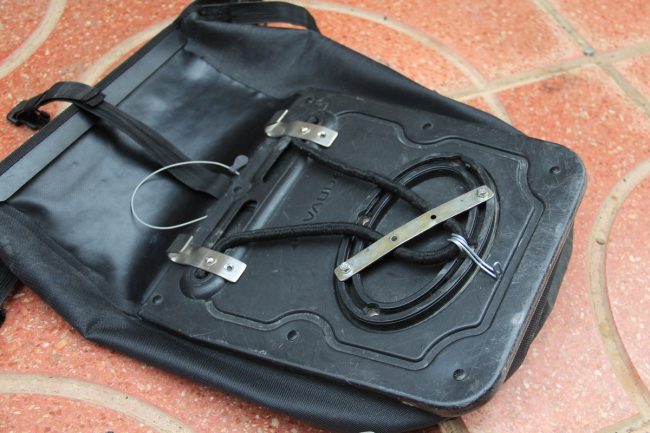
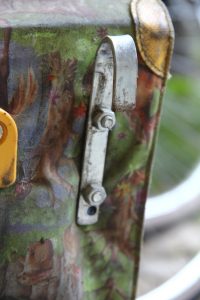
First I made hooks by bending stainless steel coat hangers (sold by a home improvement store) to a desired form and then attached them with screws into metal plates inside the slides of the hard plastic.
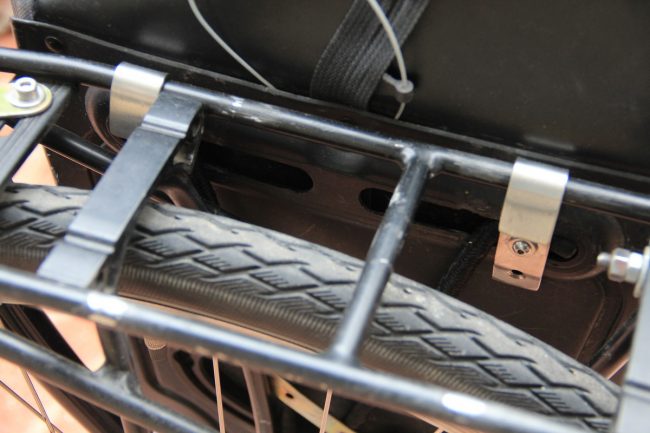
Using a bag with unsecured hooks is not a good idea as it will jump off from the rack on the first bump on the road. So it is good to have some sort of device to hold it from jumping off. To secure the bag I used the rope part of a broken bungee (also might be possible to use a broken tube). I clamped both its ends in between the hooks and the plates holding them, then I made a simple security hook from a broken spoke and put it around the middle part of the rope. The security hook needs to grab to something below the bag where it will sit on the bike (in my case there is a handy hole at the bottom of the rack). The rope has to be short enough to keep the hooks at the top from jumping off.
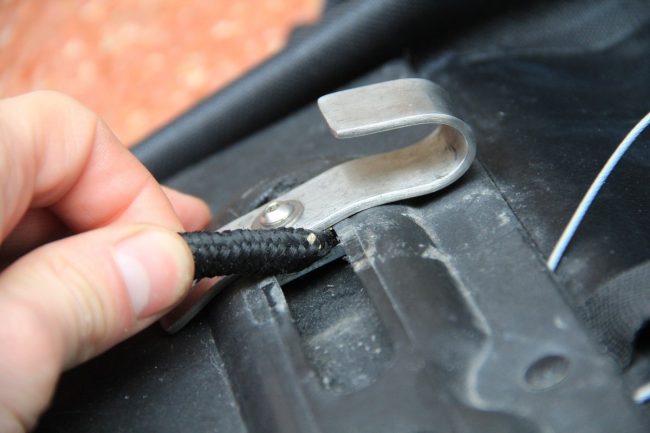
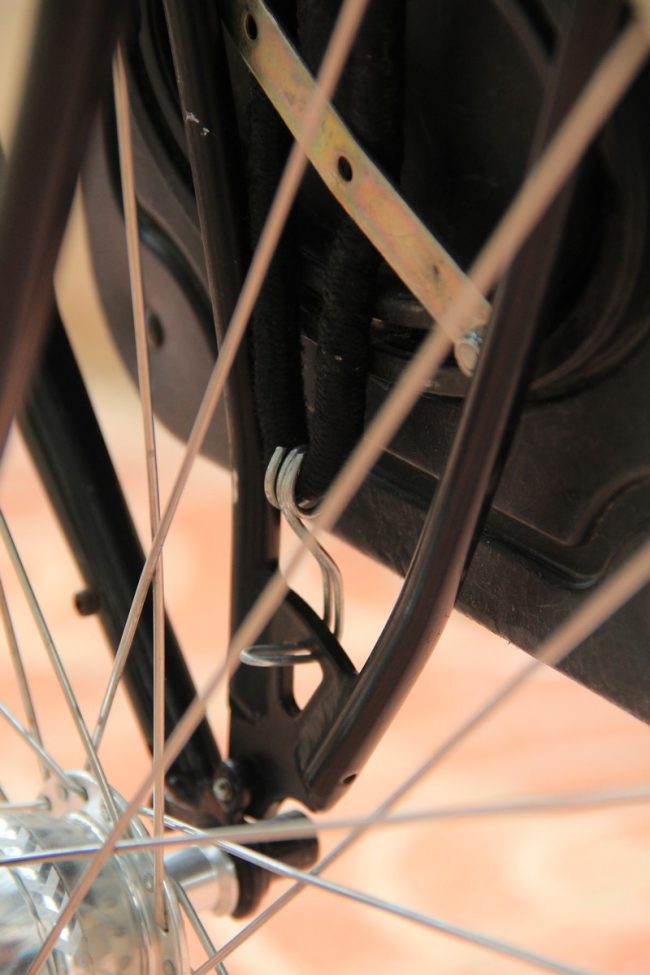
Also to hold the bags from flapping sideways on bumpy roads, I attached a metal strip just above the security hook across the rope. This way the bag won’t be flapping anymore.
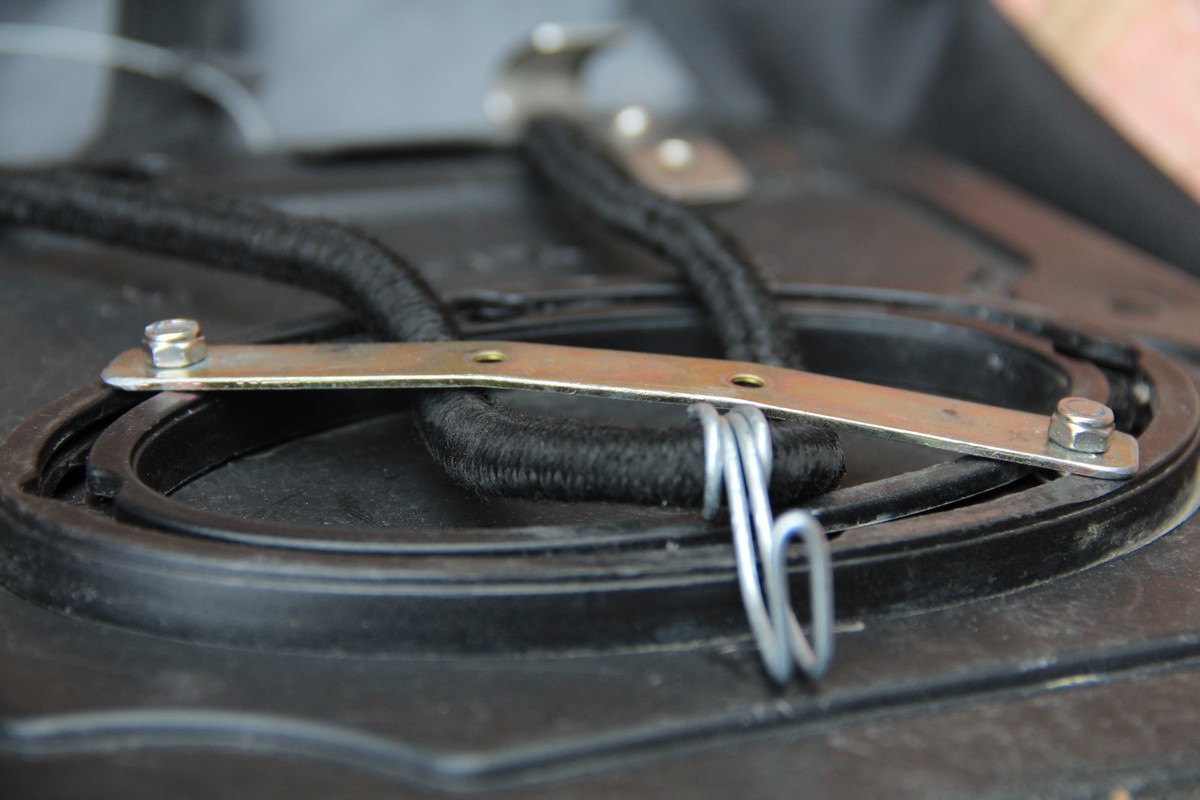
Now I have my bags attached better than with the expensive system from Vaude!
DIY or die! Check also the post on DIY-frontracks